

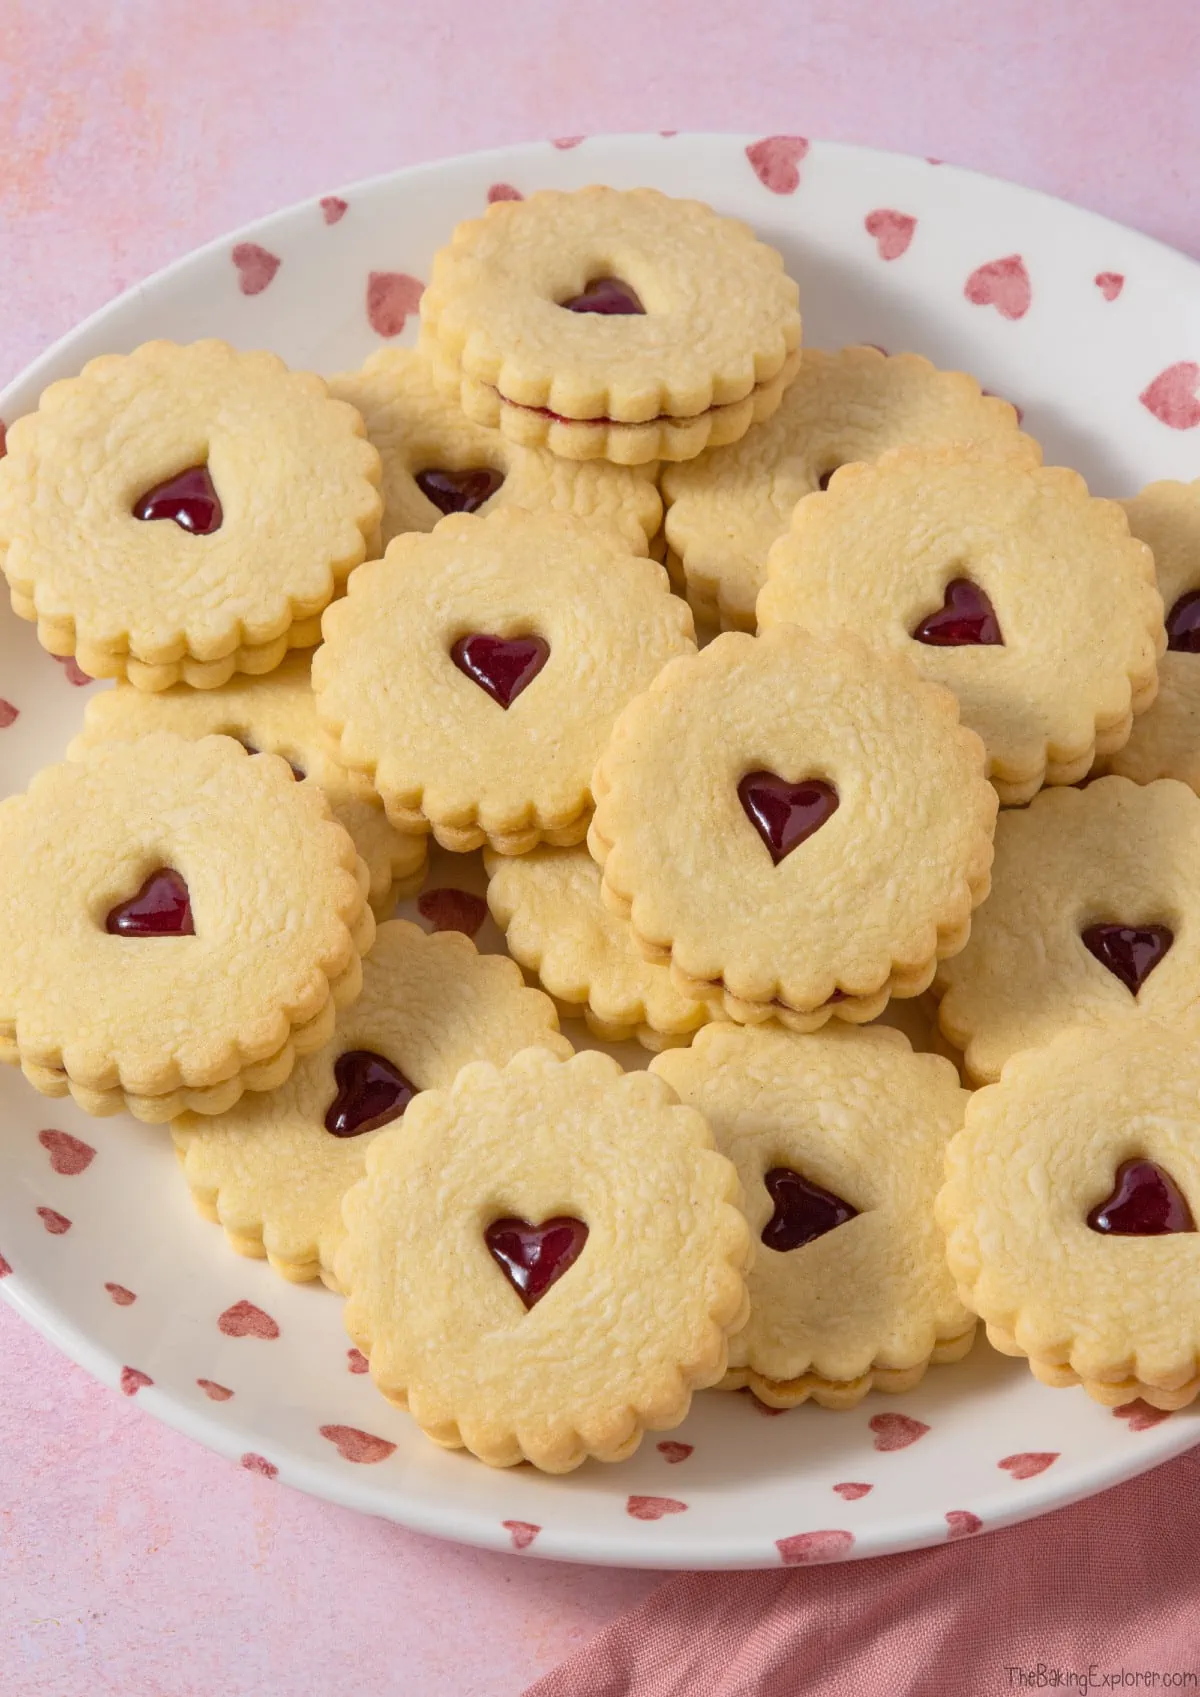
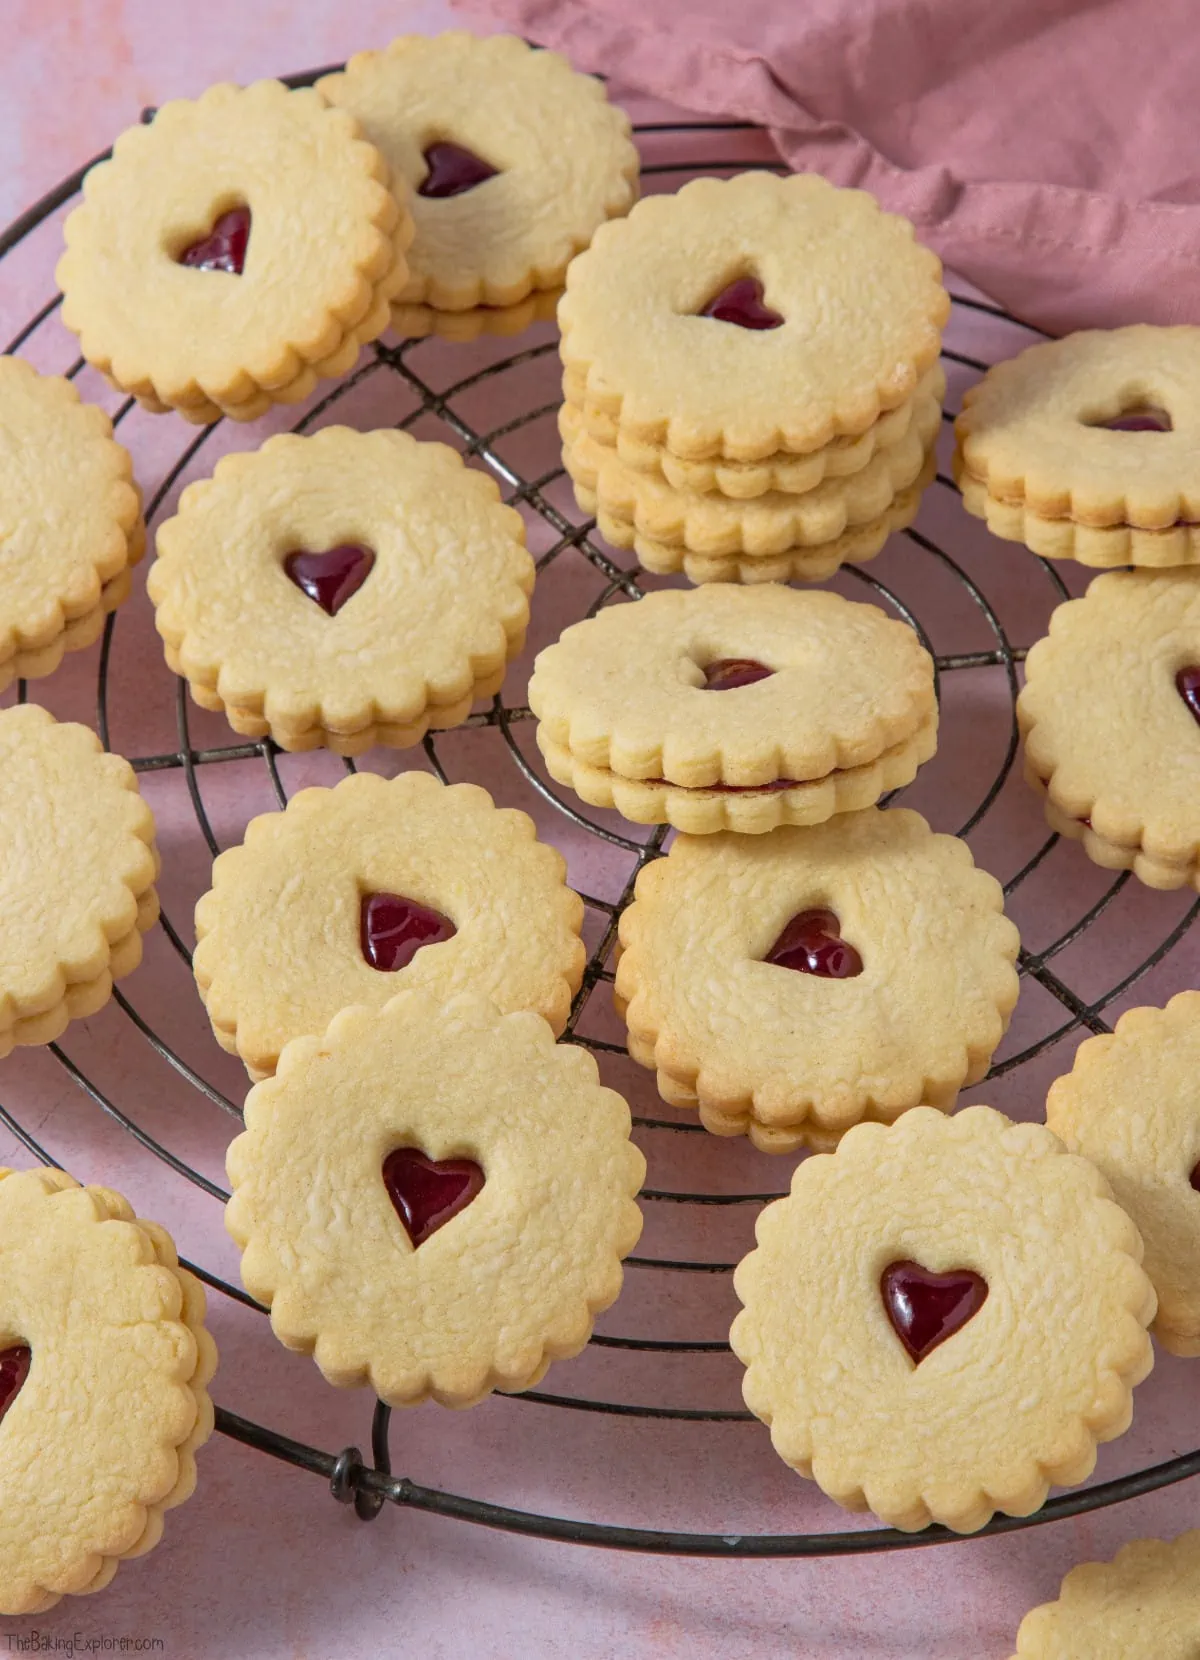
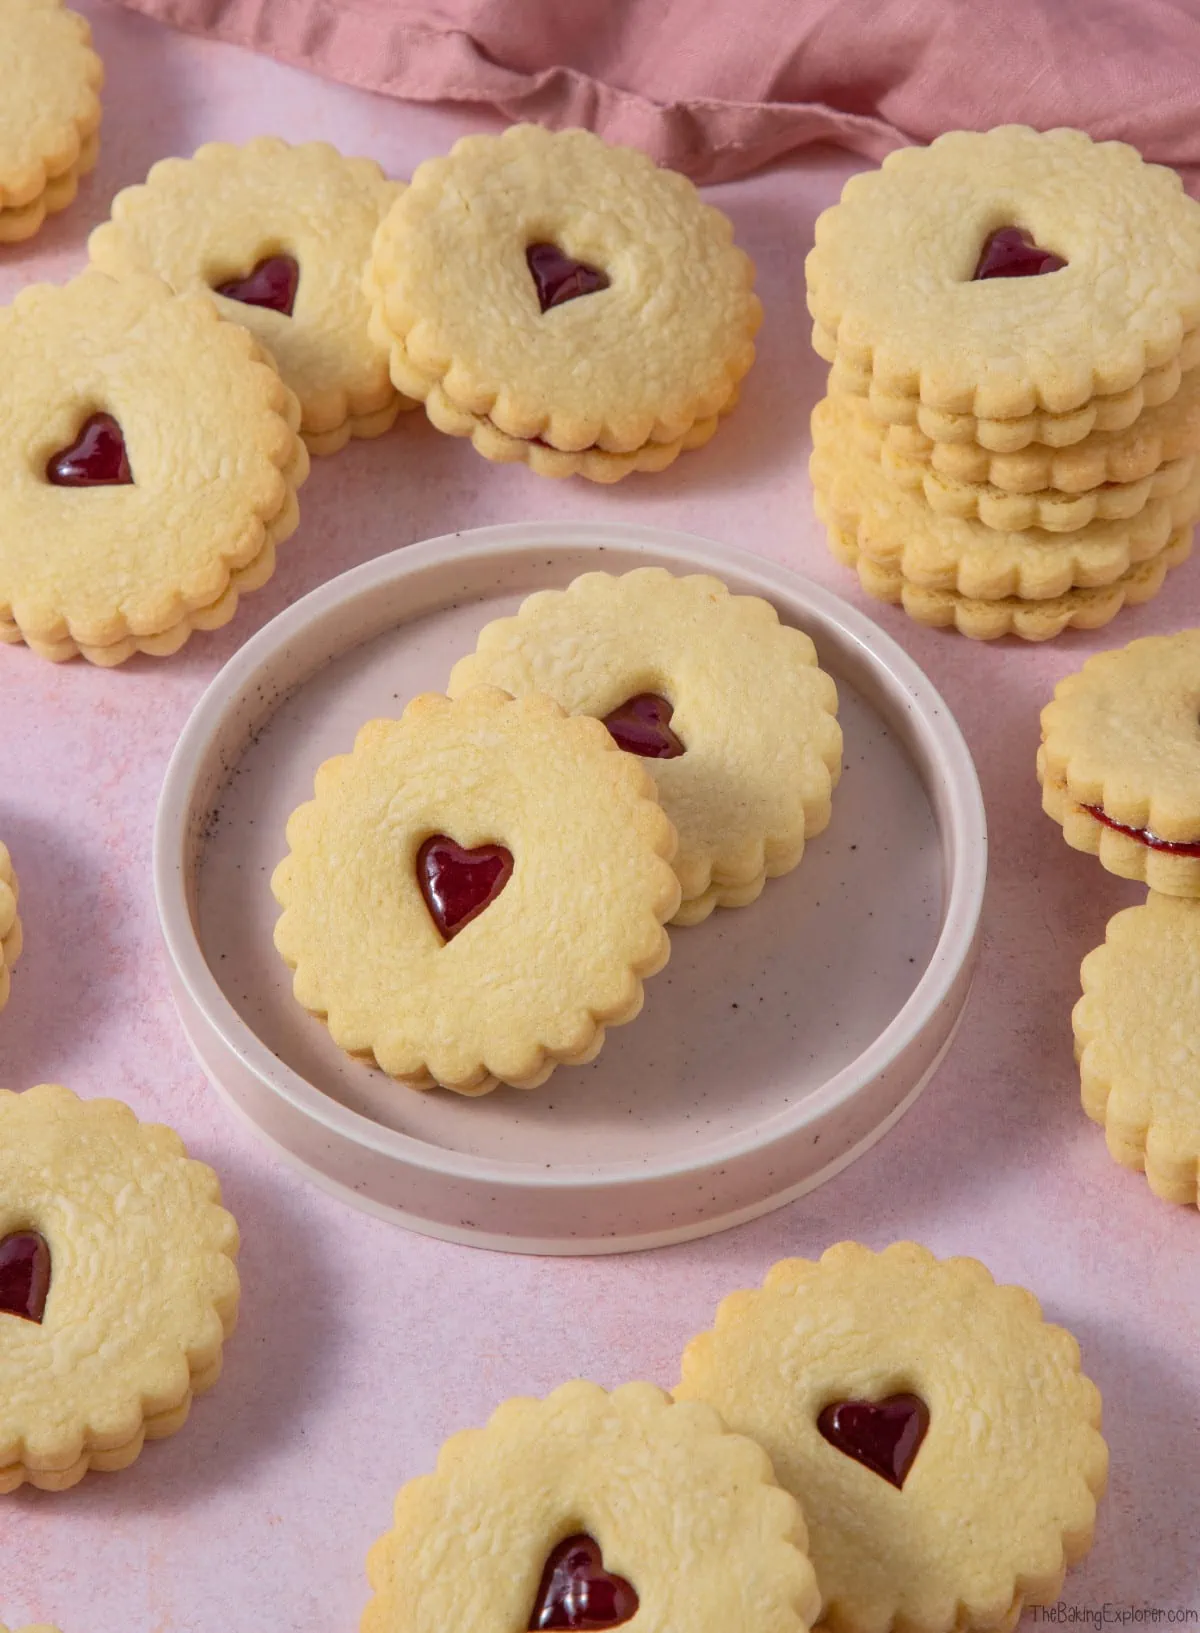
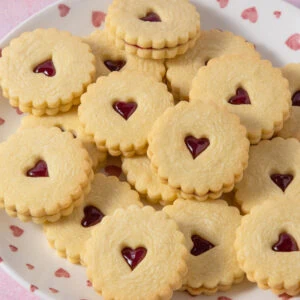
These Homemade Jammie Dodgers are a buttery jam sandwich biscuit, with cute heart cut out and a seedless raspberry jam filling. Jam sandwich biscuits are similar to linzer cookies, but linzer cookies are different as they are made with grounds almond and are dusted with icing sugar. These sandwich cookies are so flavoursome and moreish, plus they look totally adorable! You can fill them with all kinds of things, raspberry jam is the traditional choice, but lemon curd, Nutella, Biscoff spread etc. will all work well and be super delicious too!
This post may contain affiliate links. I earn from qualifying purchases.
Ingredient Tips & Equipment Information
- Make sure all your ingredients (particularly the butter and egg yolk) are at room temperature before you start baking.
- I prefer to use unsalted butter for this recipe, but you can also use a baking spread.
- For the best flavour, make sure to use a good quality vanilla extract and not an essence. You can also use a vanilla bean paste.
- If you can't find a seedless raspberry jam, you can push seeded raspberry jam through a fine sieve to remove the seeds.
- Although I provide cup measurements, I highly recommend weighing your ingredients out using digital kitchen scales. It is the most accurate way to measure ingredients and will ensure the best results. Digital scales are very low cost and can be purchased for around £12 ($16.50) .
- For teaspoon (tsp) and tablespoon (tbsp) measurements, please use measuring spoons and not the type of spoons you eat with. Again this will ensure accuracy and provide the best results.
For the full recipe with measurements, head to the recipe card at the end of this post.
How to make Homemade Jammie Dodgers

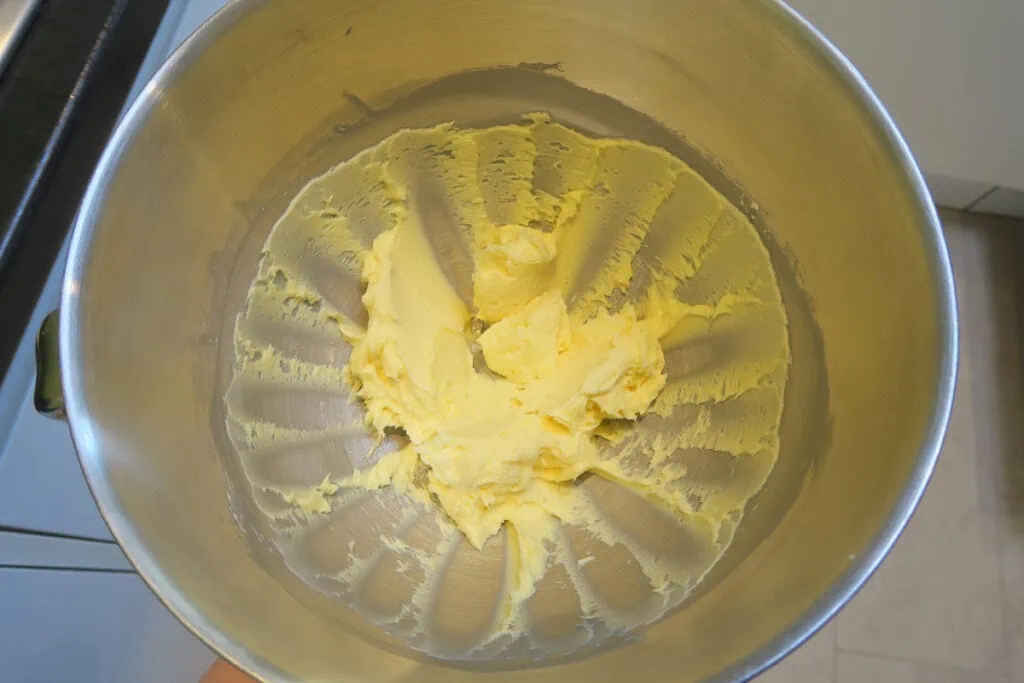
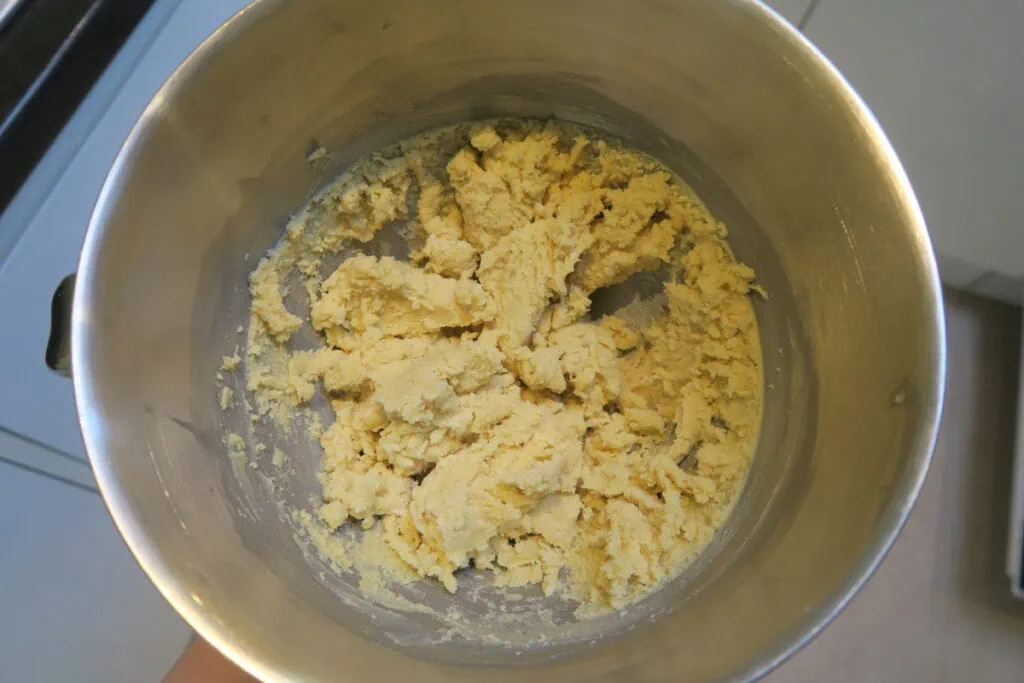
Start by mixing the butter and icing sugar together until well combined and creamy looking. Add the egg yolk, vanilla extract and milk, and mix until fully incorporated. Then add the plain flour and salt, and mix until combined.
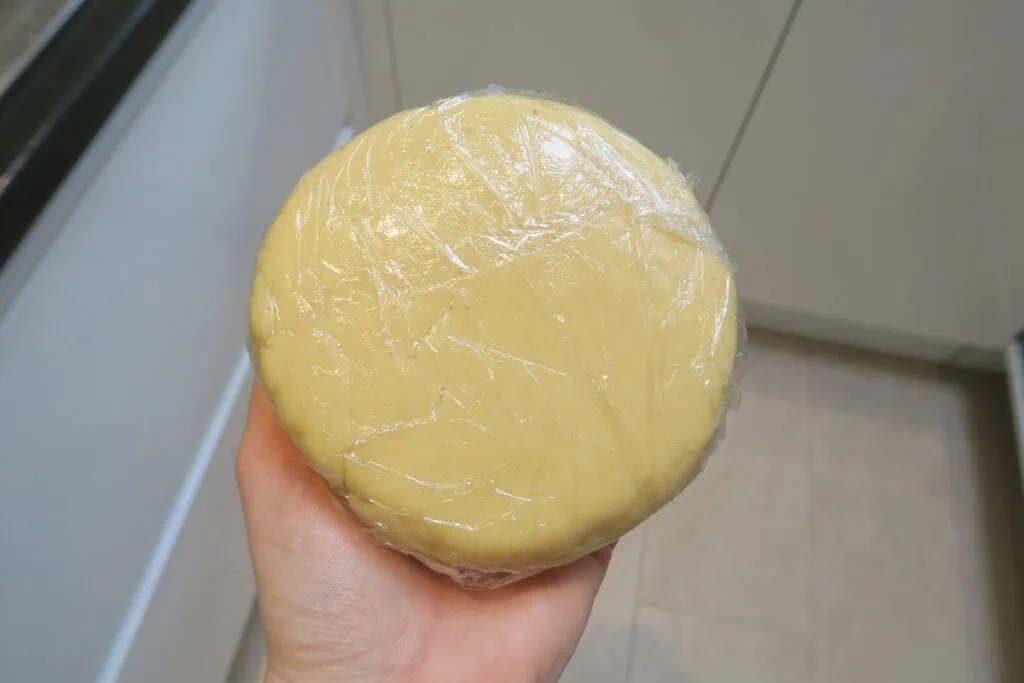
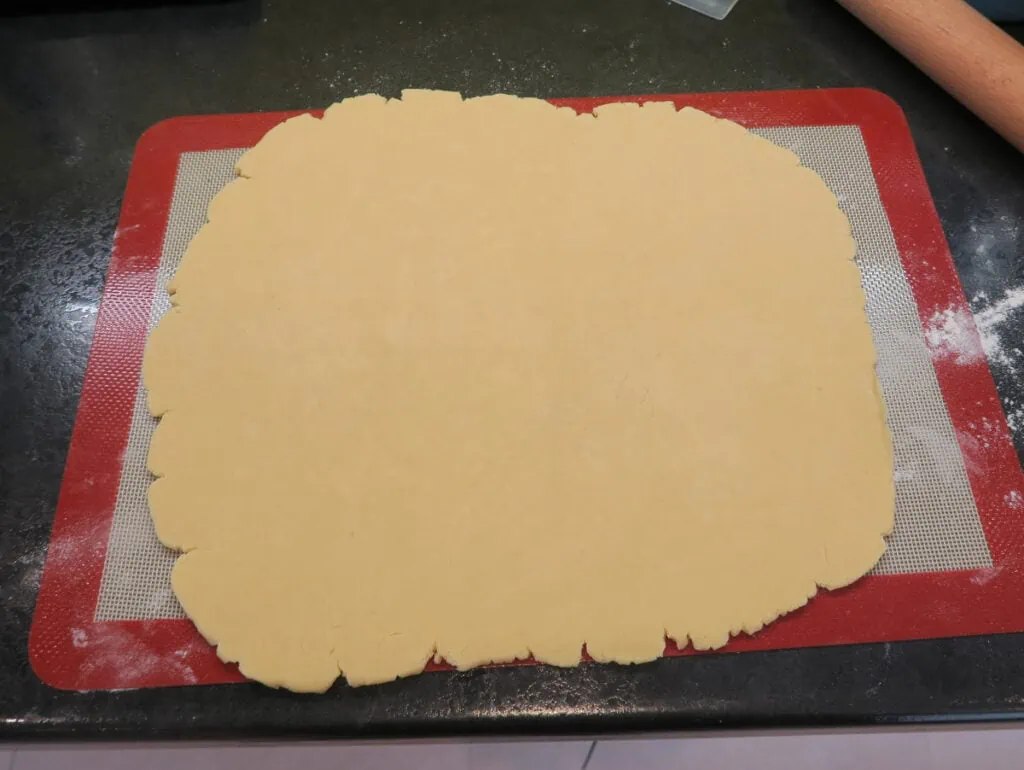
Press the mixture together into a dough and form a rough disc shape. Wrap in cling film and chill it in the fridge for 30 minutes. Roll out the dough onto a well floured surface.
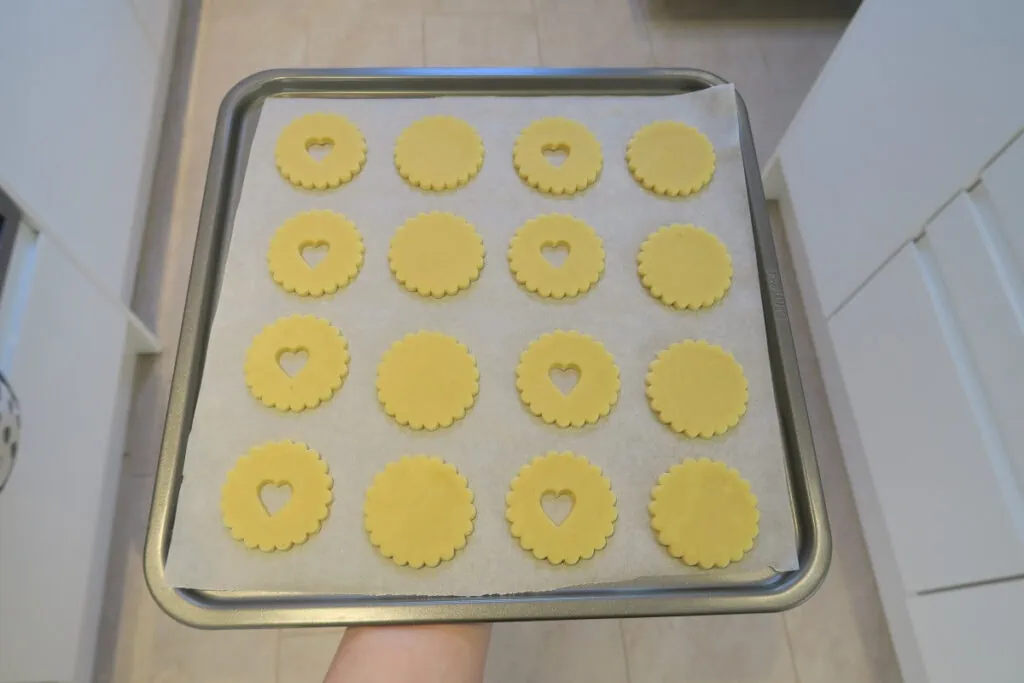
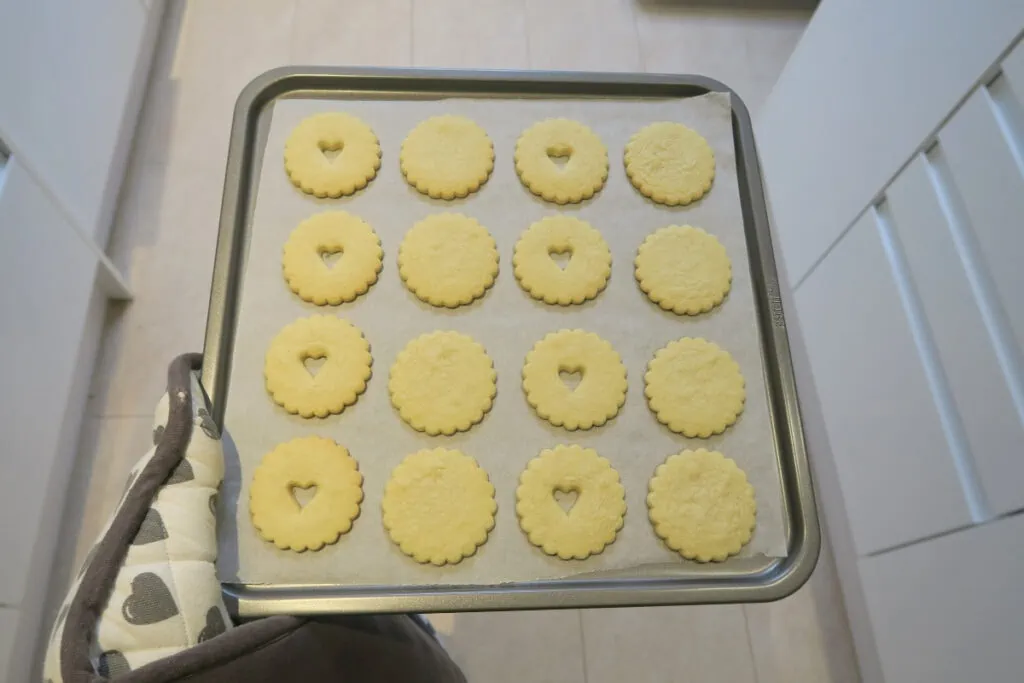
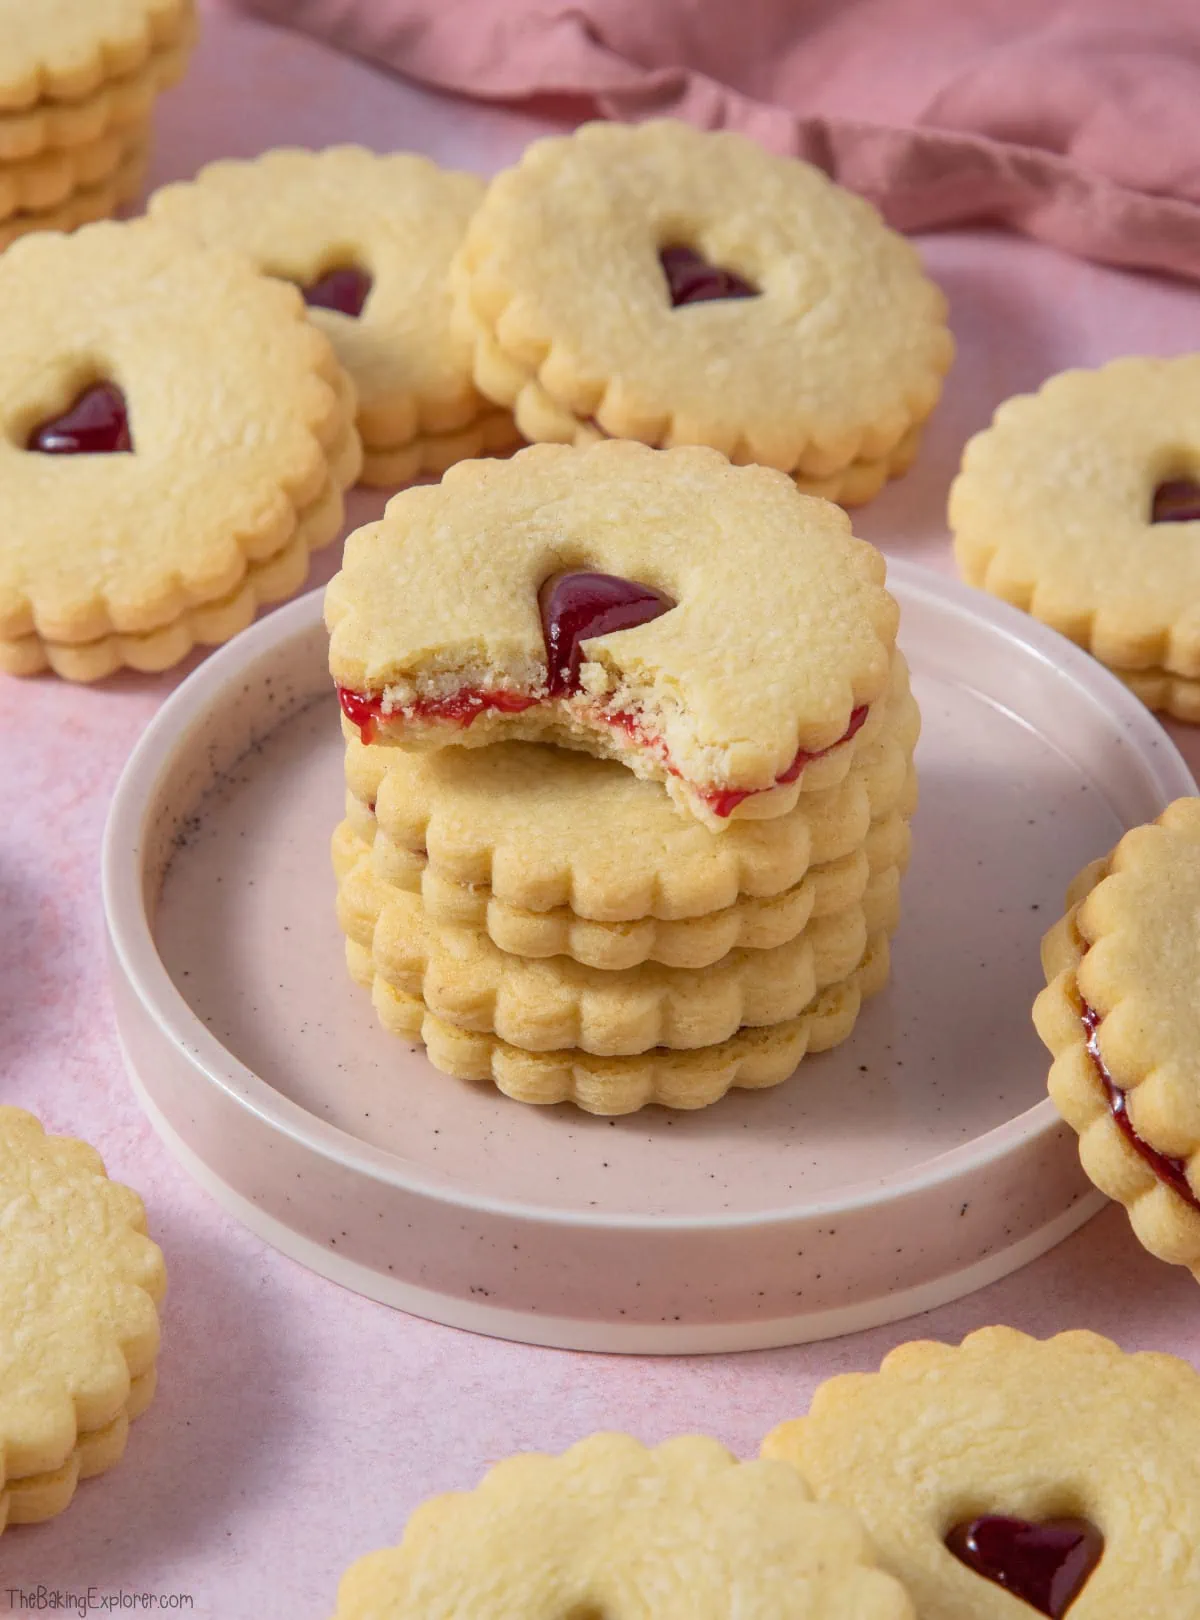
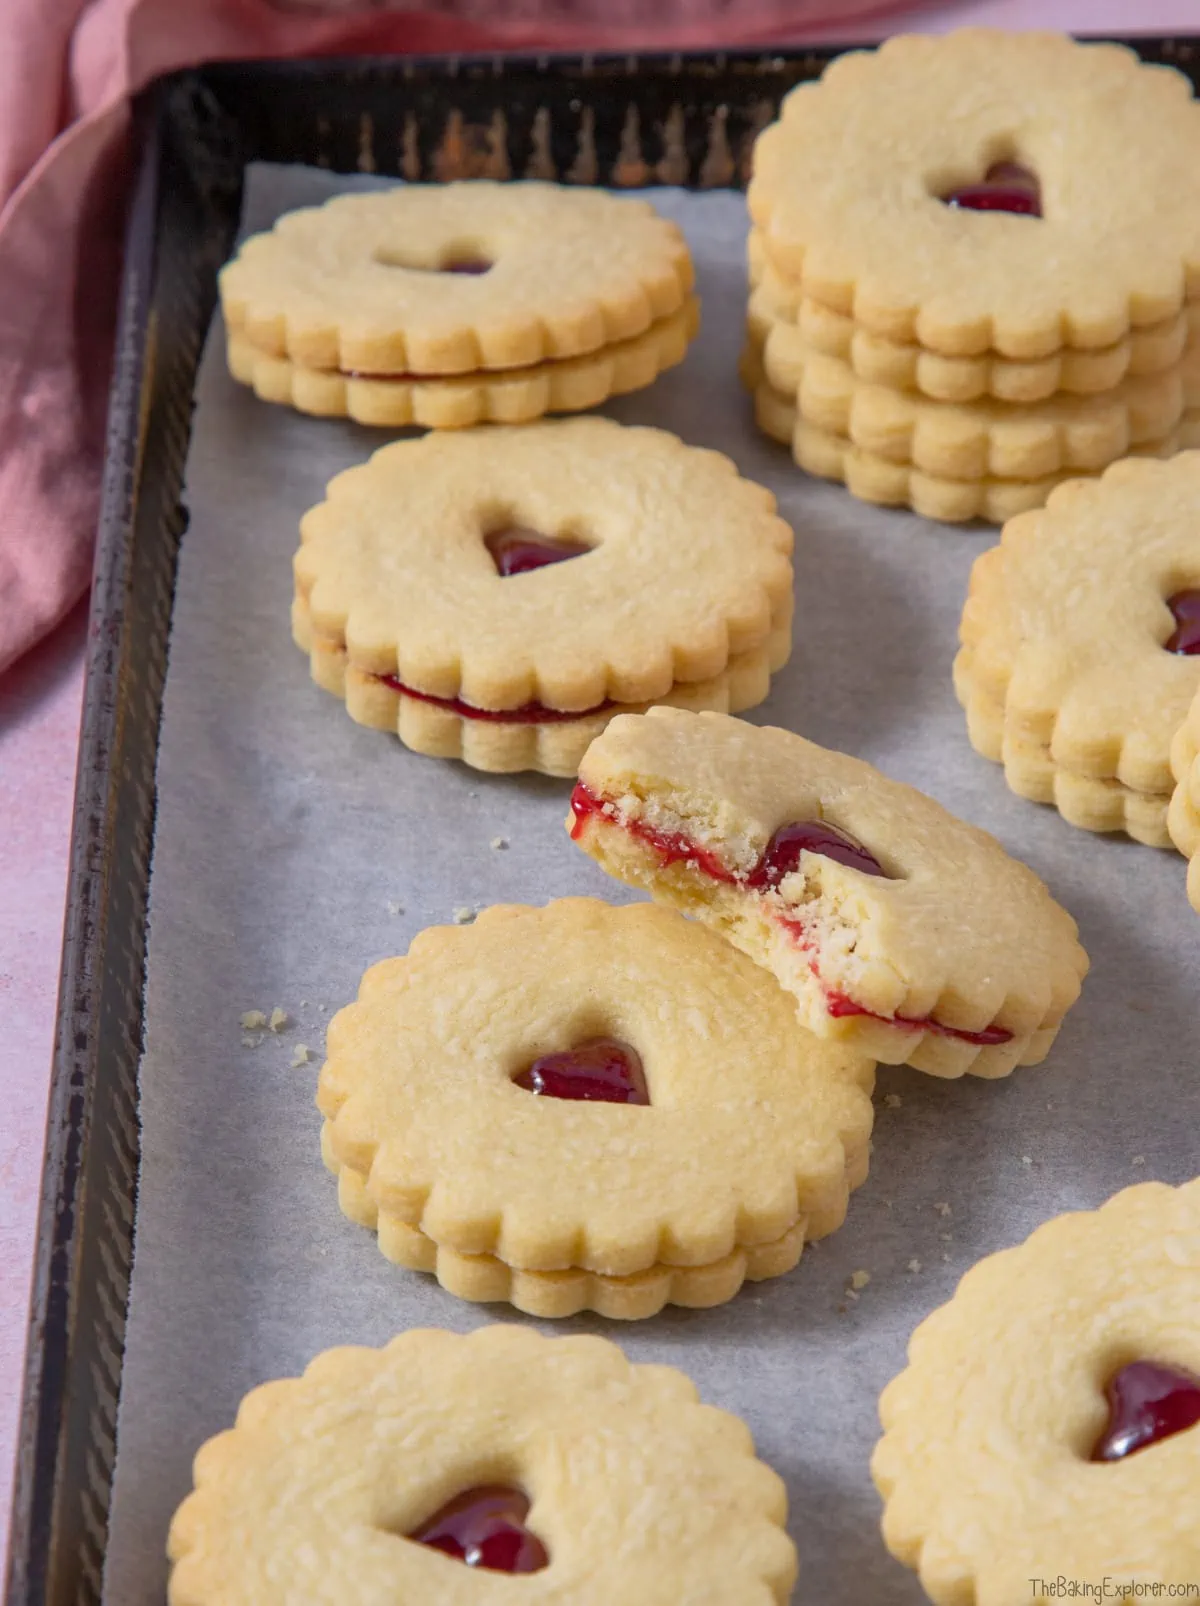
Cut out your biscuit rounds, then cut heart shapes out of half of them. Bake for 10 minutes, or until lightly golden, then leave to cool fully. Spread some seedless raspberry jam over one of the biscuit rounds, then top with a biscuit round that has had a heart cut out of it. Repeat until all of the biscuits have been sandwiched together.
For the full recipe with measurements, head to the recipe card at the end of this post.

Do you need an electric mixer to make this recipe?
While an electric stand mixer is helpful in making these biscuits and saves a lot of time and energy, you don't need one to make them. You can absolutely make the biscuits by hand, or with a handheld electric whisk.
Do you have to chill the dough?
I highly recommend chilling the dough, this helps to reduce the amount the biscuits spreads in the oven, it also gives the biscuits better texture.
How should the biscuits be stored and can they be frozen?
The baked biscuits will last for 3-4 days in an airtight container in a cool place. You can freeze the unbaked dough - either unrolled or cut into shapes. To freeze it unrolled, wrap the ball of dough in cling film well. To freeze the cut out shapes, lay them out onto a baking tray lined with baking paper and freeze them flat. When they are frozen, store in a freezer bag or container with baking paper between each one. You can bake them straight from frozen, they may just need a couple more minutes in the oven. You can freeze the baked biscuits too, wrap them well or store in a freezer bag for up to 3 months. Put a square of baking paper between each one to stop them from sticking together.
How many biscuits does this recipe make?
You can use any biscuit cutter with this recipe, so it depends what size you use as to how many biscuits you get. Mine was 5cm wide and it made 20 sandwiched biscuits.
Can this recipe be made gluten free?
For gluten free you can replace the plain flour with a gluten free plain flour blend. You may also like to add ¼ tsp xanthan gum for better texture. Please check the labels of everything you use if serving to someone with an allergy or intolerance.
Can this recipe be made dairy free?
For a dairy free version, use a dairy free milk and dairy free block butter alternative instead of butter, I recommend Flora Plant. Please do check the labels of everything you use if serving to someone with an allergy or intolerance.
More tips for making the Homemade Jammie Dodgers:
- Let the biscuits cool on the baking tray for at least 10 minutes before trying to move them onto a cooling rack. Otherwise they will be too soft and could break.
- If you don't have a heart shaped cutter of the right size, you could use a small star cutter, or a round cutter. You can also use the large round side of a piping nozzle.
Troubleshooting
If you have any questions about this recipe, or if something went wrong and you need help, please use the comment form below and I will get back to you. You can also get in touch with me on my Twitter, Instagram or Facebook. I'd love to hear from you!
Recommended equipment & ingredients
- Mixing bowls
- Baking trays
- Measuring spoons
- Cooling rack
- Kitchen scales
- Electric hand mixer
- Stand mixer
- Rolling pin
- Silicone mat
- Sieve
- Jammie dodger biscuit cutter
- Linzer cookie cutter set
- Heart cutters
- Round cutters
I earn a small amount of money if you buy the products after clicking on the links. You will not be charged anything extra for this. Thank you for supporting The Baking Explorer!
More biscuit recipes...

Homemade Jammie Dodgers
Ingredients
For the biscuits
- 135 g Butter softened, unsalted
- 135 g Icing sugar sieved
- 1 Egg yolk
- 1 tbsp Milk
- 1 tsp Vanilla extract
- 250 g Plain flour
- ⅛ tsp Salt
For the filling
- 200 g Seedless raspberry jam
Instructions
- Start by mixing the butter and icing sugar together until well combined and creamy looking. This is best done in a stand mixer with the paddle attachment for 3-5 minutes
- Add the egg yolk, vanilla extract and milk, and mix until fully incorporated
- Add the plain flour and salt, and mix until combined
- Bring the mixture together into a dough and form a rough disc shape. Wrap the dough in cling film and put it in the fridge to chill for 30 minutes
- Meanwhile, pre-heat your oven to 160C Fan/350F/Gas Mark 4, and line a few baking trays with baking paper
- Using a rolling pin, roll the dough out onto a floured surface to a thickness of 3mm. Keep turning the dough as you roll, to ensure it doesn't stick to the surface, and add more flour underneath as needed
- Cut out your biscuit rounds and place them onto the lined baking trays, then cut heart shapes out of half of them. You will need to re-roll out the dough to use it all up
- Bake the biscuits for 10 minutes, or until lightly golden, then leave to cool on the trays for at least 10 minutes before moving to cooling racks
- When they are full cool, spread some seedless raspberry jam over one of the biscuit rounds, about 1 tsp per biscuit, then top with a biscuit round that has had a heart cut out of it. Repeat until all of the biscuits have been sandwiched together
- Store in an airtight container in a cool place for 3-4 days, you can also freeze them
Video
Notes
- Make sure all your ingredients (particularly the butter and egg yolk) are at room temperature before you start baking.
- I prefer to use unsalted butter for this recipe, but you can also use a baking spread.
- For the best flavour, make sure to use a good quality vanilla extract and not an essence. You can also use a vanilla bean paste.
- If you can't find a seedless raspberry jam, you can push seeded raspberry jam through a fine sieve to remove the seeds.
- Although I provide cup measurements, I highly recommend weighing your ingredients out using digital kitchen scales. It is the most accurate way to measure ingredients and will ensure the best results. Digital scales are very low cost and can be purchased for around £12 ($16.50) .
- For teaspoon (tsp) and tablespoon (tbsp) measurements, please use measuring spoons and not the type of spoons you eat with. Again this will ensure accuracy and provide the best results.
June Antoszkiw
An amazing melt in the mouth recipe, everybody loved them
thebakingexplorer
Wonderful news - thank you!
Jennie Forbes
Love this recipe! The biscuits were lovely and buttery and crumbly. My grandchildren said they were far better than shop bought and requested I make them again!! Easy to follow recipe.
thebakingexplorer
Thanks so much for such a lovely review Jennie!
Sarah Rook
I'm very much a beginner at baking but the recipe is really easy to follow and produced lovely tasting biscuits. My work colleagues ate them all and have asked me to make more!
thebakingexplorer
Thank you so much for a lovely review Sarah!
Lynsey
What a delicious taste these are!
So easy to make, I will be making these again and again as my children demolished them.
Thank you for sharing the recipe.
Stephanie
Lovely easy recipe. I rolled mine out between 2sheets of greaseproof and it worked really well. Made my own strawberry jam to go inside.
thebakingexplorer
So happy you liked them!
Susan
These are wonderful! I recently returned to the US from visiting my son and family in Warrington, UK. My grandchildren are crazy for Jammie Dodgers and I had to try this recipe! Next time I think I must buy the cutter set to make them authentic! Thank you!
Sshirra
I am from Warrington. Living in OH
Making them tomorrow
Aisha
This was such a delicious and easy to follow recipe. I made these on Valentines Day and everyone enjoyed them. Would highly reccomend! ❤️❤️
thebakingexplorer
Thank you so much Aisha!