
I decided to make Raspberry Mille Feuille after it was a technical challenge from The Great British Bake Off. My boyfriend also higly requested it, and I thought it looked really delicious and pretty. I followed the same Paul Hollywood recipe that the bakers used to make the Raspberry Mille Feuille.
Step by step...
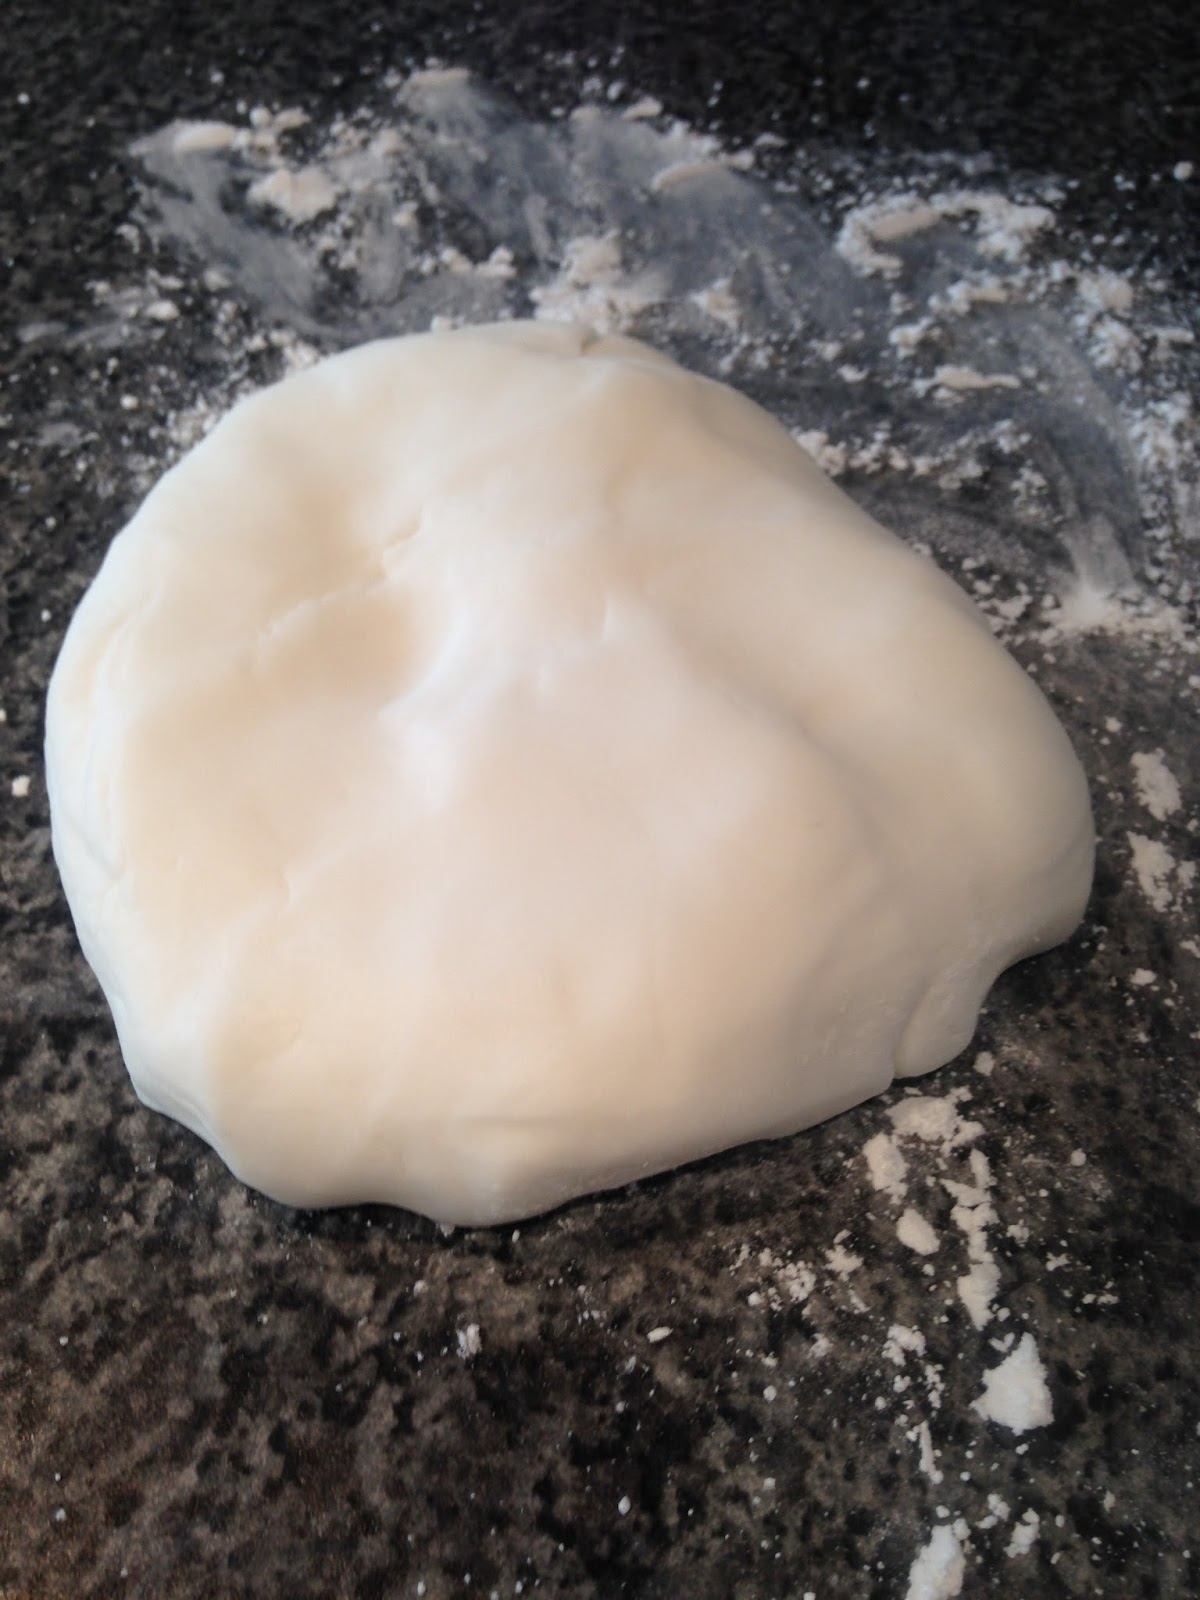
I started by kneading white fondant until it was soft and pliable, to stop it from sticking I used icing sugar to dust the work surface.
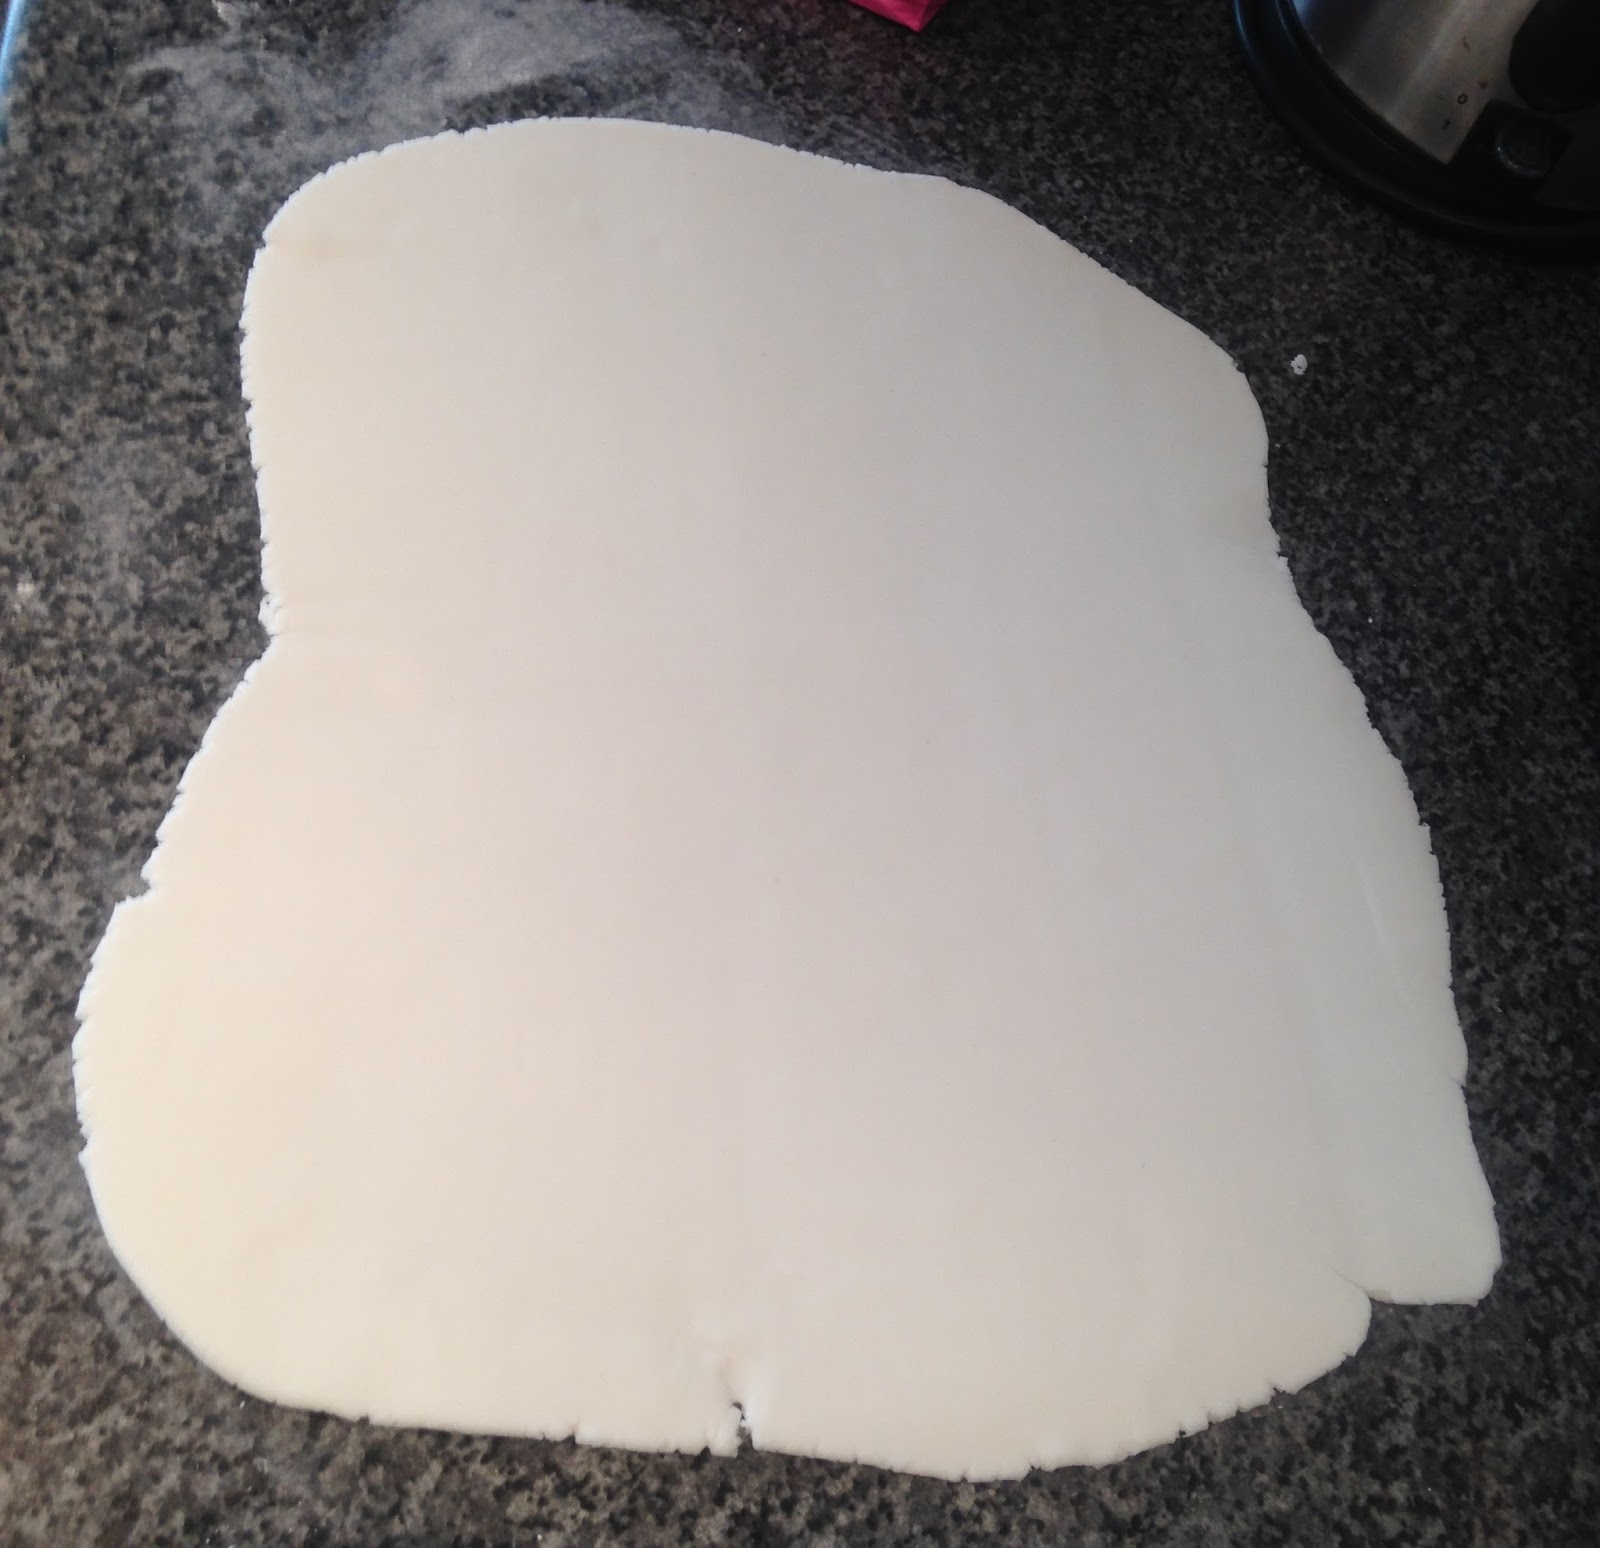
Then I rolled out the fondant making sure it was big enough to cut out a square measuring 12" x 9".

I decided to use Renshaw Decor-pan, which is coloured marzipan, as it was the perfect pink shade for the recipe. You can also use pink fondant of course.
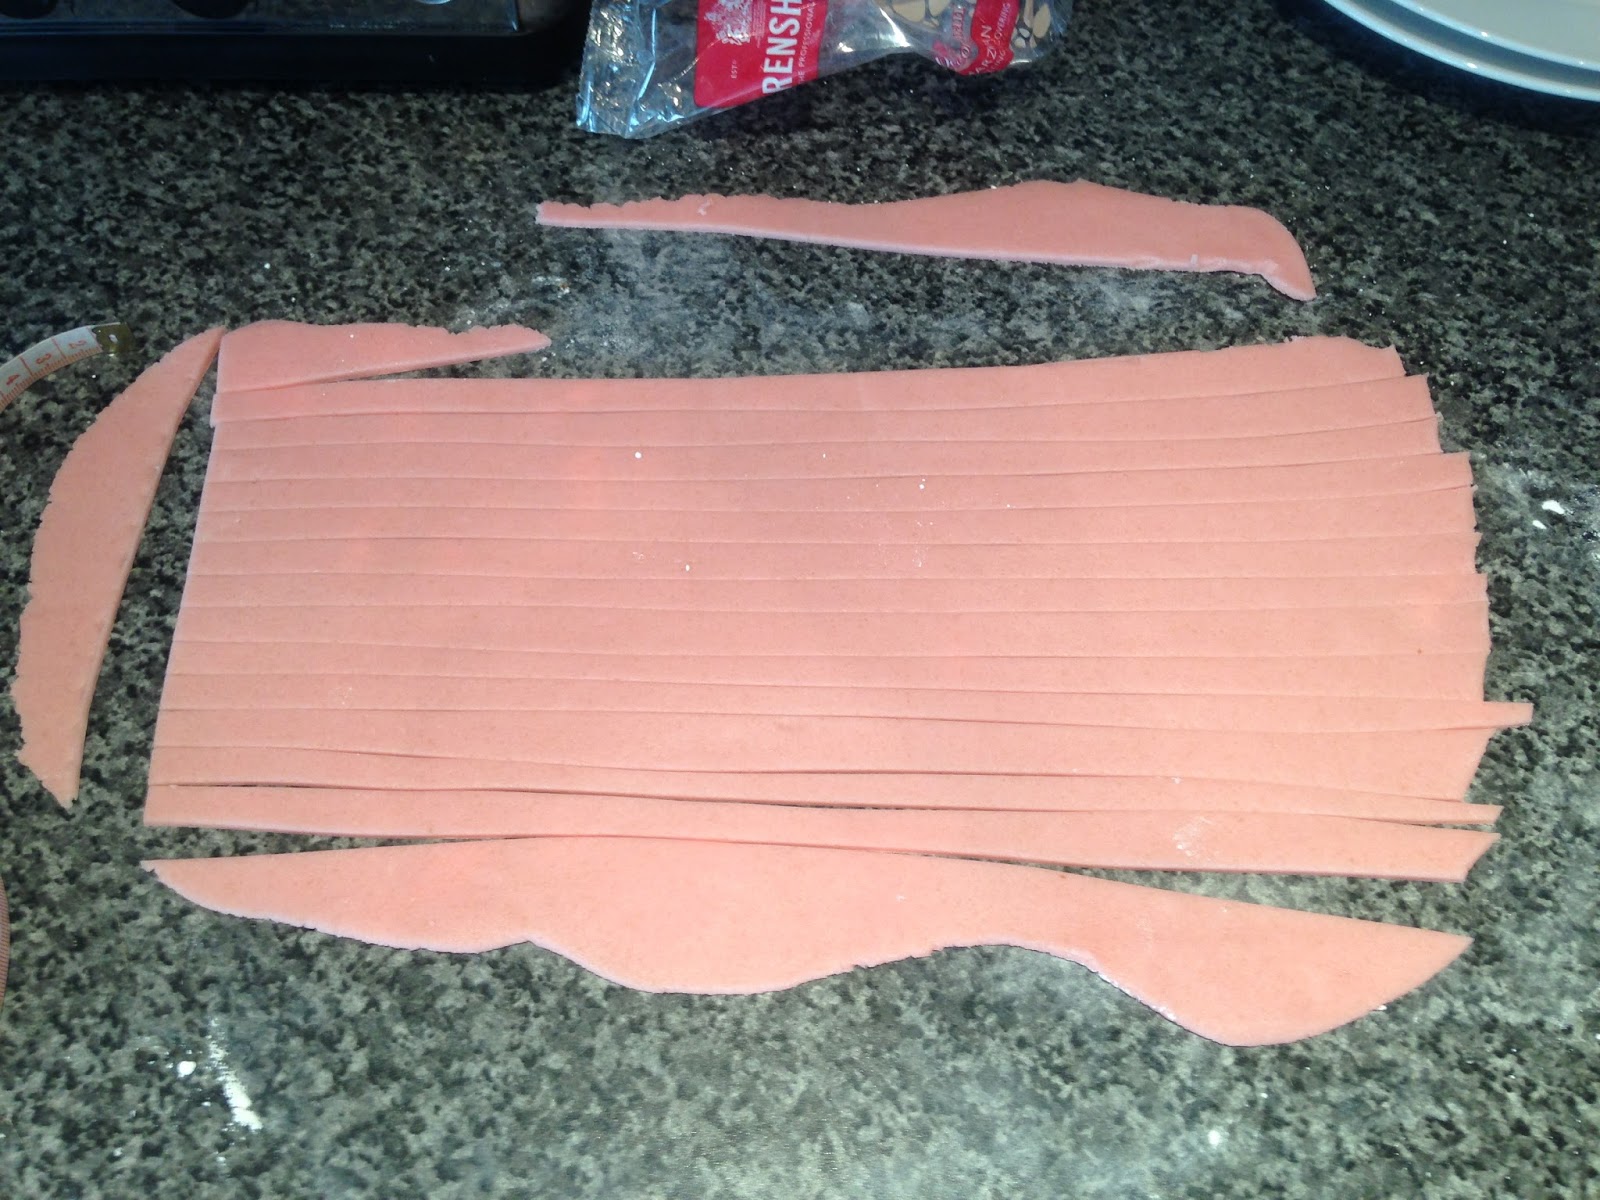
I rolled out the marzipan, again using icing sugar to stop it from sticking to the surface, then I used a knife to cut 1cm wide stripes.

I laid the stripes of marzipan out onto the white fondant. The recipe photo had the stripes straight, but I liked Ian's diagonal ones on the show so I did the same.

I then rolled over the stripes to infuse them with the fondant.

I cut out 6 squares, measuring 6" x 3". It doesn't matter if they are a little larger as you can trim them.

For the pastry I used 3 sheets of Jus Roll Puff Pastry. I rolled it out onto a baking tray.
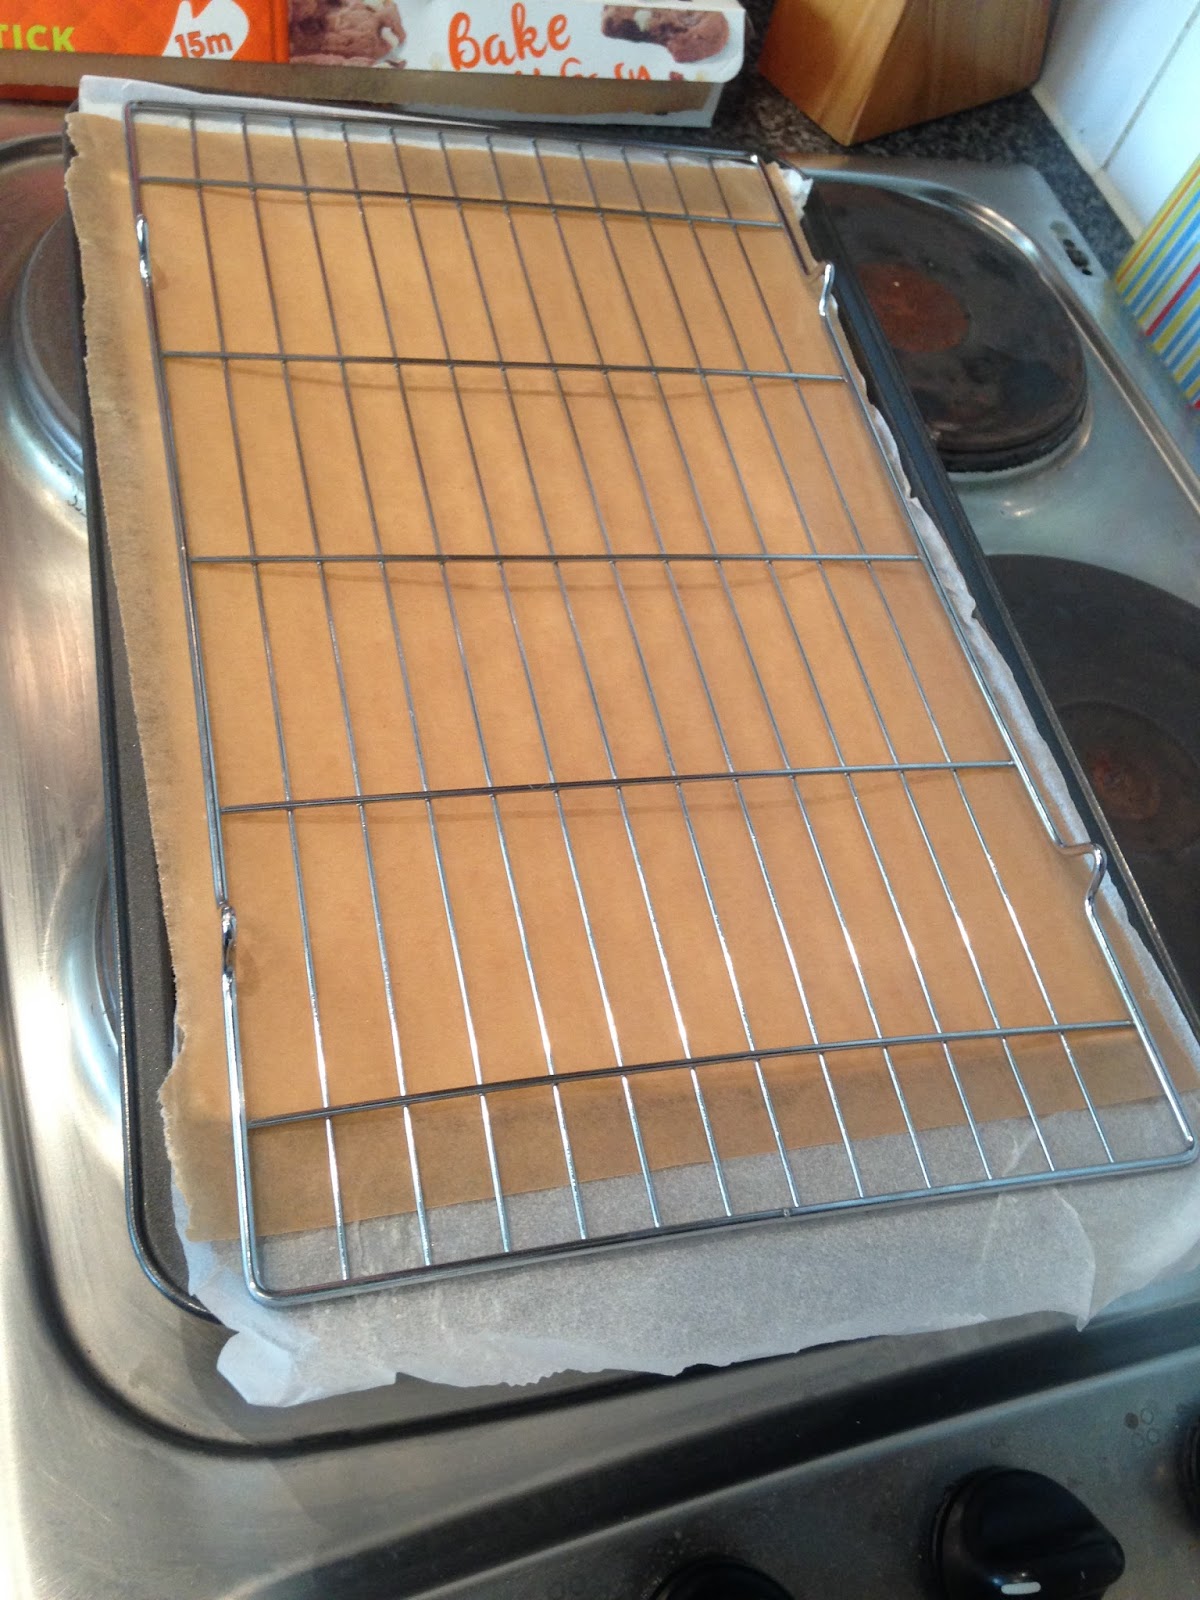
I covered the pastry with another piece of baking paper, then a cooling rack over the top. This keeps the pastry from rising too much and keeps it even, you could also use another baking tray laid on top.


I baked the pastry on 200C/400F/Gas Mark 6 for 15 minutes. I flipped it upside down and baked it again, this time without the cooling rack on top, for 10 minutes.

Once the pastry was cool enough to handle, then cut it into 6 pieces measuring 6" x 3". I did this again twice more with the other two sheets of pastry until I had 18 pieces of pastry in total.
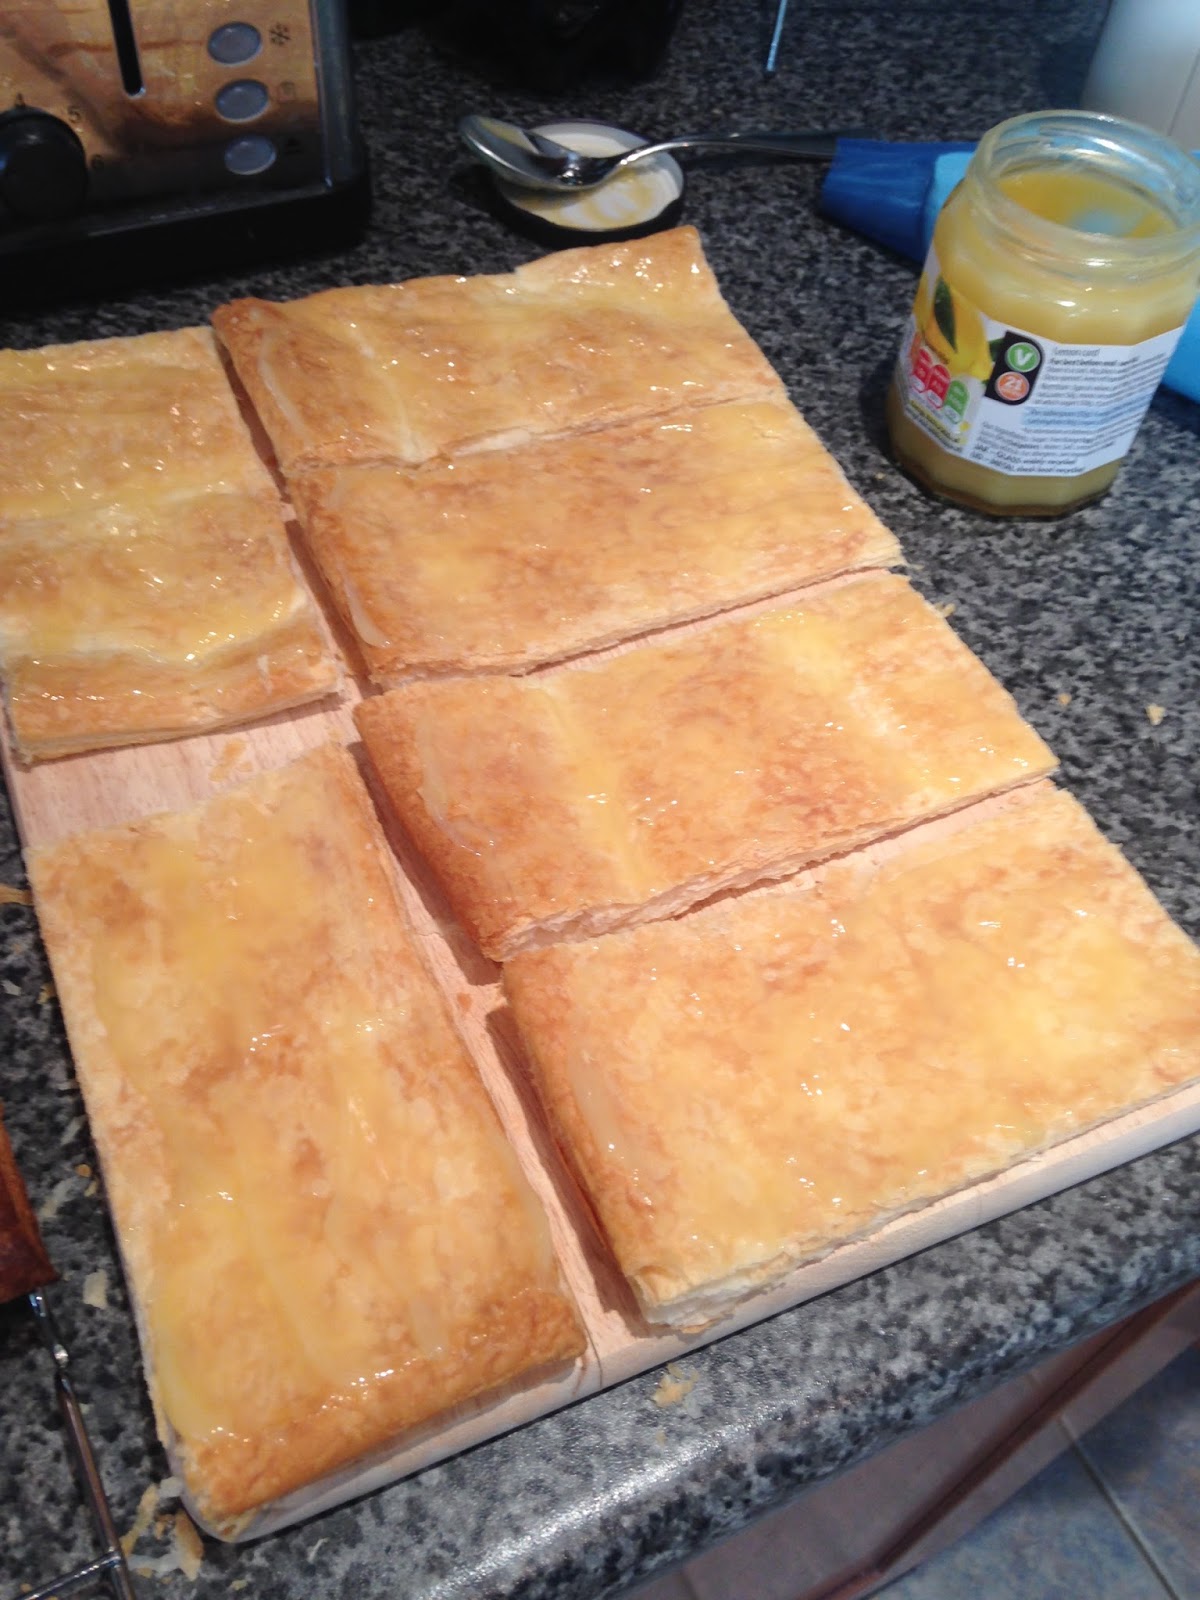
I coated 12 pieces of the pastry with lemon curd. The recipe said to use raspberry jam, but I didn't have any and I preferred using lemon curd instead.
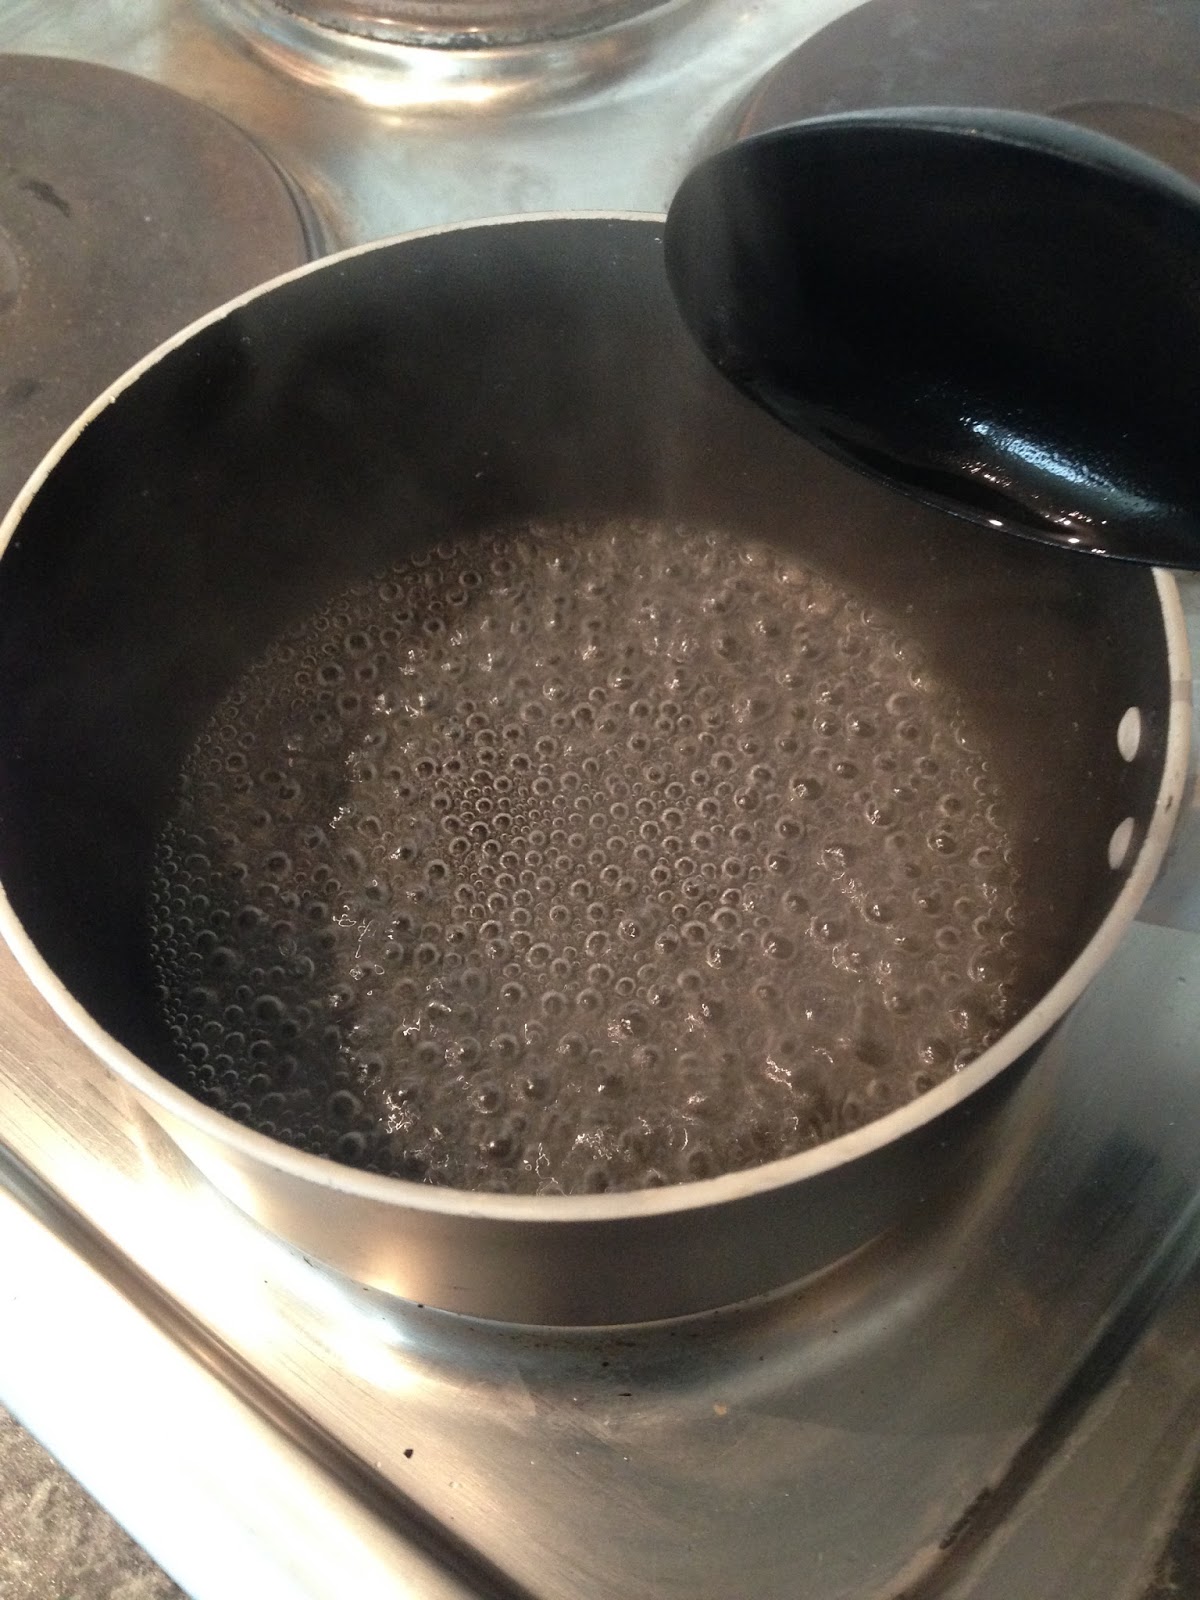
I made a sugar syrup using caster sugar and water. I brought it to the boil in a pan and let it bubble for 1 minute. Then I took it off the heat and let it cool down.

I brushed the syrup onto the other six pieces of pastry and stuck the squares of stripy icing over them.
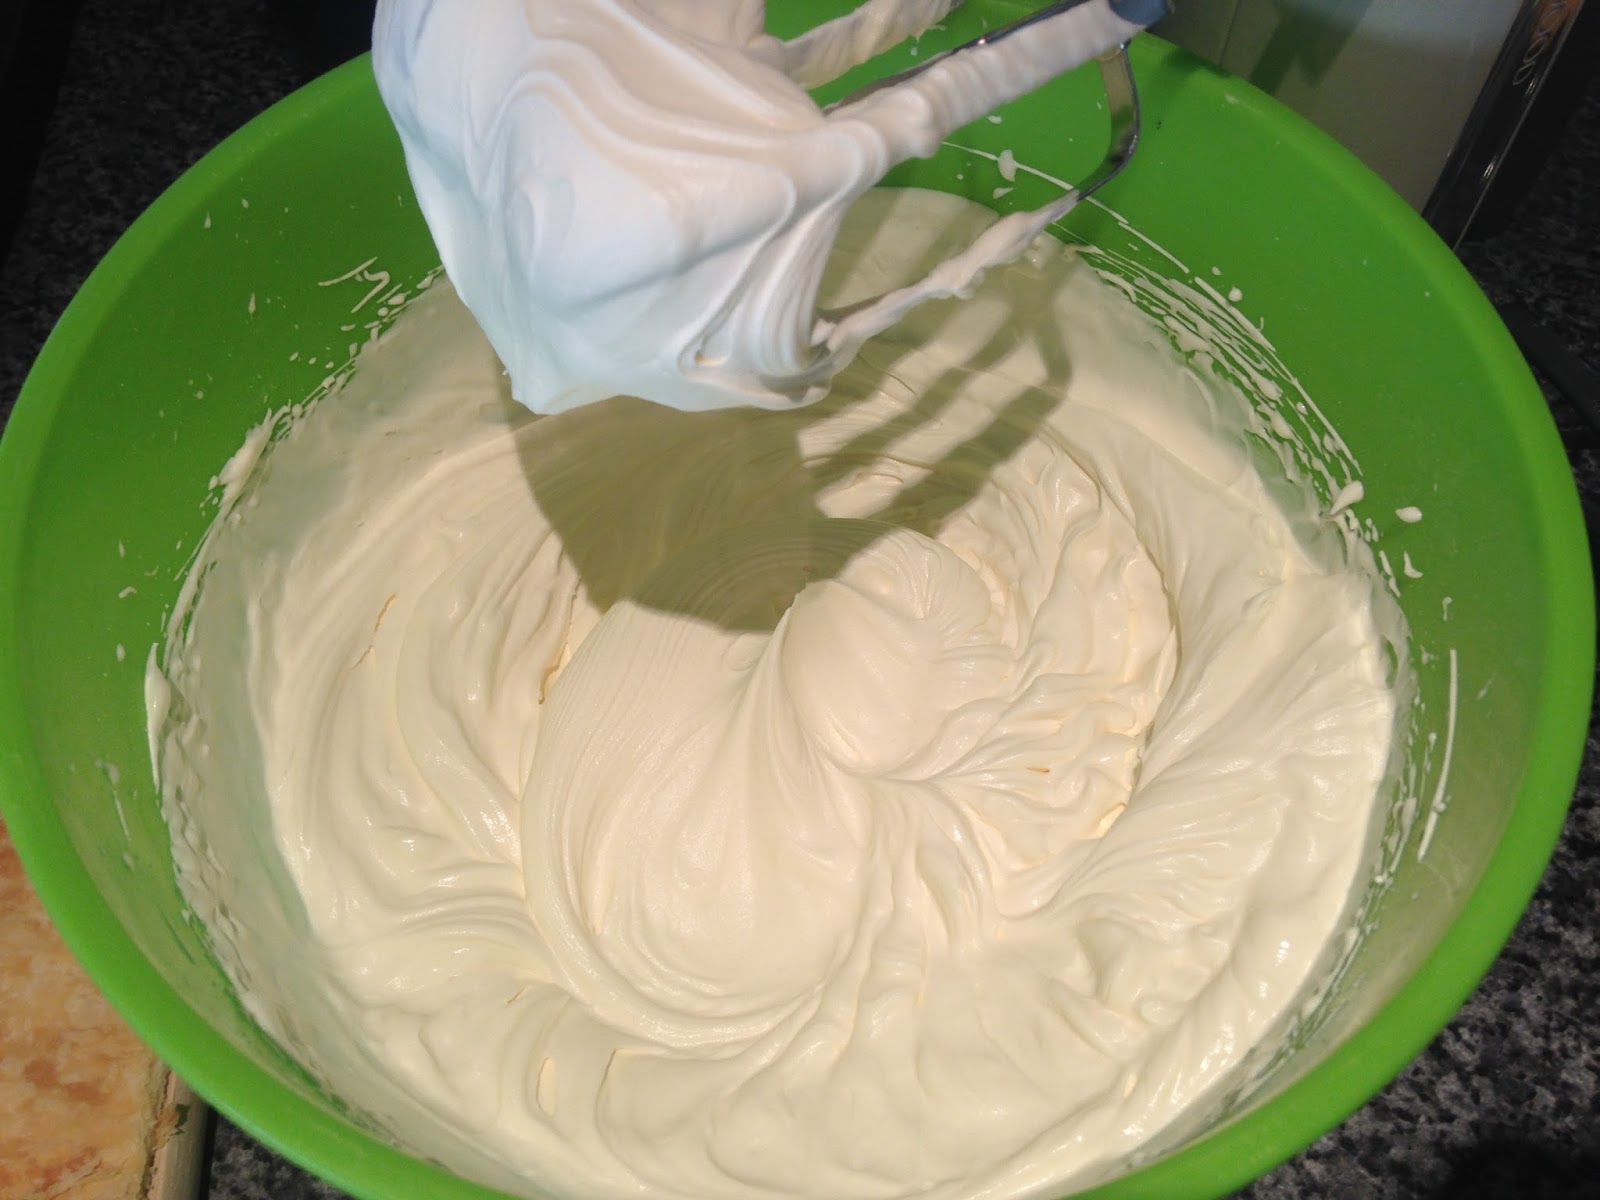
To make the chantilly cream I whipped up double cream, icing sugar and vanilla extract.
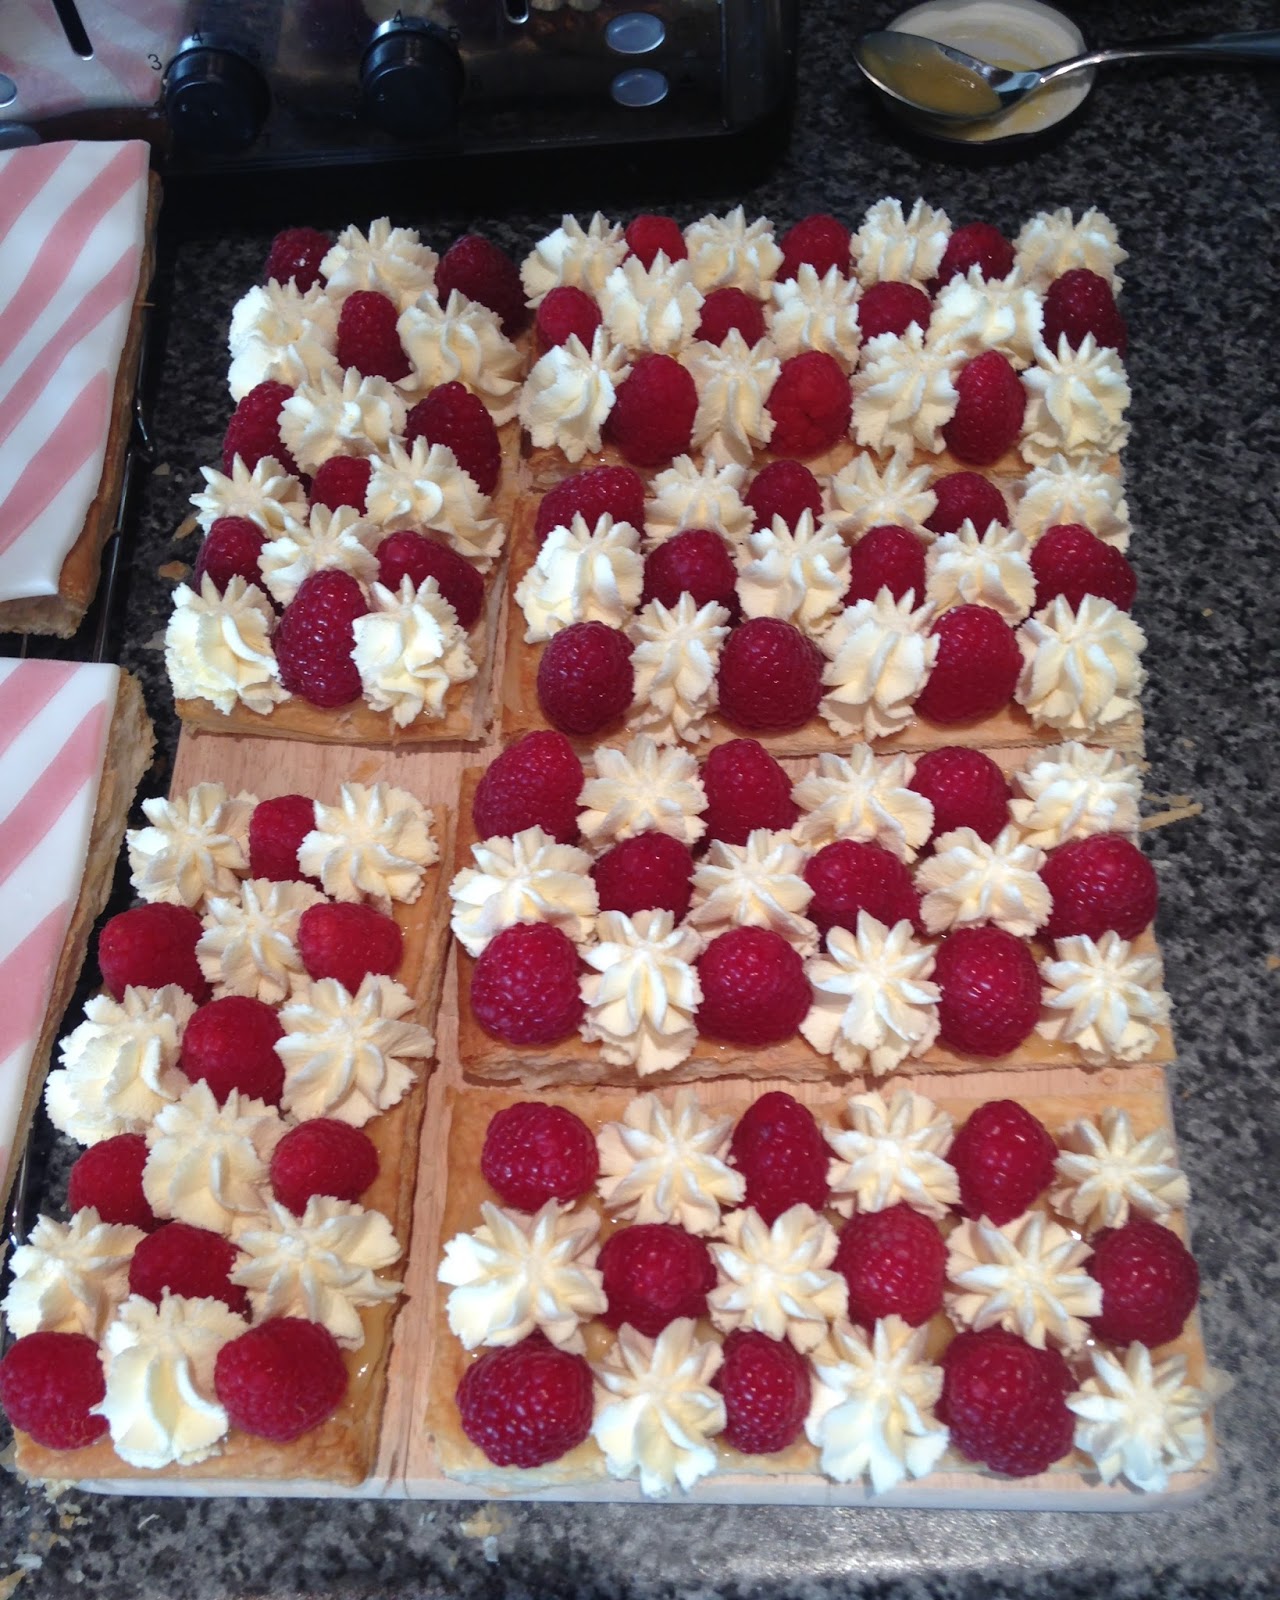
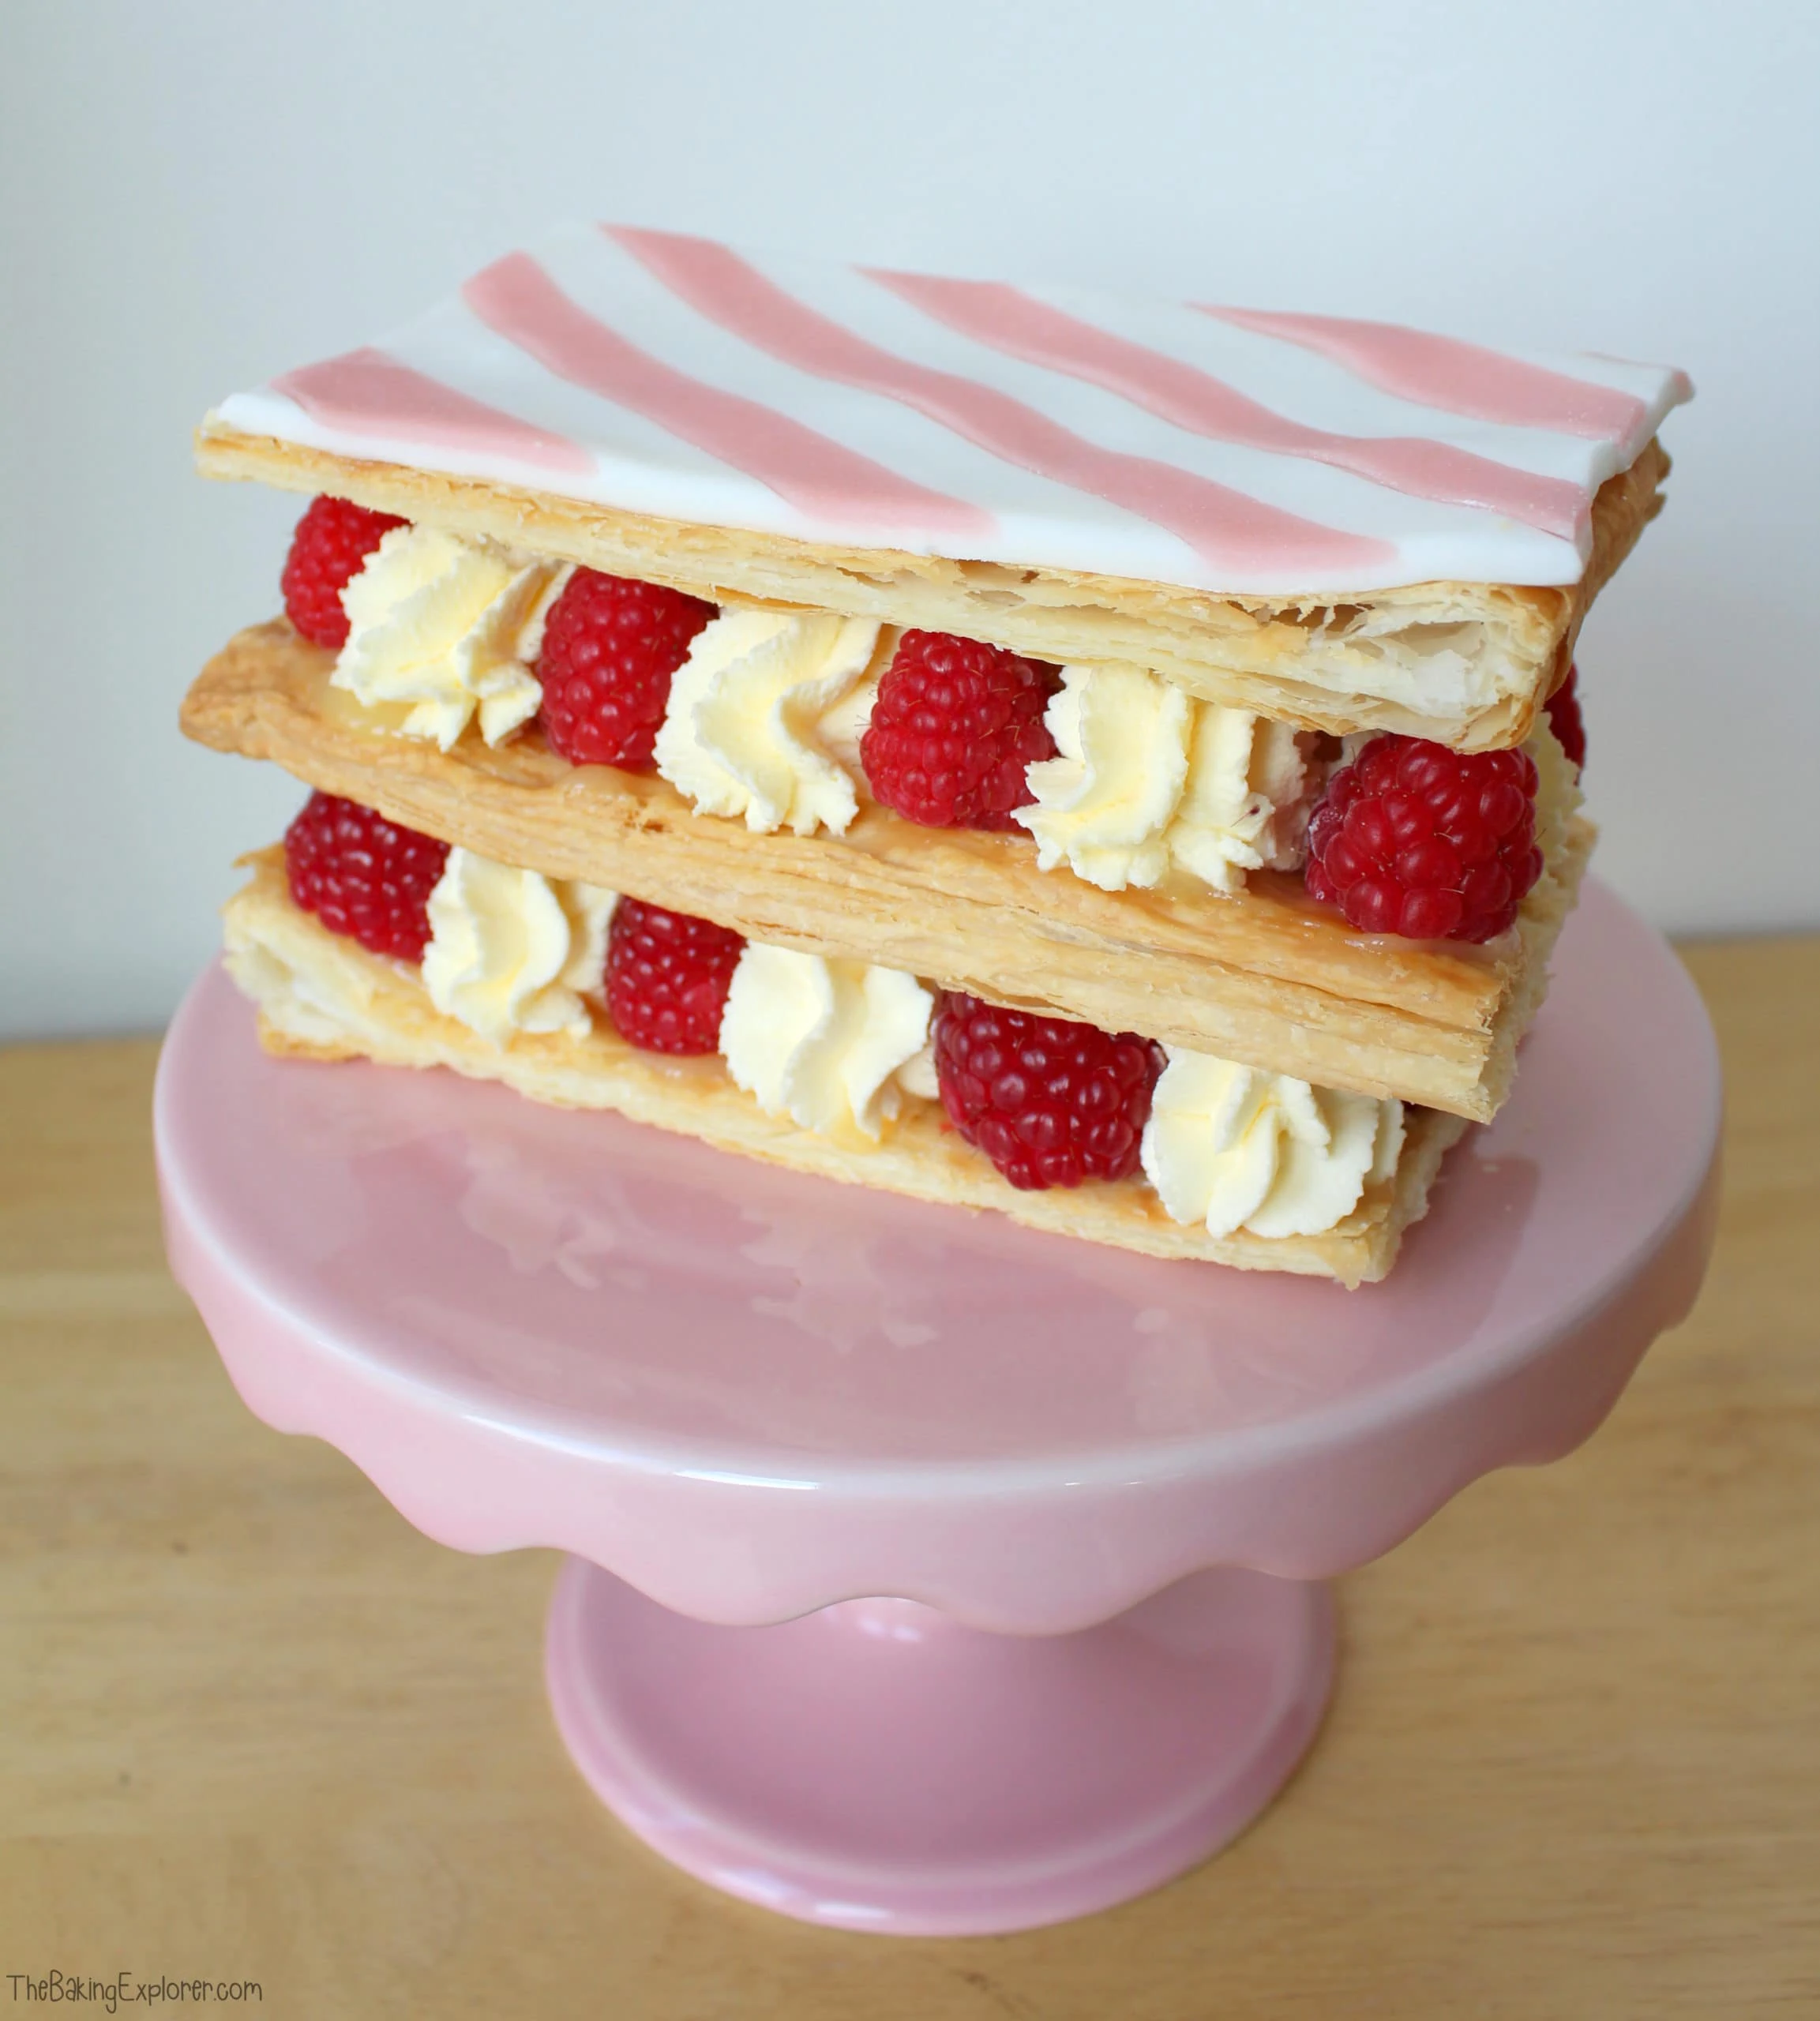
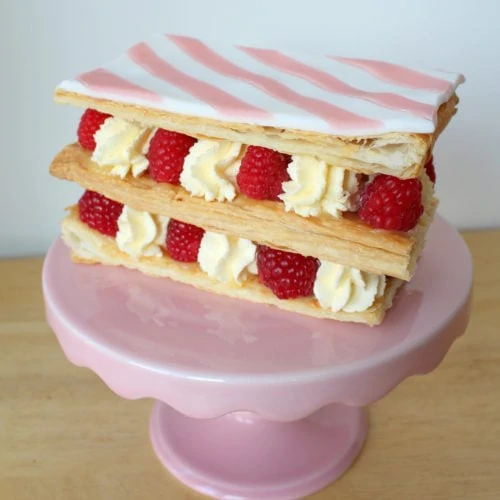
I piped the cream onto the lemon curd covered pastry and alternated it with fresh raspberries. These things used so many more raspberries than the recipe stated - I used 5 punnets!

I put the next layer on, did the same again with the cream and raspberries, and finally topped them with the stripy pastry.
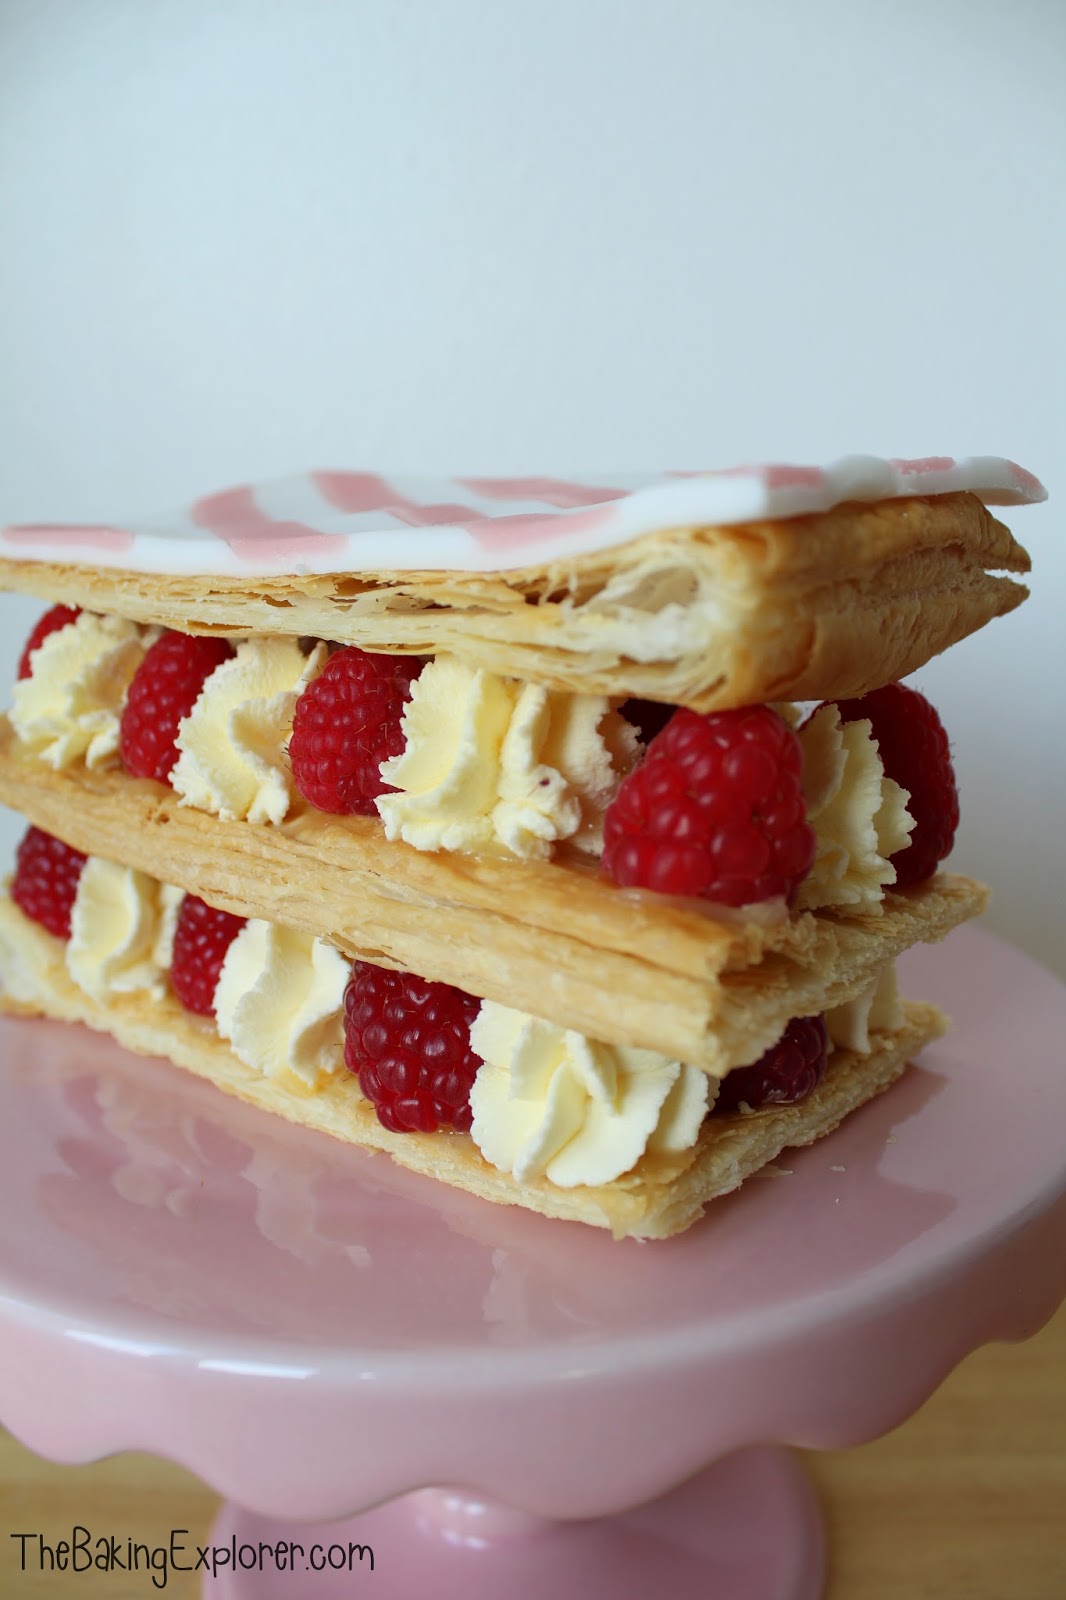
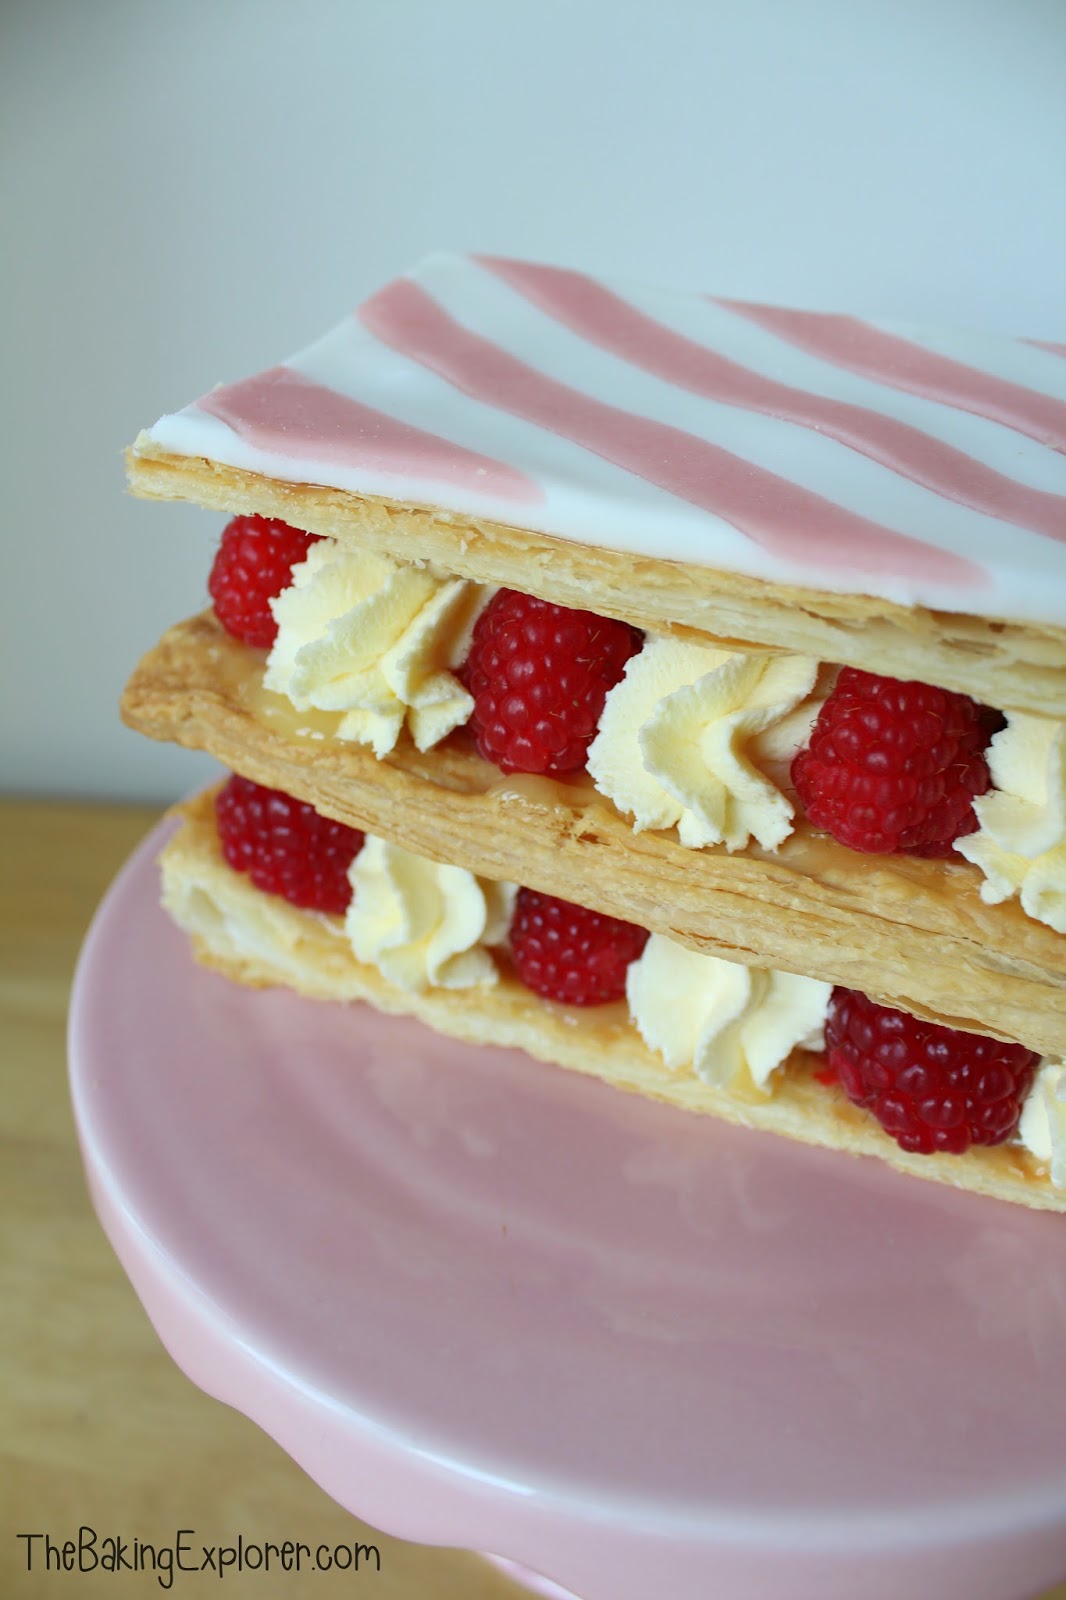
The Raspberry Mille Feuille looked so pretty! I absolutely loved the appearance of them with the stripy icing on top. They were absolutely massive though, one can easily be shared between two. Or they could also be made half the size. The Raspberry Mille Feuille were fairly tricky to eat too, but so delicious and worth all the pastry on your jumper and cream on your face!
Recommended equipment & ingredients*
| Baking trays | Mixing bowls | Cooling rack |
| Kitchen scales | Pink fondant | White fondant |
| Piping bags | Electric hand mixer |
*I earn a small amount of money if you buy the products after clicking on the links. You will not be charged anything extra for this. Thank you for supporting The Baking Explorer!
Raspberry Mille Feuille
Ingredients
- 3 sheets of Jus Roll Puff Pastry
For the fondant decoration
- 500 g White fondant
- 250 g Pink fondant or coloured marzipan
For the Sugar Syrup
- 50 ml Water
- 25 g Caster sugar
For the fillings
- 3 tbsp Lemon curd
- 600 ml Double cream
- 50 g Icing sugar
- 1 tsp Vanilla extract
- 5 punnets Fresh raspberries
Instructions
- Pre-heat your oven to 180C Fan/200C/400F/Gas Mark 6
- Knead the white fondant until it is soft and pliable. Use icing sugar to dust the work surface
- Roll out the fondant to a 12" x 9" rectangle
- Roll out the pink fondant or marzipan to the same size and use a knife to cut 1cm wide strips
- Lay the strips of pink fondant or marzipan over the white fondant. Then roll over the strips to infuse them with the white fondant
- Cut out 6 squares of the stripy fondant, measuring 6" x 3". It doesn't matter if they are a little larger as you can trim them later
- Roll the puff pastry out onto baking trays. Cover the pastry with another piece of baking paper, then a cooling rack or another baking tray over the top. This keeps the pastry from rising too much and keeps it even
- Bake the pastry for 15 minutes. Then flip it upside down and bake it again, this time without anything on top, for 10 minutes. You may need to do this in batches
- Let the pastry cool enough to handle, then cut it into 6 pieces measuring 6" x 3". You will end up with 18 pieces of pastry in total
- Coat 12 pieces of the pastry with the lemon curd
- Make a sugar syrup by boiling the caster sugar and water in a pan for 1 minute. Then take it off the heat and let it cool down Brush the syrup onto the other 6 pieces of pastry and stick the squares of stripy icing over them. Trim them if needed
- Make the Chantilly cream by whipping up the double cream, icing sugar and vanilla extract
- Pipe the cream onto the lemon curd covered pastry and alternate blobs of cream with fresh raspberries
- Put the next layer of pastry on, do the same again with the cream and raspberries, and finally top them with the stripy iced pastry
- Serve immediately and store leftovers in the fridge
Stuart Vettese
Stunning Kat - I love the candy stripe icing. You put some of the GBBO bakers to shame! You really should apply...
Kat BakingExplorer
Awh thank you Stuart!
Amanda
I love the look of your fondant! x
Kat BakingExplorer
Thank you Amanda!
Kate Glutenfreealchemist
You are SO clever! Well done.... they look perfect!
Kat BakingExplorer
Thanks Kate!
Lucy Allen
Your millefeuille look amazing! I agree that the diagonal icing looks much nicer too. The overall effect is stunning, well done on these. I would love to have tried one of them! Thanks for linking these up with Perfecting Patisserie!
Kat BakingExplorer
Thanks Lucy! Wish I could've sent you one to try!
Lili Man
Lovely millefeuille and great summary of the Great British Bake Off final too! I'm inspired to make millefeuille too now.. so thank you! 🙂
Kat BakingExplorer
Glad you enjoyed reading 🙂 let me know if you make it I would love to see!
Sammie
These Mille Feuille look amazing. I saw them on Twitter and as well as looking totally delicious, I think the way you decorated the top is awesome. So beautiful and delicious. Sammie http://www.feastingisfun.com
Kat BakingExplorer
Thanks so much Sammie!
Janice Pattie
Well done on all your bakes, the Mille Feuille looks so good and I love the stripey icing.
Kat BakingExplorer
Thanks Janice, the stripy icing is my favourite bit too 🙂
Alice Marian phelan
I love love this recipe
Love the 3tiers and the stripes it off.special holy communion coming up.I know now what I will bake.thanks for sharing.I love gbbo.
thebakingexplorer
Thank you Alice! I can't wait to see how it turns out!