
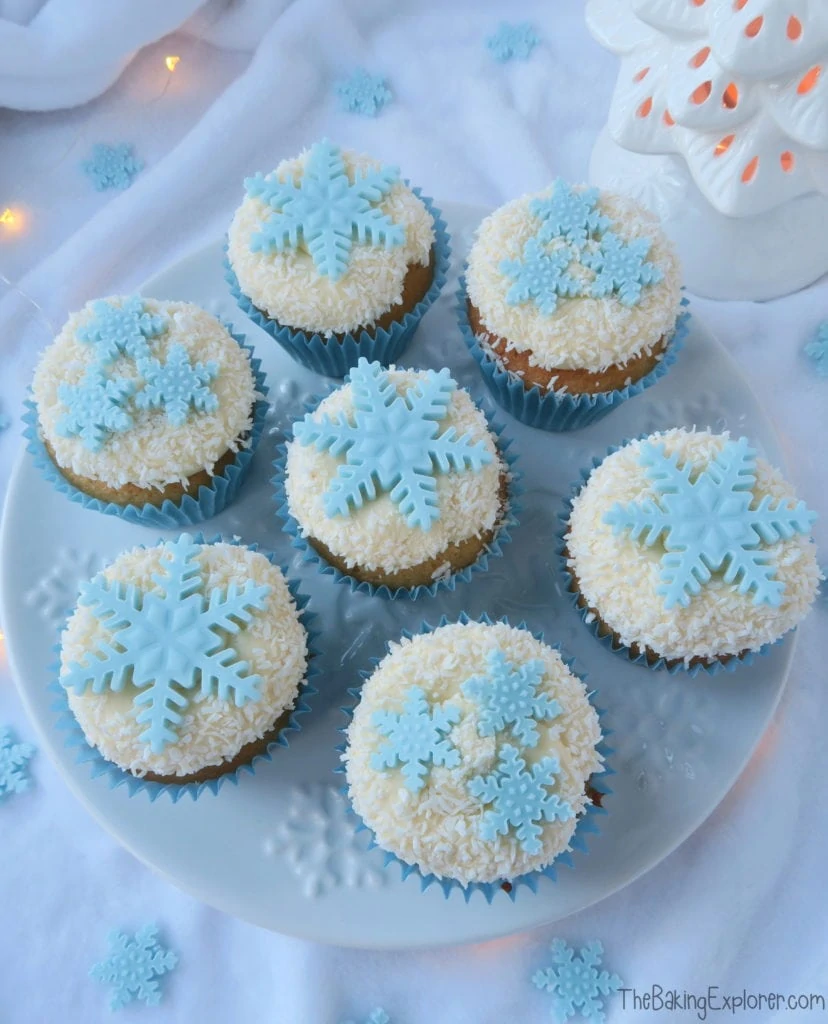
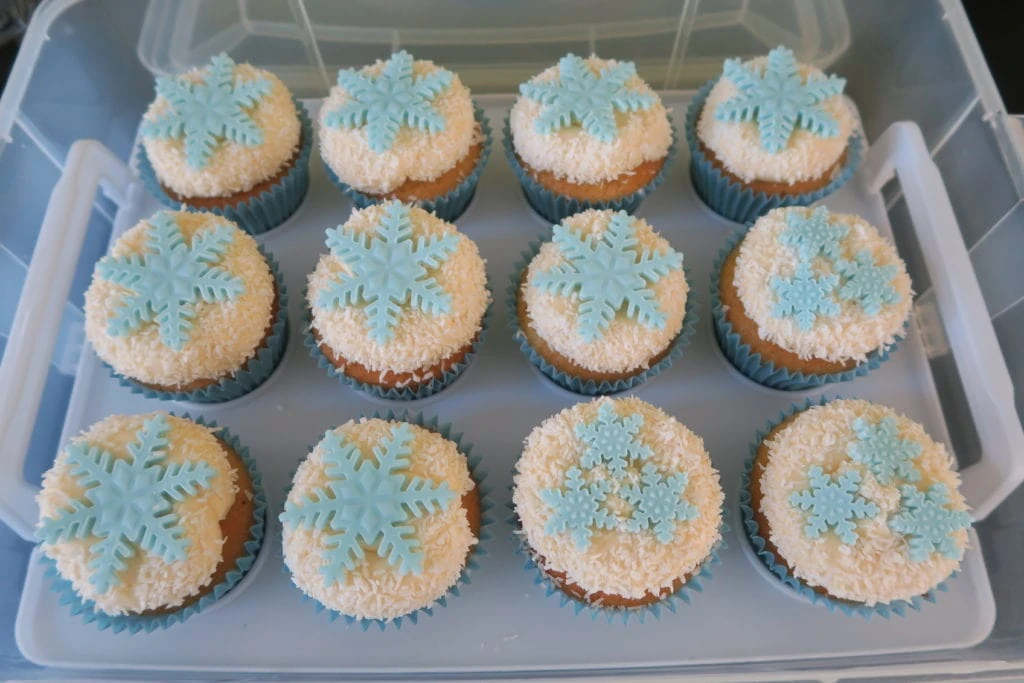
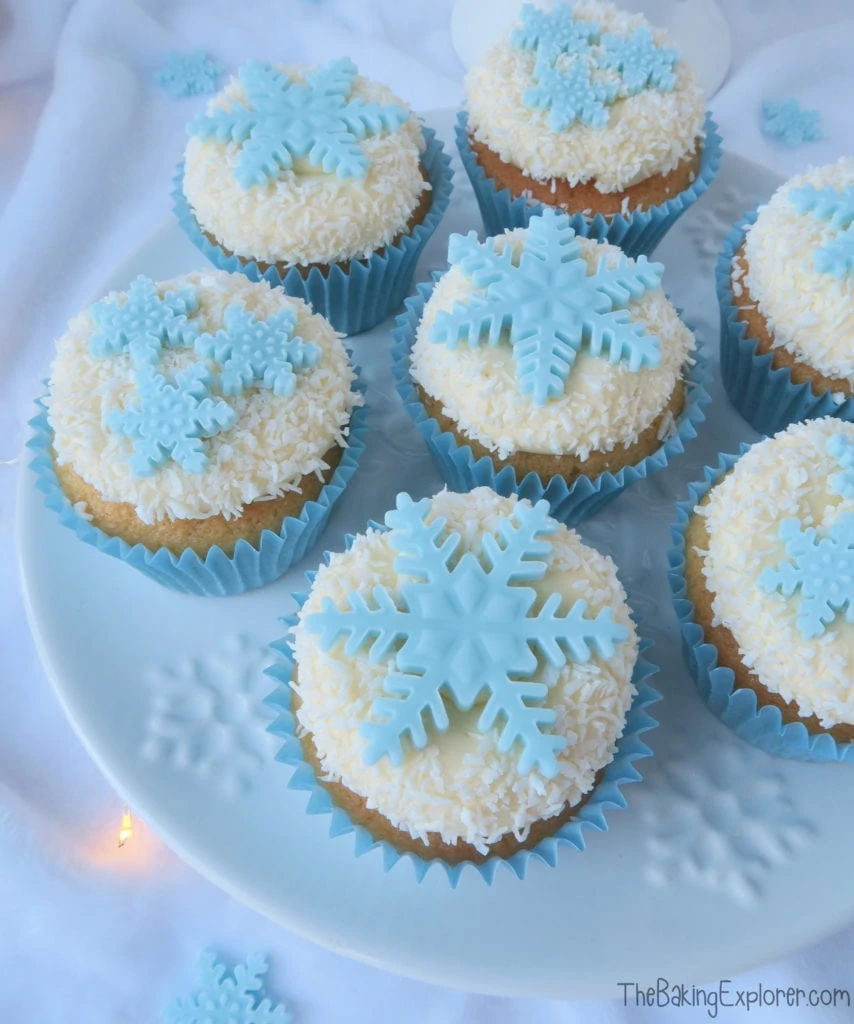
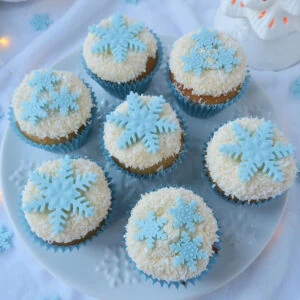
Have you ever had a real snowball fight? Like the ones you see in the movies? I had one back in my university days that went on for hours, and it was great fun. Nowadays I'd rather fight over who gets the last one of my Snowball Cupcakes! These frosty treats are flavoured with a rather tropical ingredient... coconut! It resembles snow perfectly so it had to be part of these Snowball Cupcakes. As did marshmallow fluff, which is a yummy American gooey marshmallow spread that you'll find in the centre of the cupcakes. Making the snowflake shapes was so easy too with the help of a fondant cutter. The Snowball Cupcakes would also be great for a Disney's Frozen themed party!
Ingredient Tips & Equipment Information
- Make sure all your ingredients (particularly the butter and eggs) are at room temperature before you start baking.
- I used a baking spread for the cupcakes and unsalted butter for the buttercream.
- Although I provide cup measurements, I highly recommend weighing your ingredients out using digital kitchen scales*. It is the most accurate way to measure ingredients and will ensure the best results. Digital scales are very low cost and can be purchased for around £12 ($16.50) .
- For teaspoon (tsp) and tablespoon (tbsp) measurements, please use measuring spoons* and not the type of spoons you eat with. Again this will ensure accuracy and provide the best results.
For the full recipe with measurements, head to the recipe card at the end of this post.
How to make Snowball Cupcakes
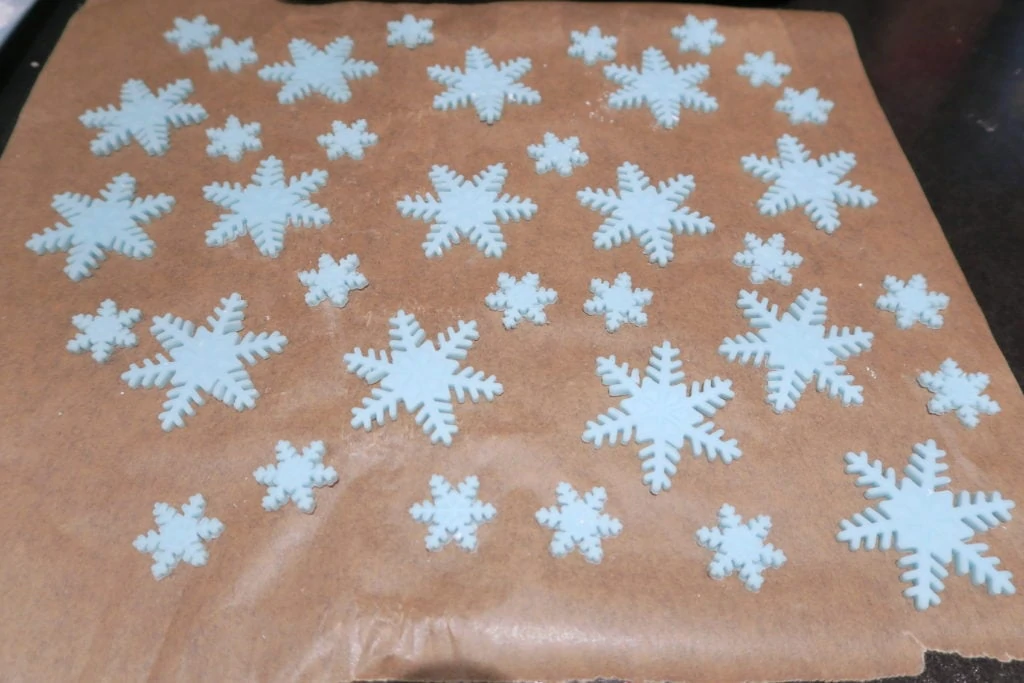
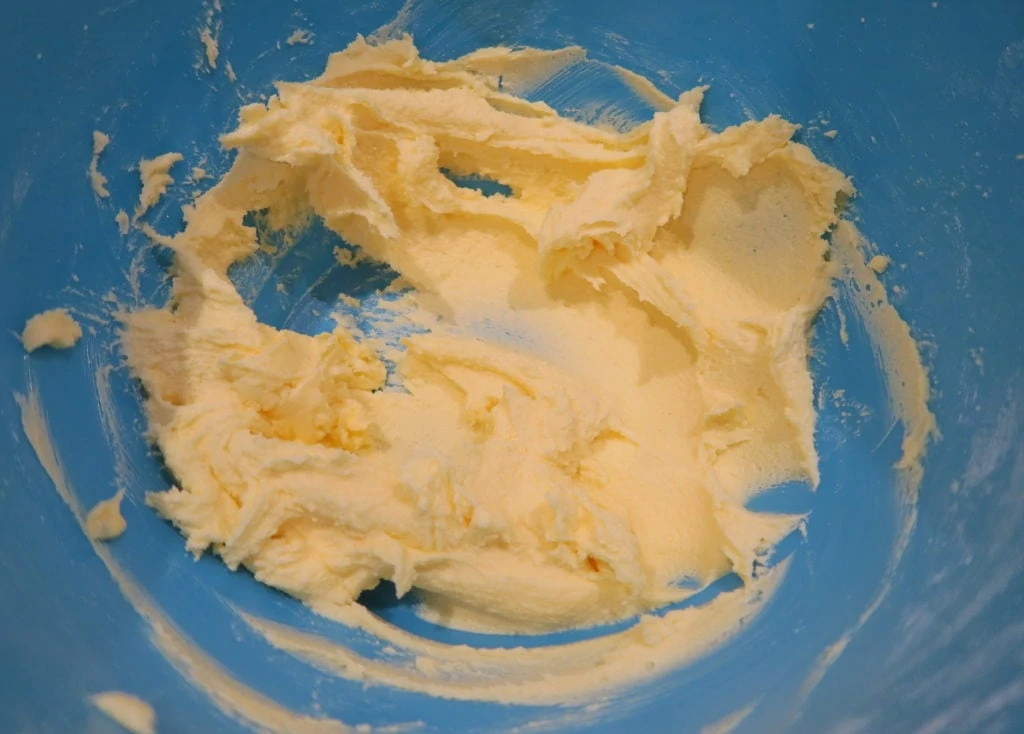
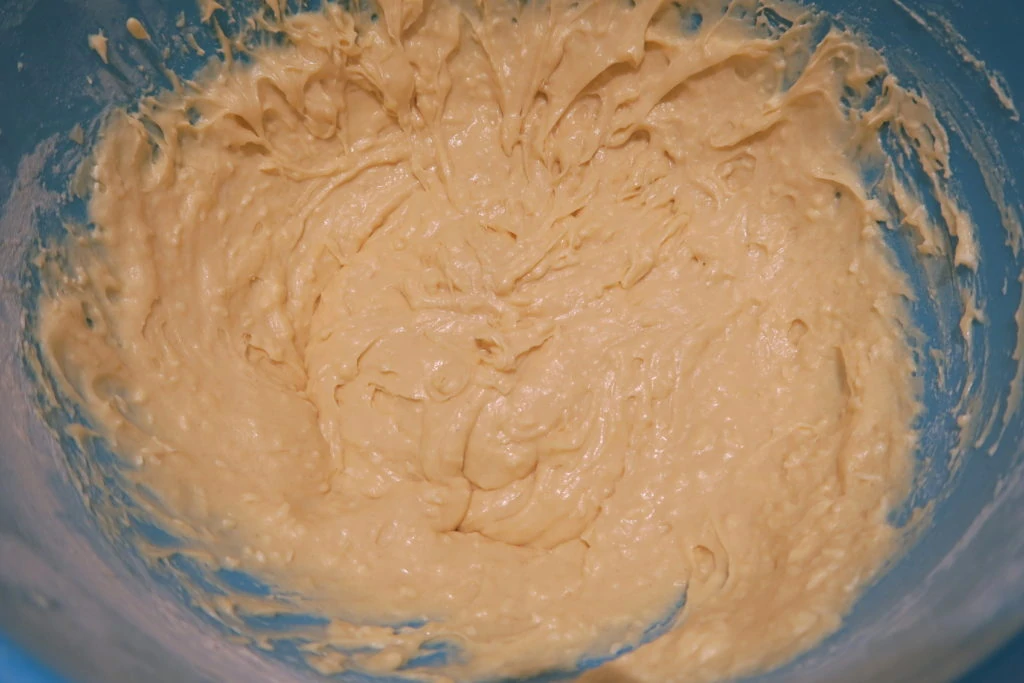
I started by making the snowflake decorations. I got some baby blue fondant and rolled it out, then I cut out snowflake shapes using a cutter. You can find links to the cutters I used at the end of the post. I creamed together the butter and sugar until smooth. Then I added the eggs, vanilla, coconut and self raising flour.
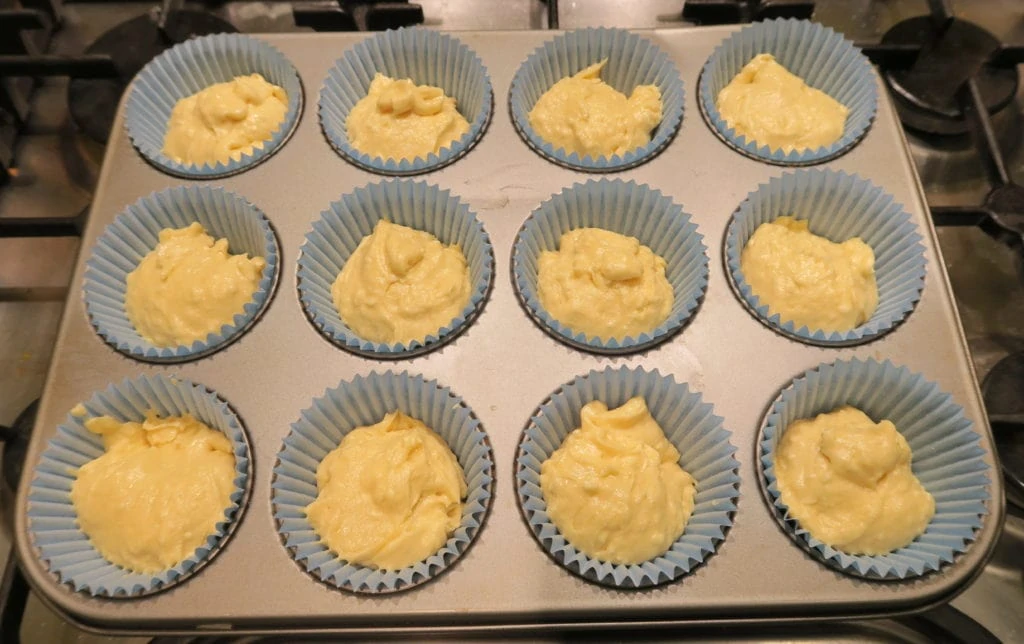
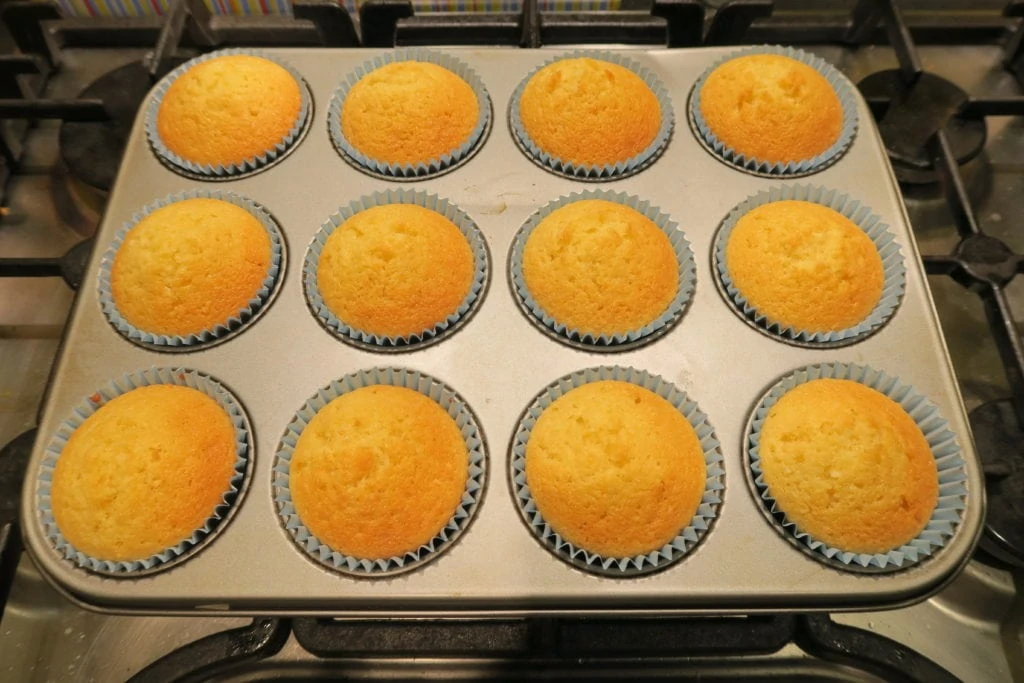
I divided the mixture between 12 baby blue cupcake cases. They baked for 20 minutes until then were golden brown. I left them to cool completely.
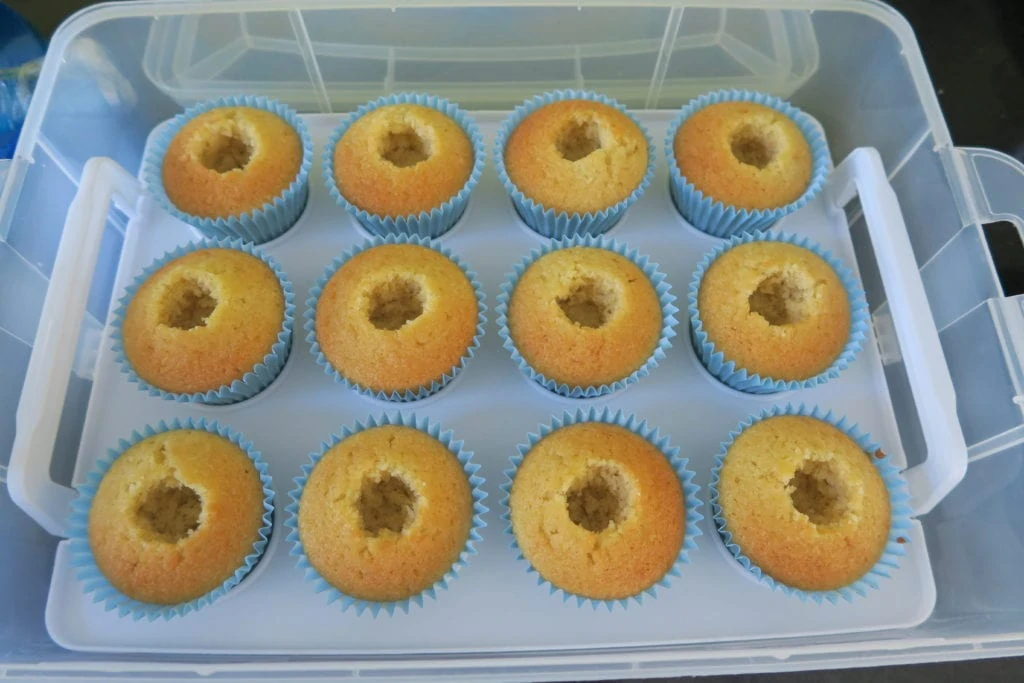
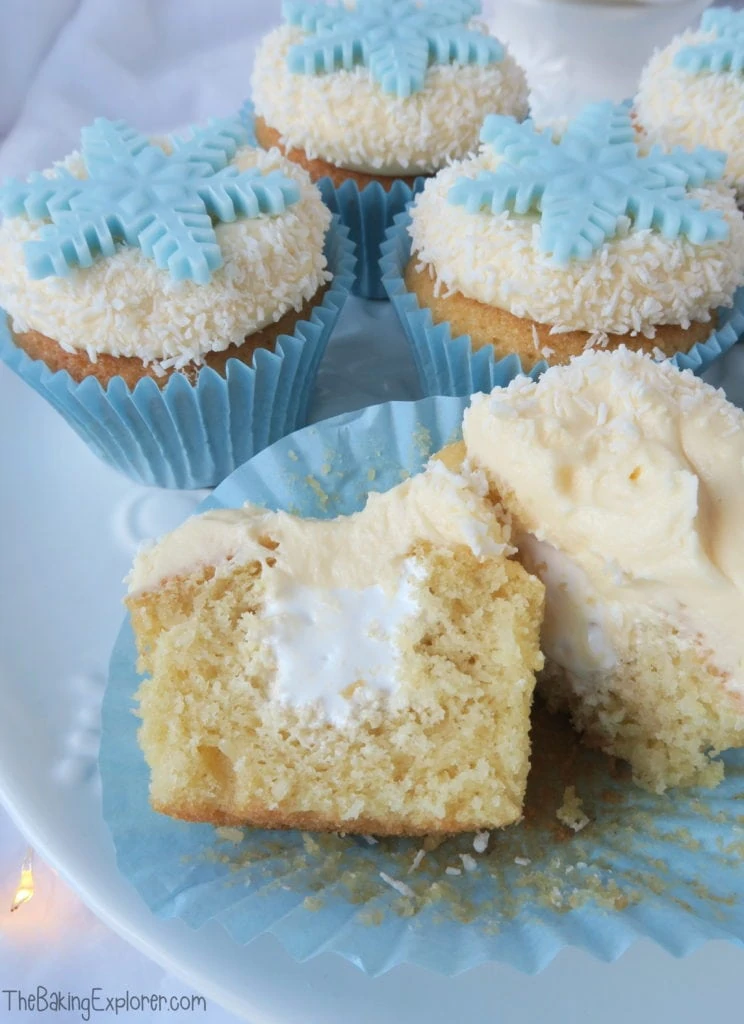
Using a cupcake corer, I made holes in the middle of each cake.
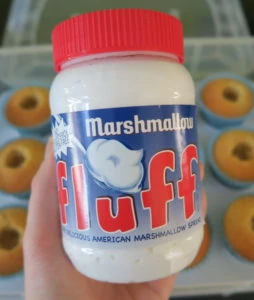
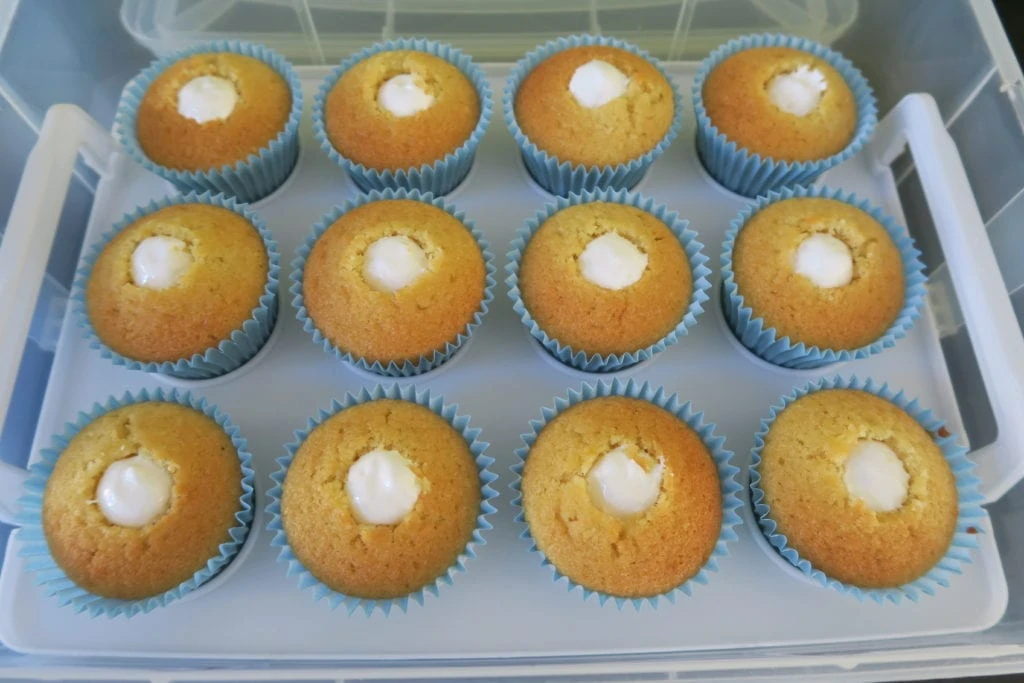
I filled each hole with marshmallow fluff, which is an amazing spread that is basically like the gooey middle of a hot marshmallow! Find it in Sainsburys, and other supermarkets in the American section. To decorate the snowball cupcakes I made a vanilla buttercream, then piped it on using a circular nozzle. I dipped the edges in dessicated coconut, then added the snowflake shapes.
How long do the cupcakes last for and can they be frozen?
The cupcakes will last for 2-3 days in an airtight container in a cool place. You can freeze both the cupcakes and the buttercream. To freeze them separately, wrap the cupcakes well in cling film or put them in an airtight container. The buttercream can be frozen in a sealed tub. To freeze them decorated, freeze the cupcakes on a plate until frozen solid, then carefully wrap in cling film. Remove the clingfilm when you take the cupcakes out of the freezer to defrost, as if they defrost with it still on it could damage the appearance of the buttercream.
Can you make the cupcakes with plain/all purpose flour?
Self raising flour, which is very commonly used in the UK where I am based, already contains a raising agent and a little salt too. Therefore if you want to swap it for plain or all purpose flour, you will need to add some baking powder and also a little salt if you like. Some people like to add salt to cake recipes and some don't, so I'll leave that up to you as it won't affect the bake. The general advice is to add 2 teaspoons baking powder (a measuring teaspoon, not the kind you stir your coffee with) per every 200g plain or all purpose flour. So for this recipe you'd need to add 1 + ½ teaspoons baking powder. Please note, I have not tested this recipe using plain or all purpose flour.
Can the cupcakes be made gluten or dairy free?
Yes! For gluten free you can replace the self raising flour with a gluten free self raising flour blend. If you only have a gluten free plain flour blend, you will need to add baking powder. The general advice is to add 2 tsp baking powder per 200g flour, so for this recipe you'd need to add 1 + ½ teaspoons baking powder. You may also like to add ¼ tsp Xanthan Gum for better texture. For a dairy free version, use a dairy free baking spread and dairy free milk for the cupcakes and the buttercream. Please check the labels of everything you use if serving to someone with an allergy or intolerance.
Do you need an electric mixer to make this recipe?
While you can absolutely make this recipe with a wooden spoon and some elbow grease, I do recommend using an electric mixer for the best results. The cupcakes will be lighter and fluffier when made with an electric mixer. The buttercream will also be smoother. You don't have to use an expensive stand mixer either, you can get electric hand whisks for as little as £10!
More tips for making the Snowball Cupcakes
- If you can't find baby blue cupcake cases, you could also use white ones.
- The snowflake cutters are really cheap, easy to use and create such a pretty effect.
- If you don't want to pipe the icing on, just spread it on with a spoon.
- You can also use a knife to cut out the holes in the cupcakes if you don't have a cupcake corer.
Troubleshooting
If you have any questions about this recipe, or if something went wrong and you need help, please use the comment form below and I will get back to you. You can also get in touch with me on my Twitter, Instagram or Facebook. I'd love to hear from you!
Recommended equipment & ingredients*
- Cupcake tin
- Mixing bowls
- Cooling rack
- Kitchen scales
- Electric hand mixer
- Piping bags
- Round piping nozzle
- Pastel blue cupcake cases
- Cupcake corer
- Light blue fondant
- Snowflake fondant cutters
- Marshmallow fluff
*I earn a small amount of money if you buy the products after clicking on the links. You will not be charged anything extra for this. Thank you for supporting The Baking Explorer!
Snowball Cupcakes
Ingredients
For the sponge
- 175 g Butter or baking spread softened, unsalted
- 175 g Caster sugar
- 3 Eggs large
- 1 tbsp Milk
- 1 tsp Vanilla extract
- 25 g Dessicated coconut
- 175 g Self raising flour
For the buttercream
- 200 g Butter softened, unsalted
- 400 g Icing sugar
- 1 ½ tsp Vanilla extract
- 2-3 tbsp Milk
For decoration & filling
- 100 g Baby blue fondant
- 75 g Fluff marshmallow spread
- 25 g Dessicated coconut
- Icing sugar to dust
Instructions
- Start by making the snowflake decorations. Dust a mat or work surface with icing sugar and roll out the fondant
- Using a cutter, cut out snowflake shapes and place them on baking or greaseproof paper to dry out and harden
- Pre-heat your oven to 160C Fan/180C/350F/Gas Mark 4, and line a muffin tin with 12 light blue cupcake cases, or another colour if you can't find light blue. White would work well
- Cream together the butter and caster sugar until smooth
- Add the eggs, vanilla and coconut, mix them in
- Add the flour and mix it in
- Divide the mixture between the cupcake cases, then bake for 20 minutes or until they are golden brown. Let them cool completely on a cooling rack
- Using a cupcake corer or a knife, make holes in the middle of each cake
- Spoon or pipe the marshmallow fluff spread into each hole
- Make the buttercream by mixing the ingredients together in a stand mixer or with an electric hand whisk until they are smooth, then put it into a piping bag fitted with a circular nozzle and pipe it onto the cupcakes
- Dip the sides of the buttercream in the dessicated coconut, then add the snowflake shape in the centre
Notes
- Make sure all your ingredients (particularly the butter and eggs) are at room temperature before you start baking.
- I used a baking spread for the cupcakes and unsalted butter for the buttercream.
- Although I provide cup measurements, I highly recommend weighing your ingredients out using digital kitchen scales*. It is the most accurate way to measure ingredients and will ensure the best results. Digital scales are very low cost and can be purchased for around £12 ($16.50) .
- For teaspoon (tsp) and tablespoon (tbsp) measurements, please use measuring spoons* and not the type of spoons you eat with. Again this will ensure accuracy and provide the best results.
Robin
I'd love to make these! Do you ever make your own fondant out of marshmallows or do you always buy it?
thebakingexplorer
Hi Robin, I've never made my own fondant, I always buy it as it's so convenient! I hope you make and enjoy my cupcakes 🙂
jenny paulin
ooooh Kat your are a clever baker. Not only do these look fabulous and very festive, I love that you filled each cupcake with marshmallow! No wonder they were so yummy. These would also be great served at a Frozen themed party.
thank you for linking with #Bakeoftheweek x
thebakingexplorer
Thanks Jenny! I agree they would be fab at a Frozen party!
Corina Blum
Oh these look so pretty and really tasty too! I didn't even realise till now that you could get a cupcake corer but I'm also now thinking how useful that would be. I might even get one for myself as a little stocking filler type Christmas present!
thebakingexplorer
It's so fab and really handy! Very cheap as well!
Kirsty Hijacked By Twins
Ooooh Kat these look so pretty, my little lady loves Frozen so I know she would love these cupcakes! x #BakeoftheWeek
thebakingexplorer
Thanks Kirsty!
Eb Gargano | Easy Peasy Foodie
So pretty! I love them...like Kirsty, I have a Frozen loving daughter, who would think these are wonderful! Thanks for linking them up to #CookBlogShare. Eb x
thebakingexplorer
Thank you! I'm glad the Frozen fans are loving these cupcakes!
Angela / Only Crumbs Remain
These are brilliant Kat - so easy and eyecatching too. I've never tried marshmallow fluff before - for some reason I've just always assumed that it wasn't vegetarian friendly (like regular marshmallows) but now I know better so will definitely be popping some into our shopping trolly! Thanks so much for linking up with #BakingCrumbs.
Angela x
thebakingexplorer
I think because it's not set, it's more 'gooey', they don't use the gelatine like in regular marshmallows. It's great on waffles and pancakes too!
Natalie
What could I use in replace of coconut?
These are amazing x
thebakingexplorer
Thank you! You could use white sugar strand sprinkles or white nonpareils for the decoration, and you can just leave it out of the sponge if you don't like it or have an allergy
Midge @ Peachicks' Bakery
LOVE these! So cute! Peachicks approve too - they want to make some for christmas!
thebakingexplorer
Oh I'm so glad! I hope they enjoy them!
Lesley
Omg these are absolutely gorgeous, they came out perfect. Thank you so much for this beautiful cupcake recipe x
thebakingexplorer
Thank you Lesley, you're very welcome!