
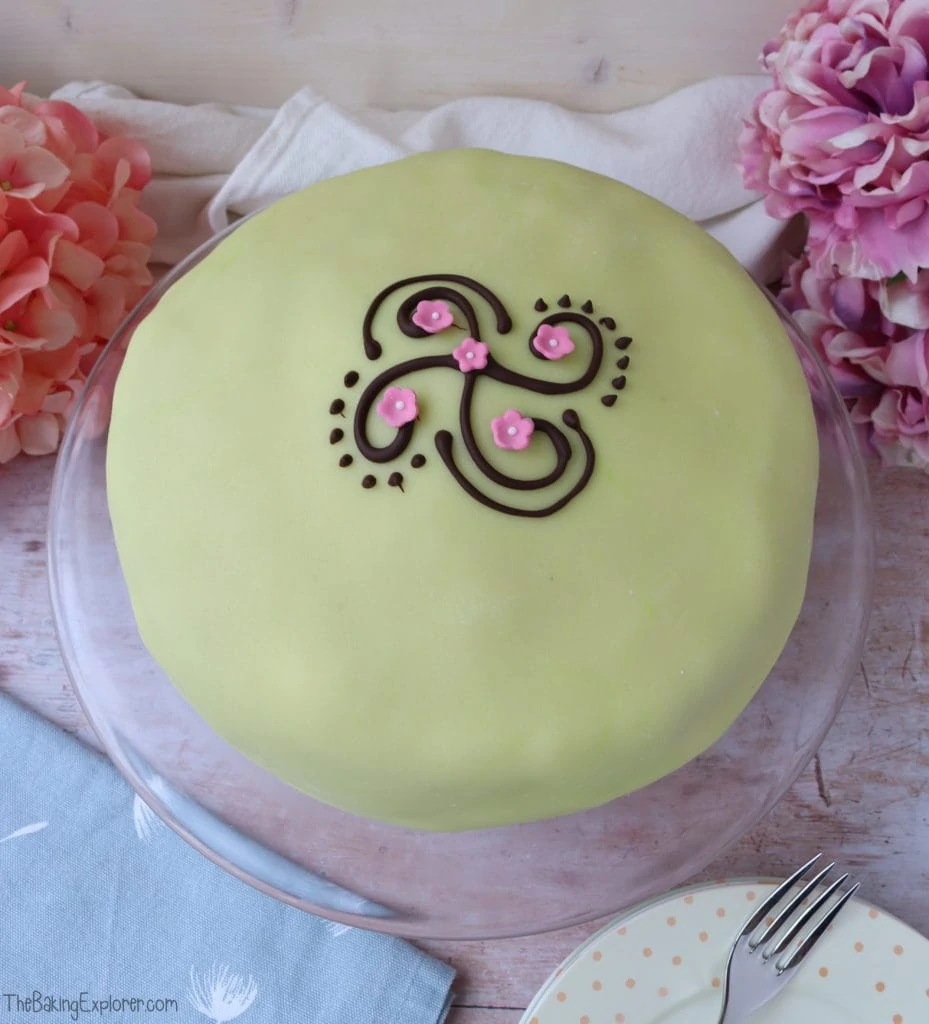
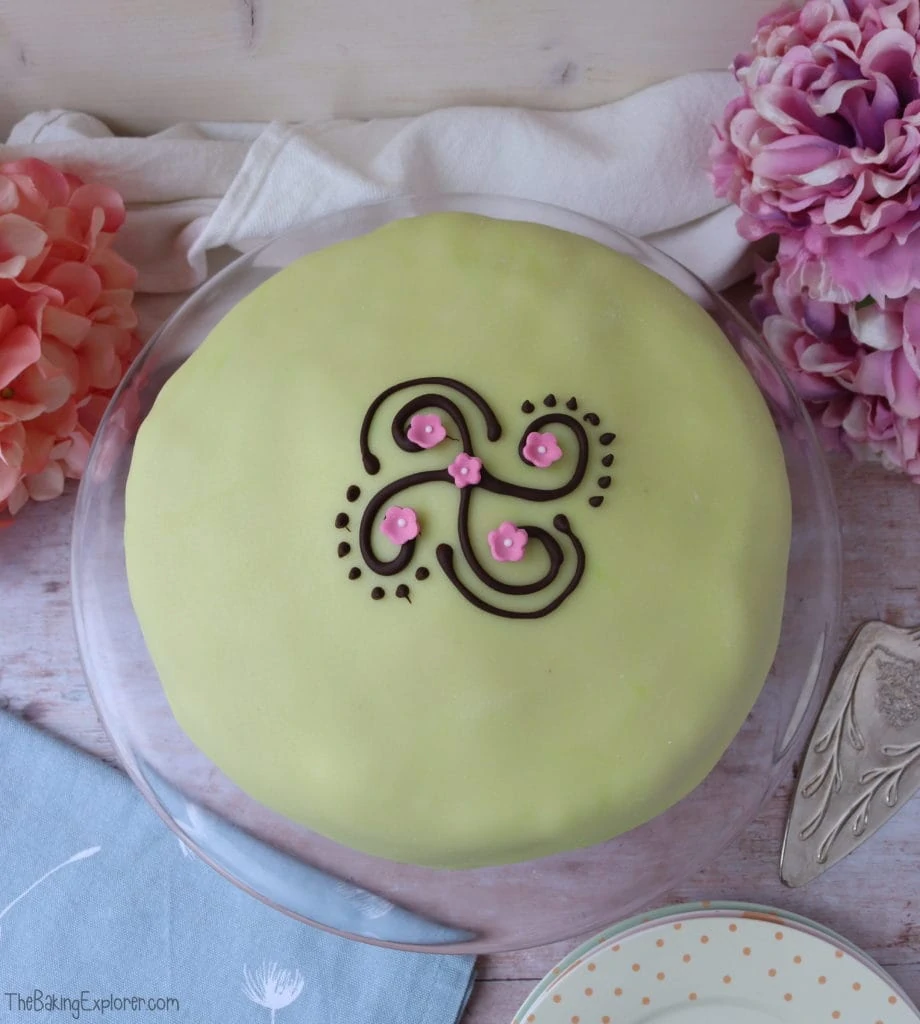
If you've not heard of a Swedish Princess Cake before then you are in for a treat! It's made up of layers of light genoise sponge, filled with creme pattiserie, jam and whipped cream. Then it's covered with green coloured marzipan and decorated with dark chocolate and sugar flowers. You may remember it being a technical challenge on The Great British Bake Off, and it is quite a complex bake with several different stages. I spread it out over a couple of days by making the creme pattiserie and the genoise sponge the day before, then I assemble and decorate it before serving the next day. If you are up for the challenge I can promise you it's worth it, as it's absolutely yummy!!
For the full recipe with measurements, head to the recipe card at the end of this post.
How to make Swedish Princess Cake
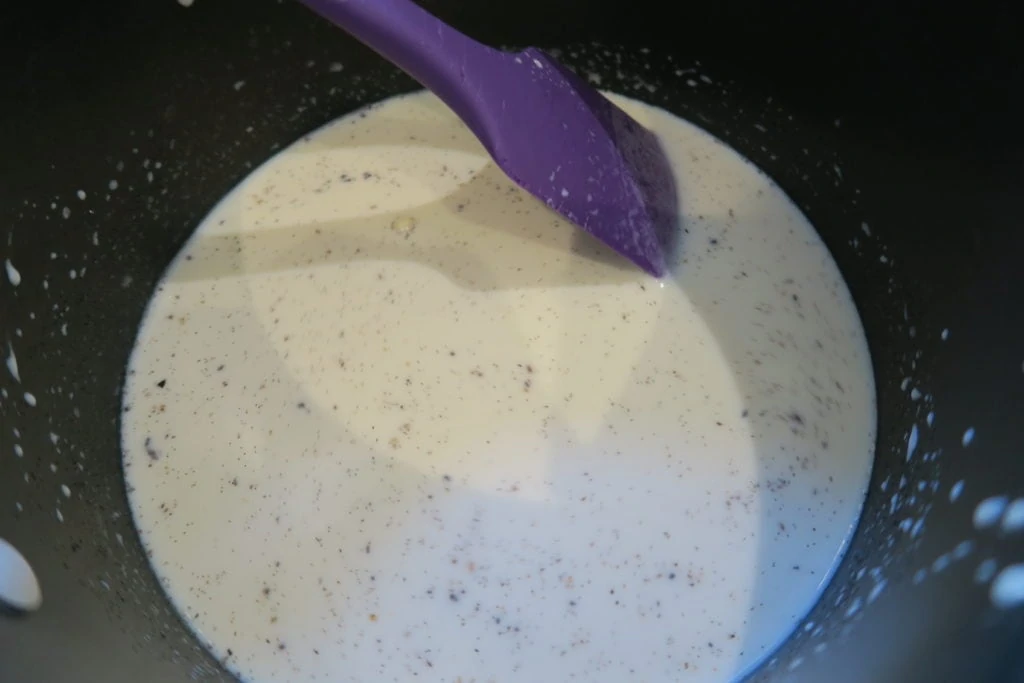
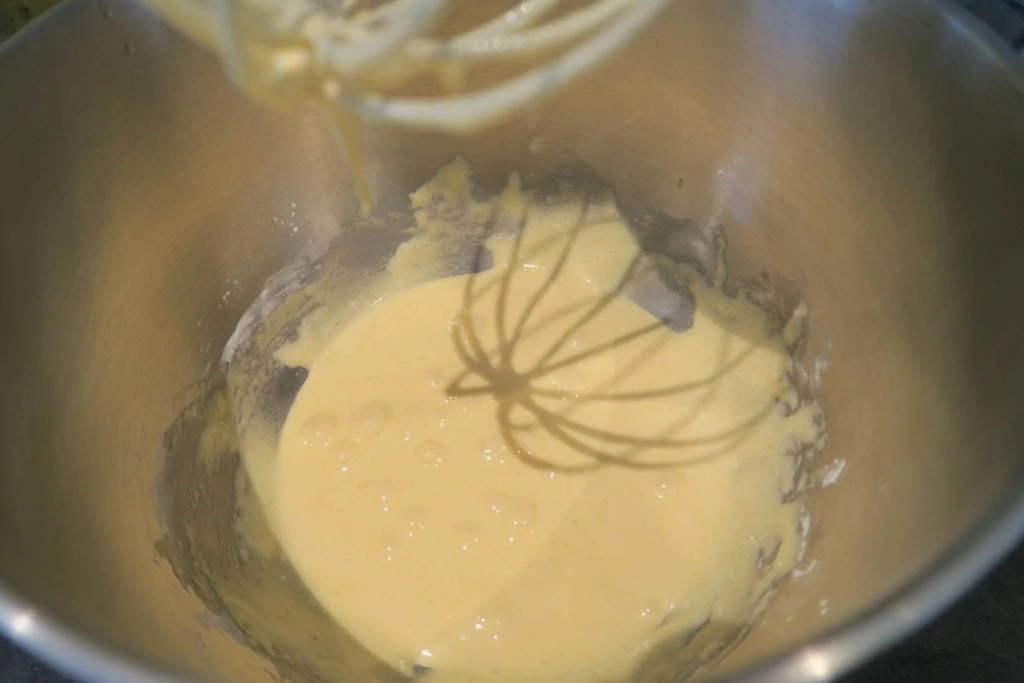
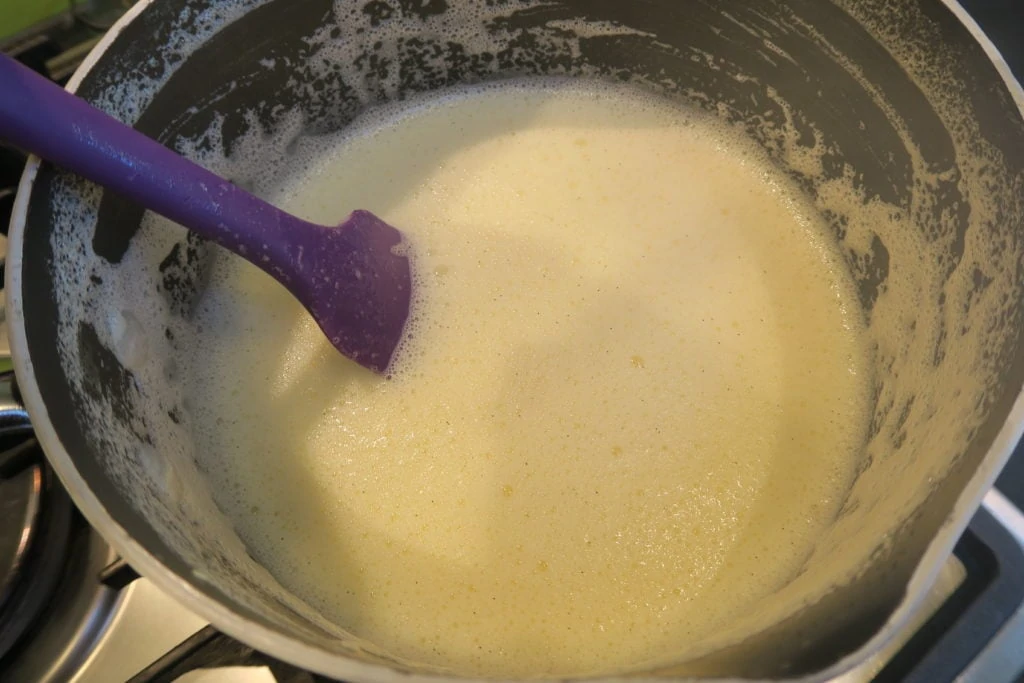
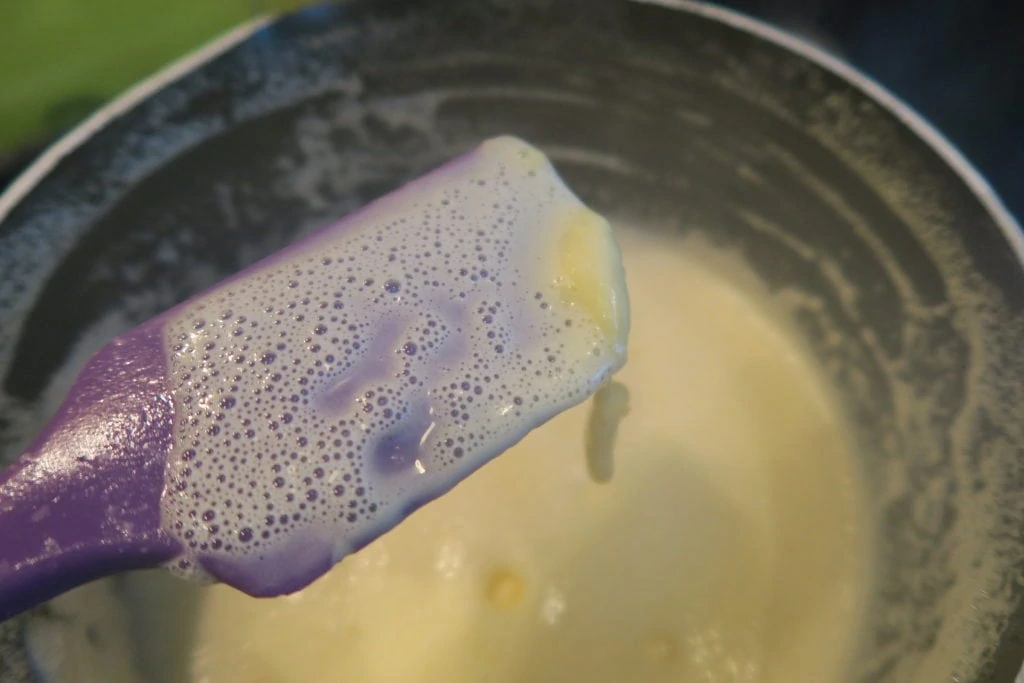
Start by making the creme patisserie as it needs time to cool down. In a pan on a low heat, warm the milk with the seeds from a vanilla pod until it starts steaming. In a food mixer, whisk up the egg yolks and caster sugar until they are pale and thick. Add cornflour to the egg mixture and let it combine, then turn the mixer back on and pour the warm milk in slowly. Then pour the egg and milk mixture back into the pan and heat it up whilst continuously stirring. There is a moment when it suddenly starts to thicken and at that point, start whisking to keep it smooth and stop any lumps.
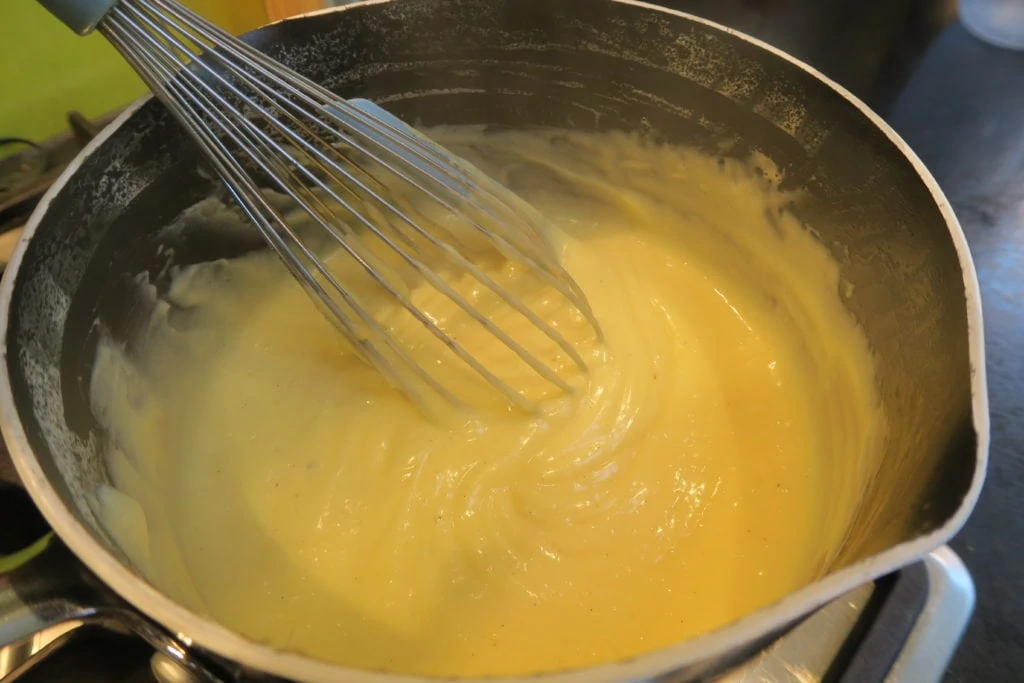

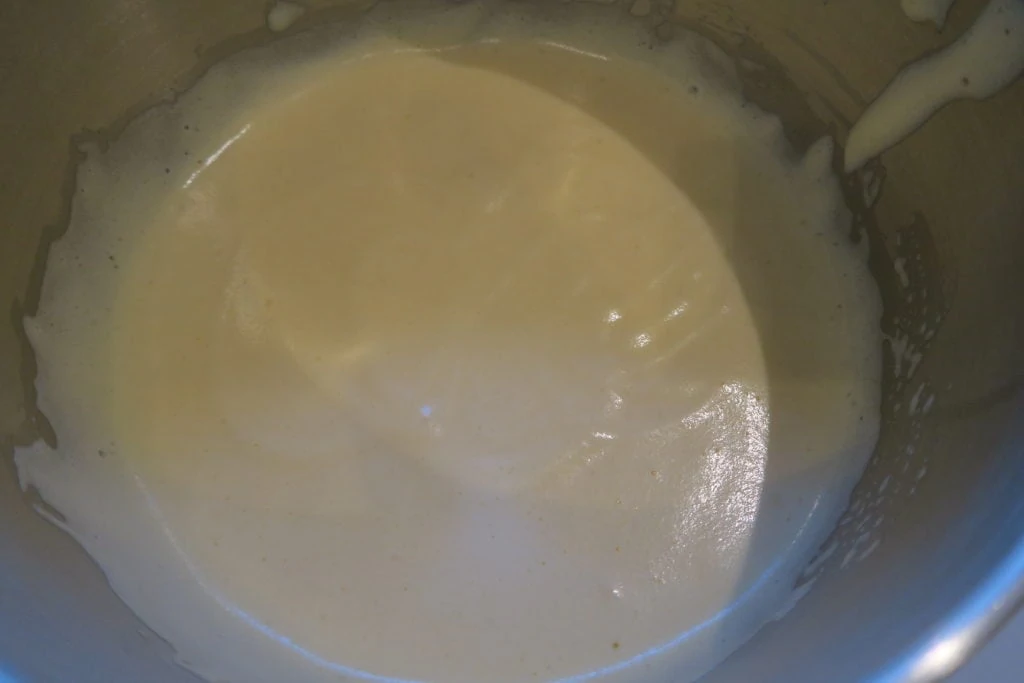
Once the whole mixture is thick and smooth, take it off the heat and put it in a bowl. Cover it with cling film, making sure the cling film is touching the top of the creme pattiserie. Then leave it in the fridge to cool. Next make the genoise sponge. In a food mixer, whisk up eggs with caster sugar until pale and super thick. When you lift the whisk out the mixture that falls off should stay on the surface for 3 seconds before sinking in - this is called the ribbon stage.
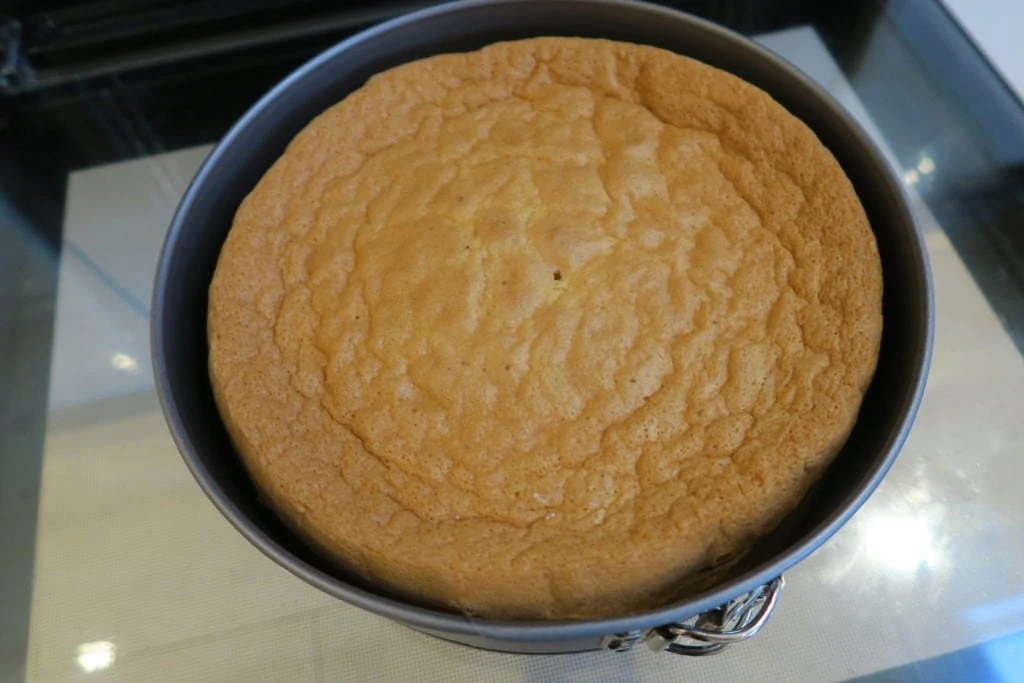
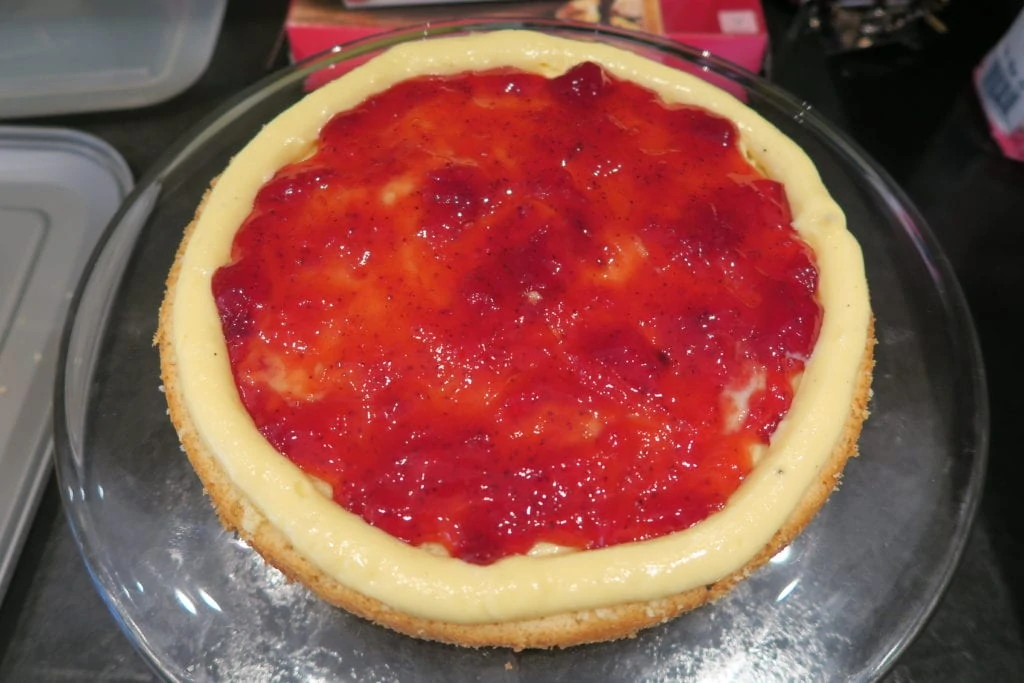

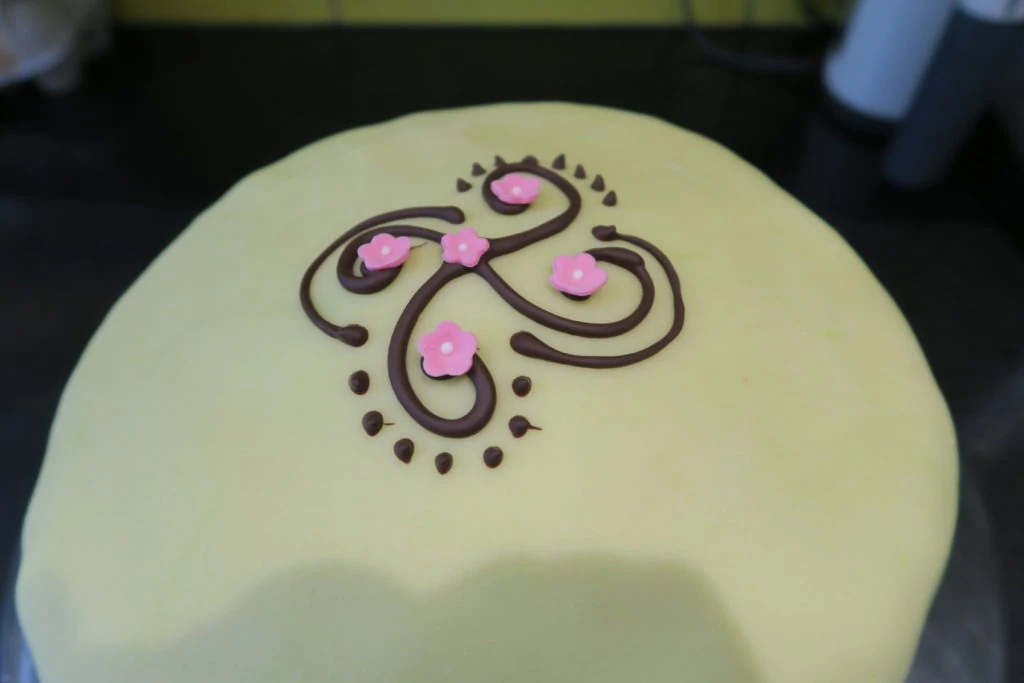
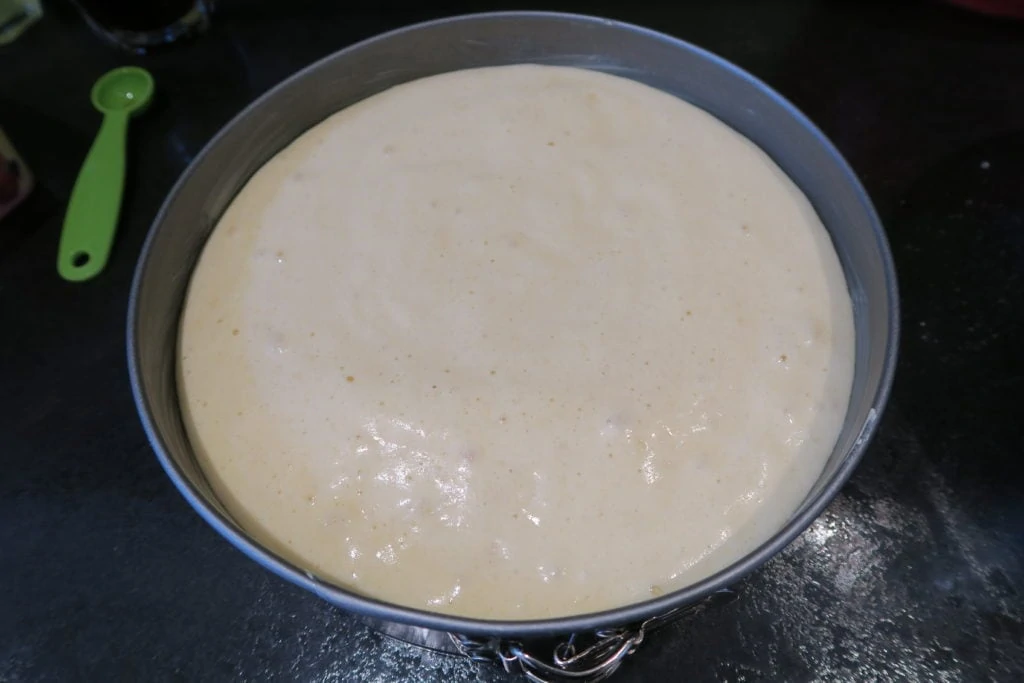
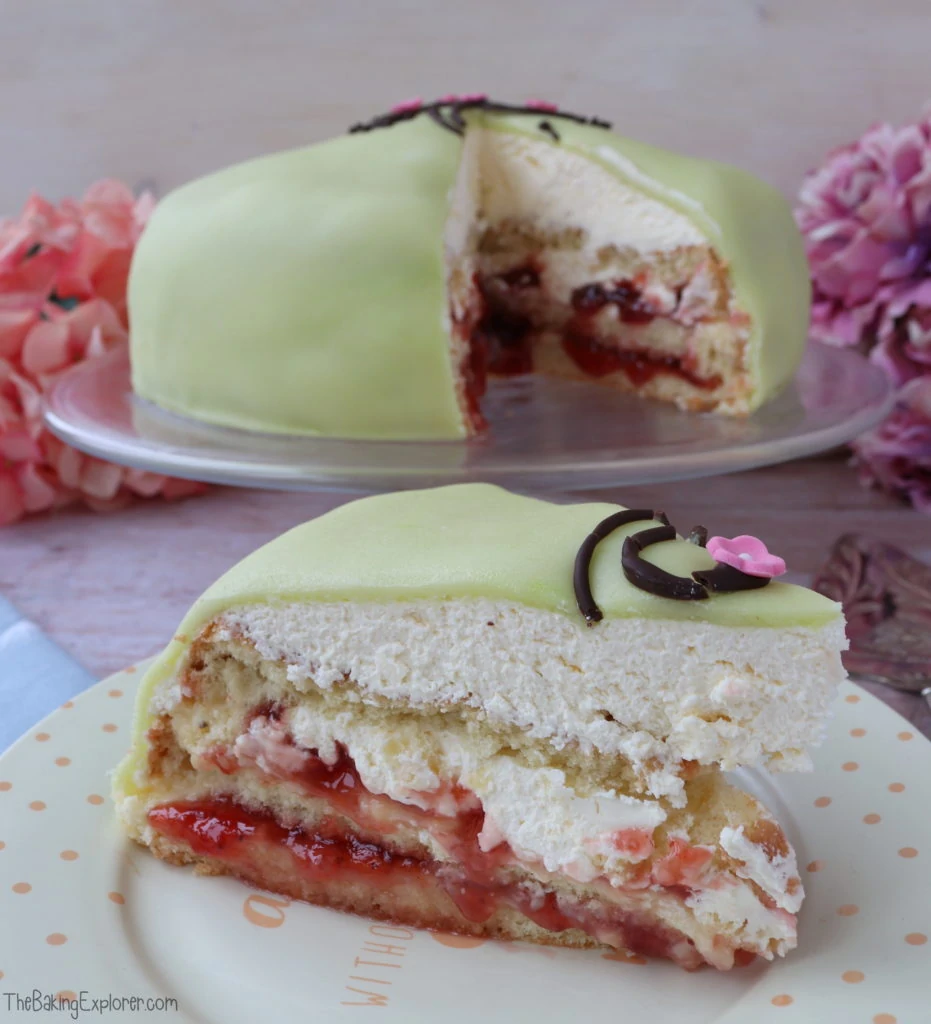
Fold plain flour into the egg mixture very gently so as little volume is lost as possible. Then put it in the tin and bake the sponge for 25 minutes. Once it is fully cool, carefully cut the sponge into three pieces and put the first piece on a cake stand. Spread a thin layer of the creme patisserie onto it, then pipe a border of it around the edge and fill the middle with jam. Put the second sponge on and spread over more creme patisserie and another border around the edge. (Traditionally, there is only meant to be one layer of jam, but I love jam so I added it to both layers!) This time the jam got some whipped cream on top of it too. Place the final sponge layer on, then spread double cream over the whole cake, making a dome shape on top. Then knead green food colouring into natural marzipan and roll it out, then covered the whole cake with it as neatly as you can, and trim the edges. To finish the Swedish Princess Cake, melt some dark chocolate and pipe a design on top, and add some pink sugar flowers too.
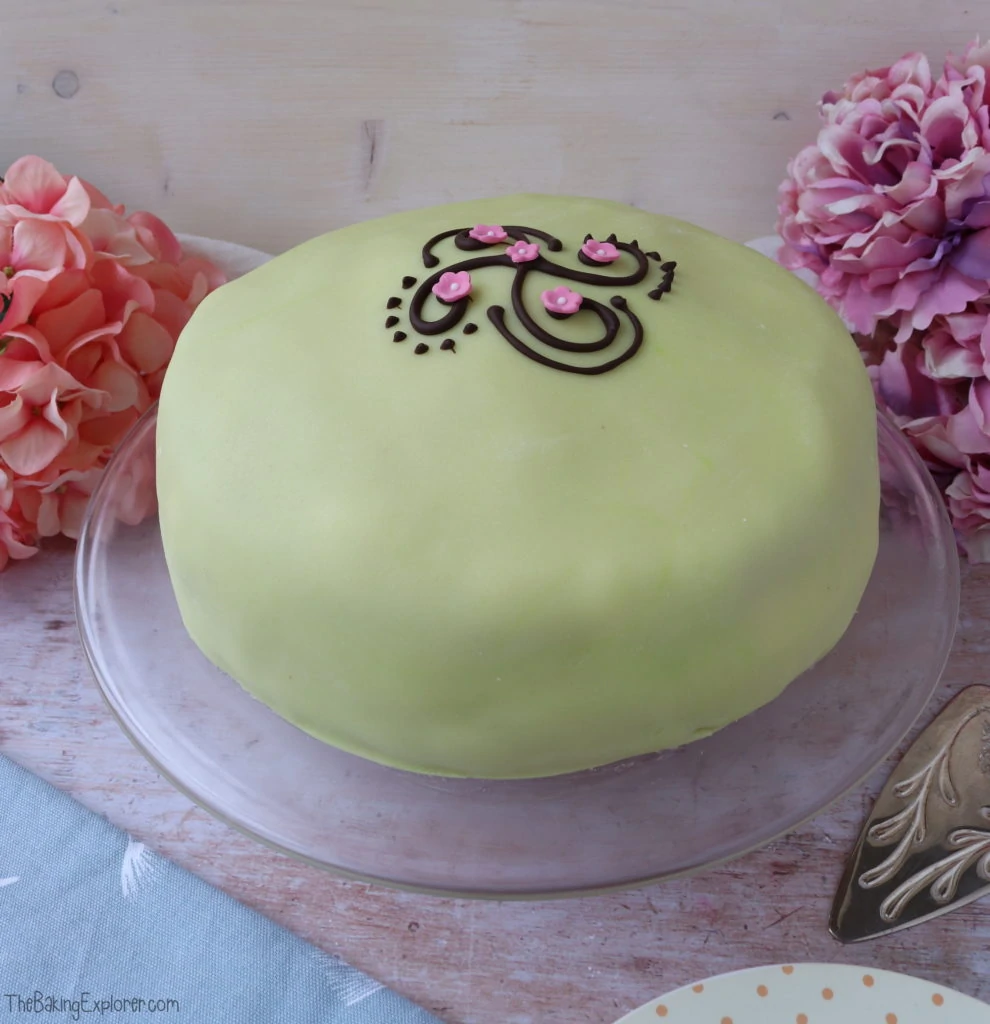
When the Swedish Princess Cake was cut the layers were not very well defined as I cut into it immediately! If you let it set in the fridge for an hour the layers will look much better when you cut it. It's a very indulgent cake and there is obviously a ton of cream, so I think the jam is a nice fruity way to offset the sweetness. And even if you are not a huge fan of marzipan, it's not overpowering.
Tips for making the Swedish Princess Cake:
- You need to use natural marzipan to cover the cake (as opposed to golden marzipan) because this will take the green colour better. Or if you don't fancy using marzipan, you could cover it with green fondant too.
- You can make your own pink flower decoration for the top if you like with pink fondant.
- If you can't get hold of a vanilla pod for the creme pattiserie, you can stir vanilla extract or vanilla bean paste in at the end.
- If you let the cake set for an hour or so in the fridge before slicing, the layers will be better defined after cutting - as you can see from my photo I didn't wait!
Troubleshooting
If you have any questions about this recipe, or if something went wrong and you need help, please use the comment form below and I will get back to you. You can also get in touch with me on my Twitter, Instagram or Facebook. I'd love to hear from you!
Recommended equipment & ingredients*
- 23cm Springform tin
- Mixing bowls
- Cooling rack
- Kitchen scales
- Electric hand mixer
- Stand mixer
- Cake tin liners
- Green food colouring
- Piping bags
- Dark chocolate
- Natural marzipan
- Pink sugar flowers
*I earn a small amount of money if you buy the products after clicking on the links. You will not be charged anything extra for this. Thank you for supporting The Baking Explorer!
Swedish Princess Cake
Ingredients
For the creme patisserie
- 500 ml Whole milk
- 1 Vanilla pod
- 45 g Cornflour
- 6 Egg yolks
- 140 g Caster sugar
For the genoise sponge
- 150 g Caster sugar
- 5 Eggs large
- 1 tsp Vanilla extract
- 130 g Plain flour
For the filling
- 200 g Raspberry jam (or strawberry is good too)
For covering and decorating
- 700 ml Double cream
- 2 tbsp Icing sugar
- 1 tsp Vanilla extract
- 450 g Natural Marzipan
- Green food colouring
- 50 g Dark chocolate
- Pink sugar flower(s)
Instructions
- To make the creme patisserie heat the whole milk with the seeds from the vanilla pod until it steams. Then take it off the heat
- In a food mixer or with an electric hand whisk, whisk up the egg yolks with the caster sugar until pale and thick. Add the cornflour and whisk in, then turn the mixer back on and pour the warm milk in slowly
- Pour the mixture back into the pan and heat it up whilst stirring. When it starts to thicken, whisk it to keep it smooth and stop any lumps forming
- Put it in a bowl, and covered it with cling film. Make sure the cling film is touching the creme patisserie so that a skin doesn't form on it. Put it in the fridge to cool completely
- Pre-heat your oven to 160C Fan/180C/350F/Gas Mark 4. Line and grease a 23cm spring form cake tin
- In a food mixer whisk up the eggs with the caster sugar until pale and super thick. This takes around 8 minutes. When you lift the whisk out the mixture that falls off should stay on the surface for 3 seconds before sinking in - this is called the ribbon stage
- Fold the plain flour and vanilla extract into the egg mixture very gently so as little air is lost as possible. Then put it in the tin
- Bake the sponge for 25 minutes. Leave to cool completely
- Cut the sponge into three layers and put the first piece onto a cake stand. Spread a thin layer of the creme patisserie onto it, then pipe a border of the creme patisserie around the edge
- Add jam in the middle and spread evenly
- Put the second sponge on and spread over more creme patisserie, then pipe a border of the creme patisserie around the edge
- Add jam in the middle and spread evenly
- Whip up the double cream with the vanilla and icing sugar, and add some of it over the top of the jam
- Place the final sponge layer on, then spread the rest of the whipped cream over the whole cake, making a dome shape on top
- Knead green food colouring into the marzipan and roll it out, use icing sugar to stop it from sticking to the work surface. Cover the entire cake with it, smooth it down and trim the edges
- Melt the dark chocolate and pipe a design on top, and add the pink sugar flowers
- Store leftovers in the fridge and eat within 2 days
Nutrition
If you like this, check out more of my Cake recipes!
Recipe adapted from The Telegraph.
Charlene F
You were very brave to recreate this dish. It looks lovely 🙂 x
Kat BakingExplorer
Thank you. I'm really pleased with how it turned out!
Kate Glutenfreealchemist
Ha! How clever are you? And from the front it looks perfect..... But what's that I can hear it asking? 'Does my bum look big in this?'
Kat BakingExplorer
Haha it's much too big! Burst right out of it's marzipan coating!
Jen Price
Your Princess cake looks great! I'm not much of a decorator either, much prefer to focus on the flavour 🙂
Kat BakingExplorer
Thank you! This cake is all about being pretty, which isn't my forte but pleased I got the techniques right 🙂
Rachel
Looks stunning! Wow! 🙂
Kat BakingExplorer
Thank you!
Vohn's Vittles
Looks fab Kat & nice to know that even Swedish princesses have ugly bums! 😉
Kat BakingExplorer
Thank you! Haha yes it certainly is 😉
Ketutar
I think you succeeded well with the prinsesstårta 🙂
I would only critique that the dome isn't round, and the marzipan... well... you know your weaknesses, and the looks don't harm the taste 🙂
I personally dislike this cake, because of the excess cream! Too much cream for me, I like the cake in cakes 😀
I can also tell you that the marzipan cover is difficult for the Swedish home bakers as well, even though we are very familiar with it here 🙂
Also, try to make the marzipan. It's surprisingly easy, a lot cheaper and tastes better than store bought. 🙂 But maybe not for this challenge 😀
Anyway, well done!