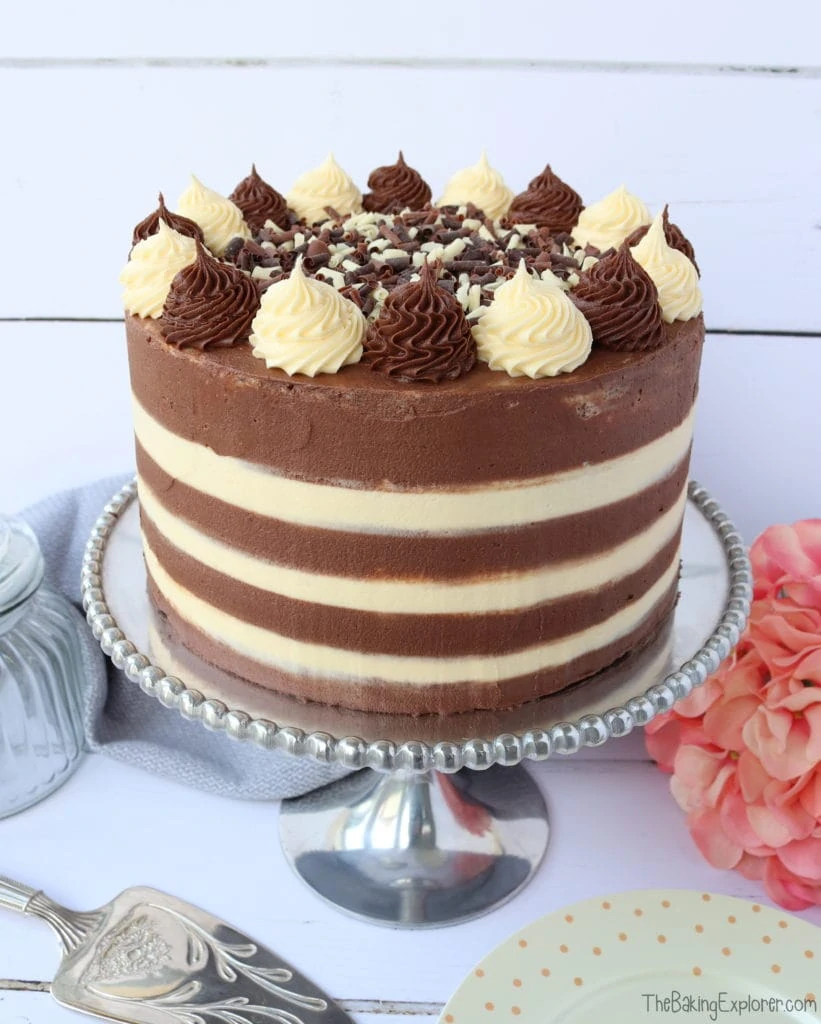
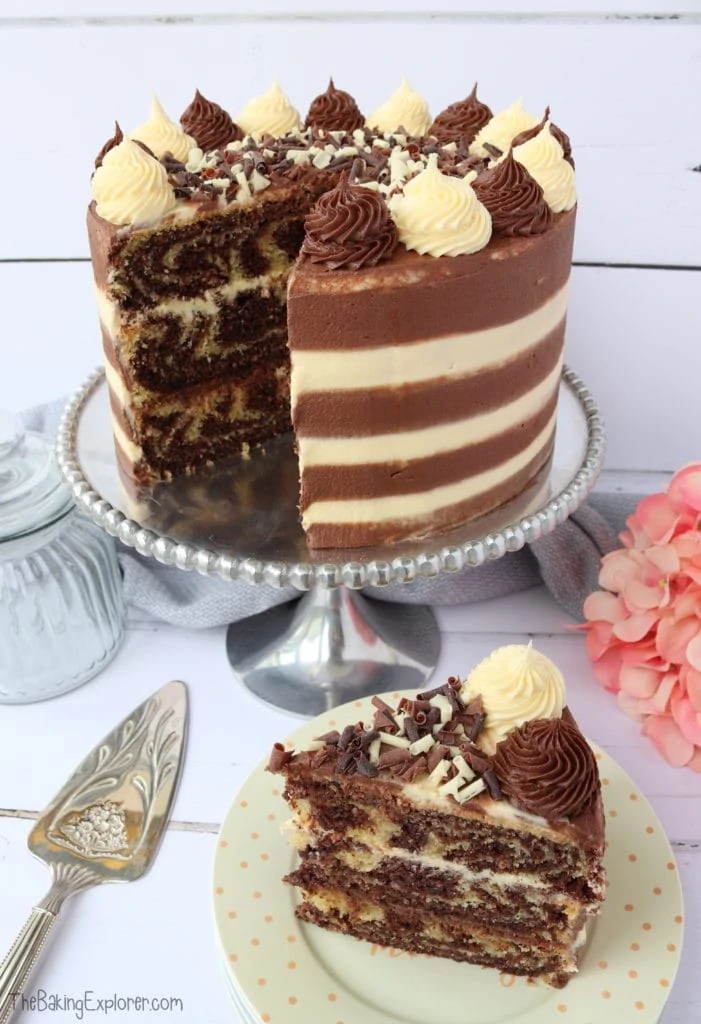
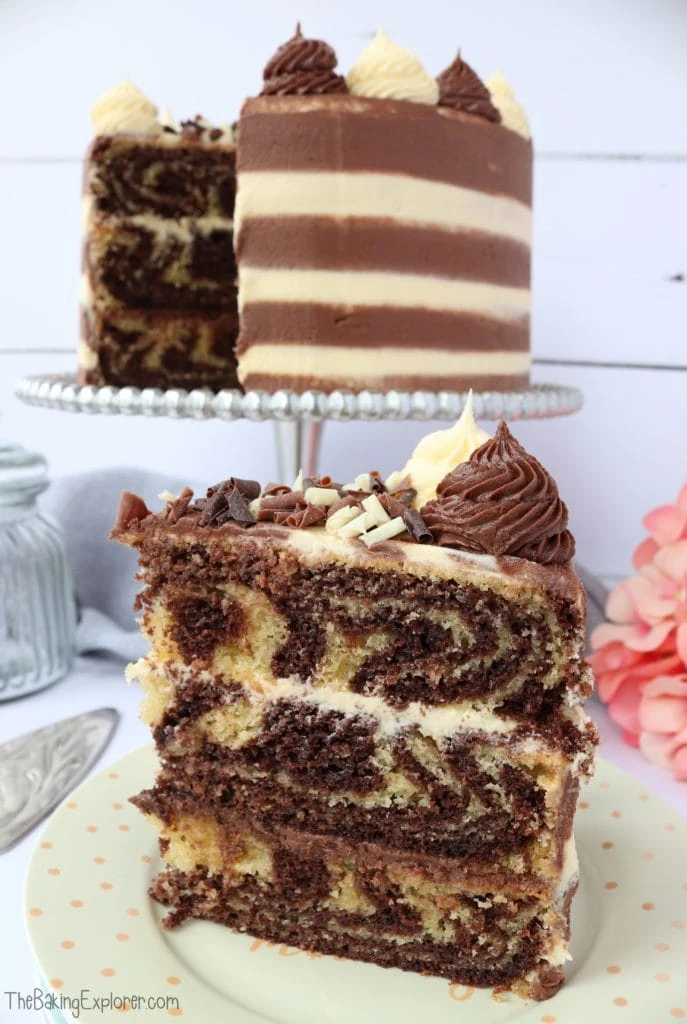
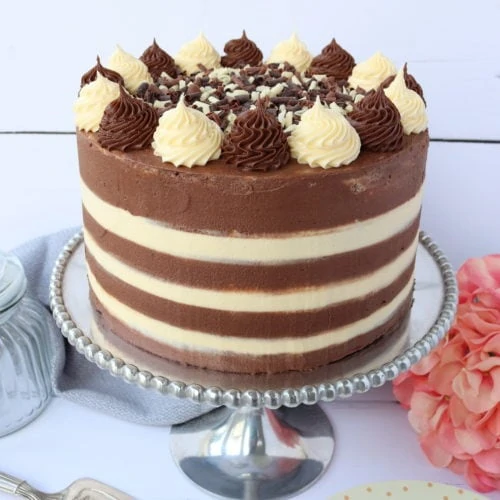
Marble cake is usually a fairly simple loaf cake made with chocolate and vanilla sponge that has been swirled together. I wanted to elevate the cake and make it into a special celebration cake. This could easily be a birthday or celebration cake as it's such a showstopper! This Ultimate Marble Cake is made up of three layers, all of which are marbled chocolate and vanilla sponges. The striped buttercream is simpler than you might think to do, providing you have the right tools, and I think the effect is so striking!
Ingredient Tips & Equipment Information
- Make sure all your ingredients (particularly the butter and eggs) are at room temperature before you start baking.
- I used a baking spread for the cake and unsalted butter for the buttercream.
- You can use any cocoa powder for this cake, of course the better quality it is, the better flavour it will have. Also do make sure you are using cocoa powder and not a hot chocolate powder.
- Although I provide cup measurements, I highly recommend weighing your ingredients out using digital kitchen scales*. It is the most accurate way to measure ingredients and will ensure the best results. Digital scales are very low cost and can be purchased for around £12 ($16.50) .
- For teaspoon (tsp) and tablespoon (tbsp) measurements, please use measuring spoons* and not the type of spoons you eat with. Again this will ensure accuracy and provide the best results.
For the full recipe with measurements, head to the recipe card at the end of this post.
How to make Ultimate Marble Cake
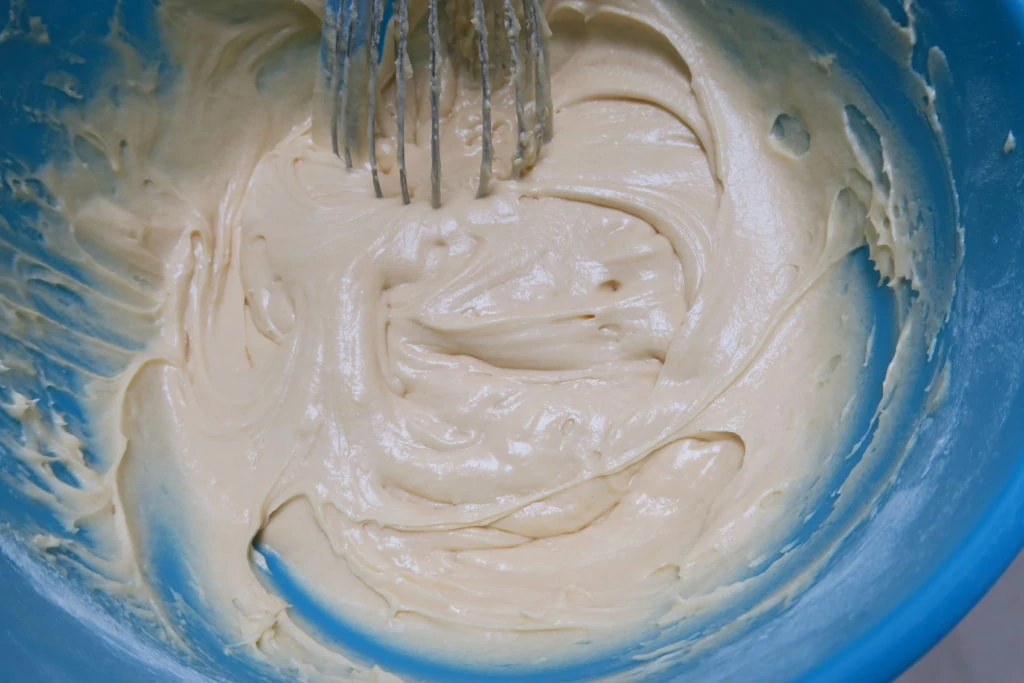
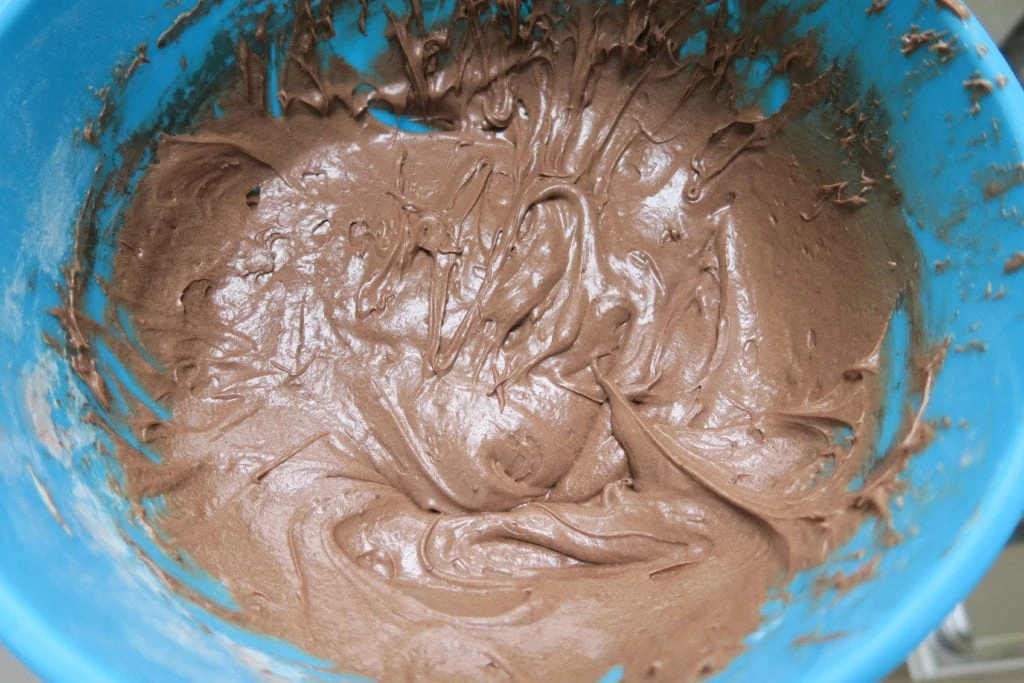
Make the vanilla sponge and chocolate sponge in separate bowls.
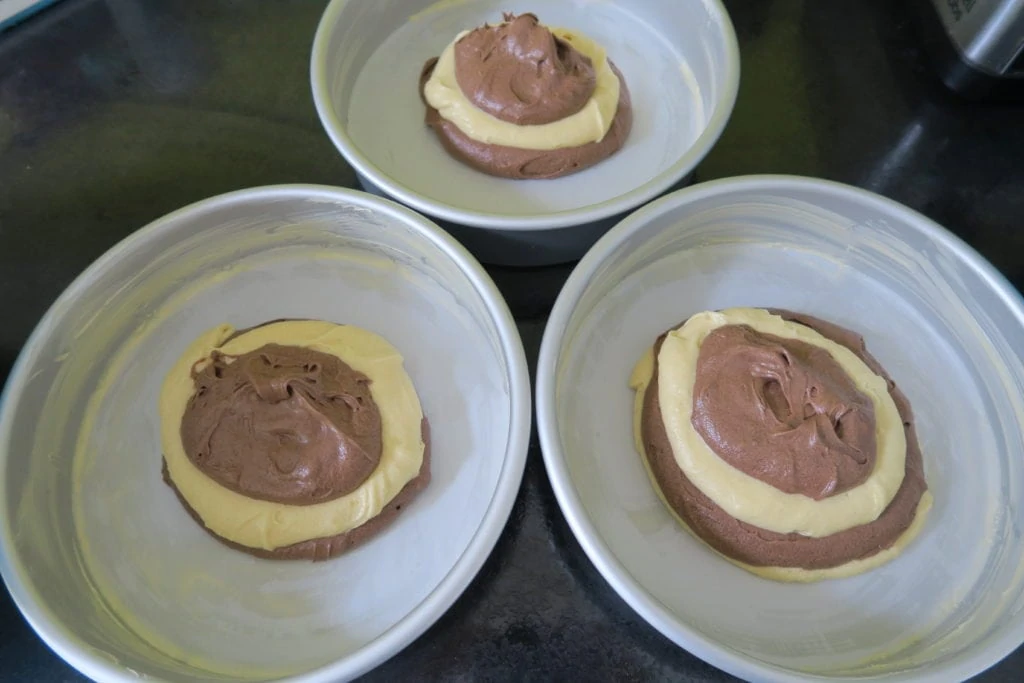
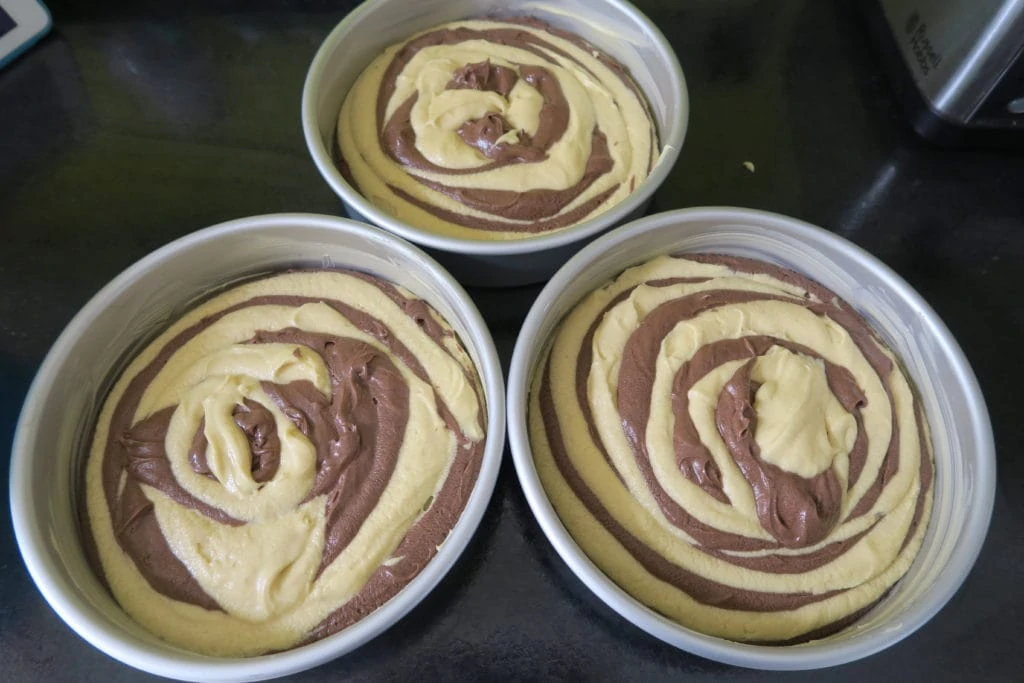
Add the sponges in alternate spoonfuls to three greased and lined cake tins. Continue until all of the batter is used up. The batter will spread out and fill the tin as you add it, but you can give the tins a little shake to encourage it.
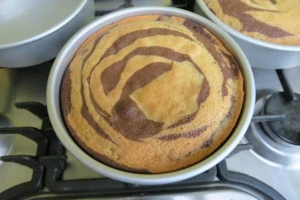
Bake them for 30 minutes or until a skewer inserted in the centre comes out clean.
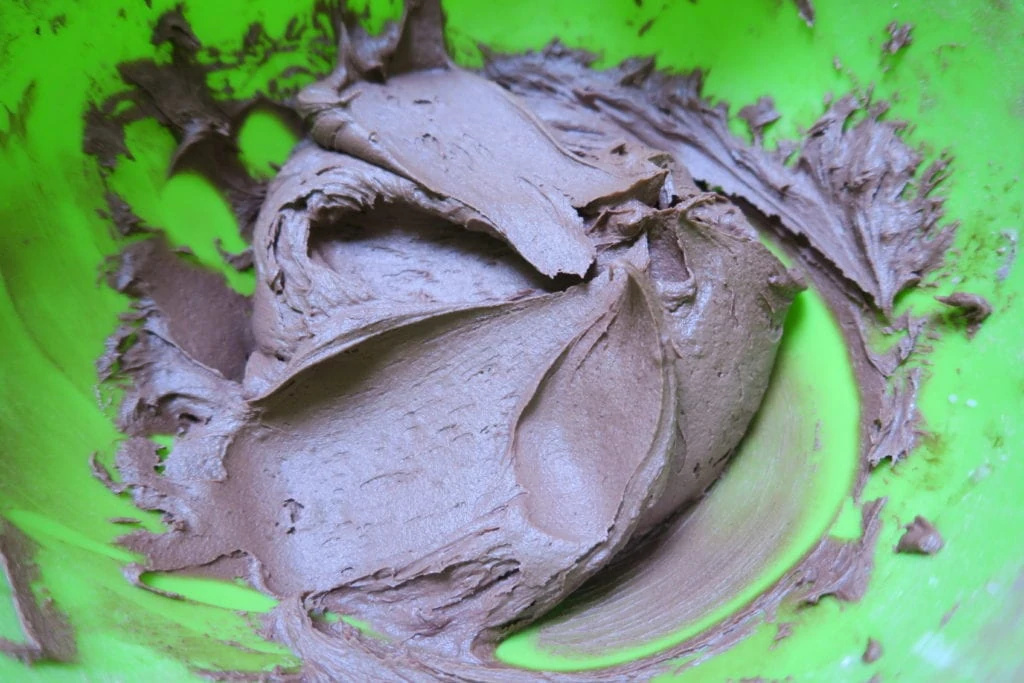
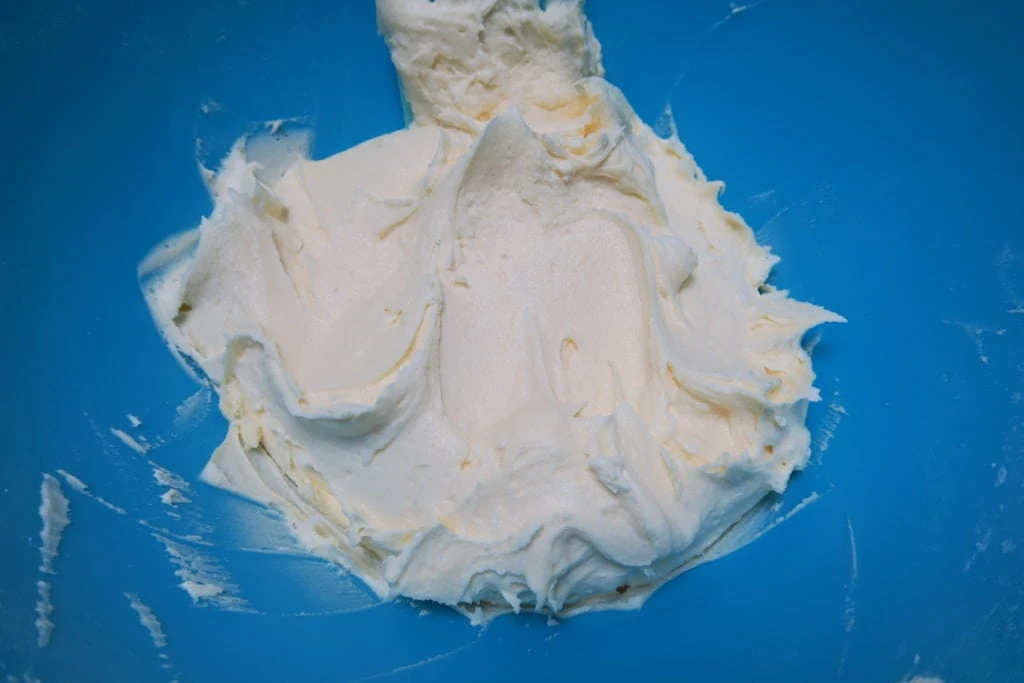
Make the chocolate buttercream and vanilla buttercream in separate bowls.
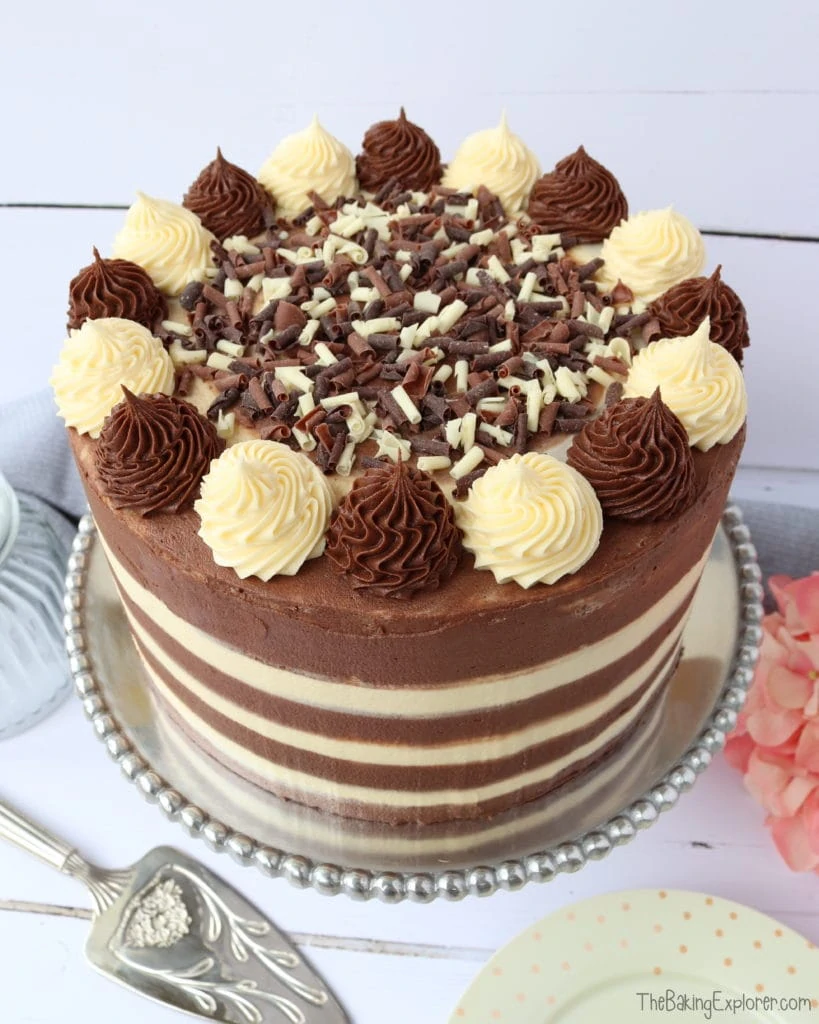
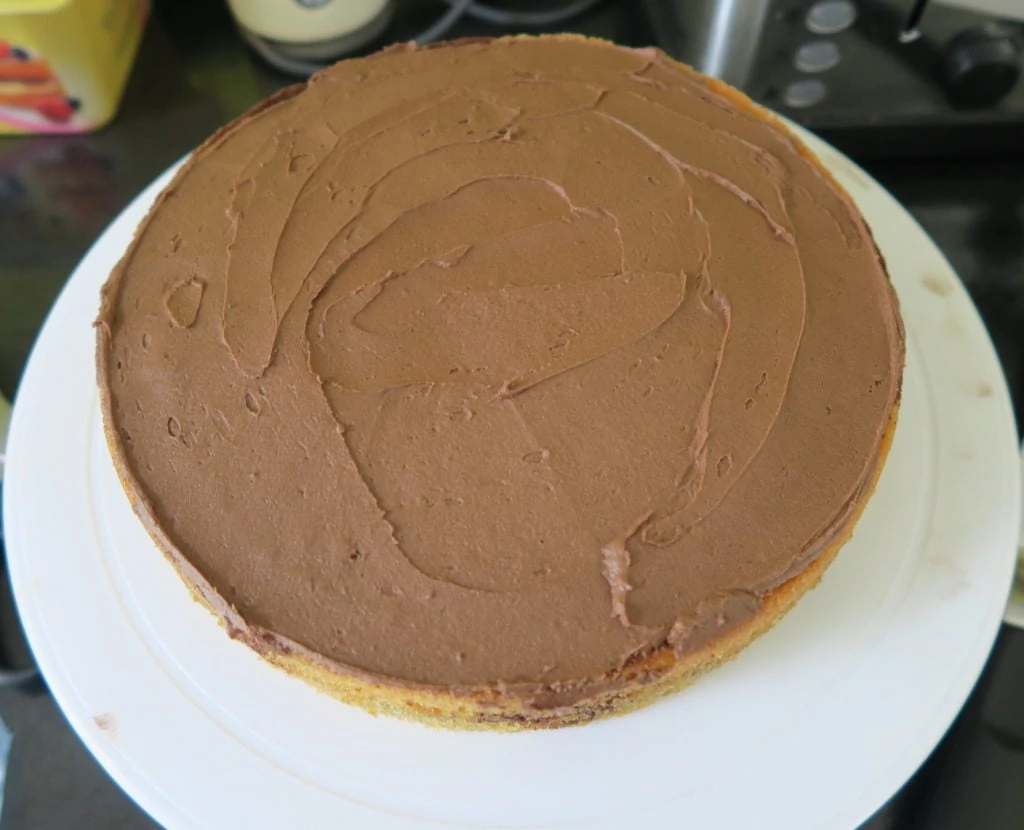
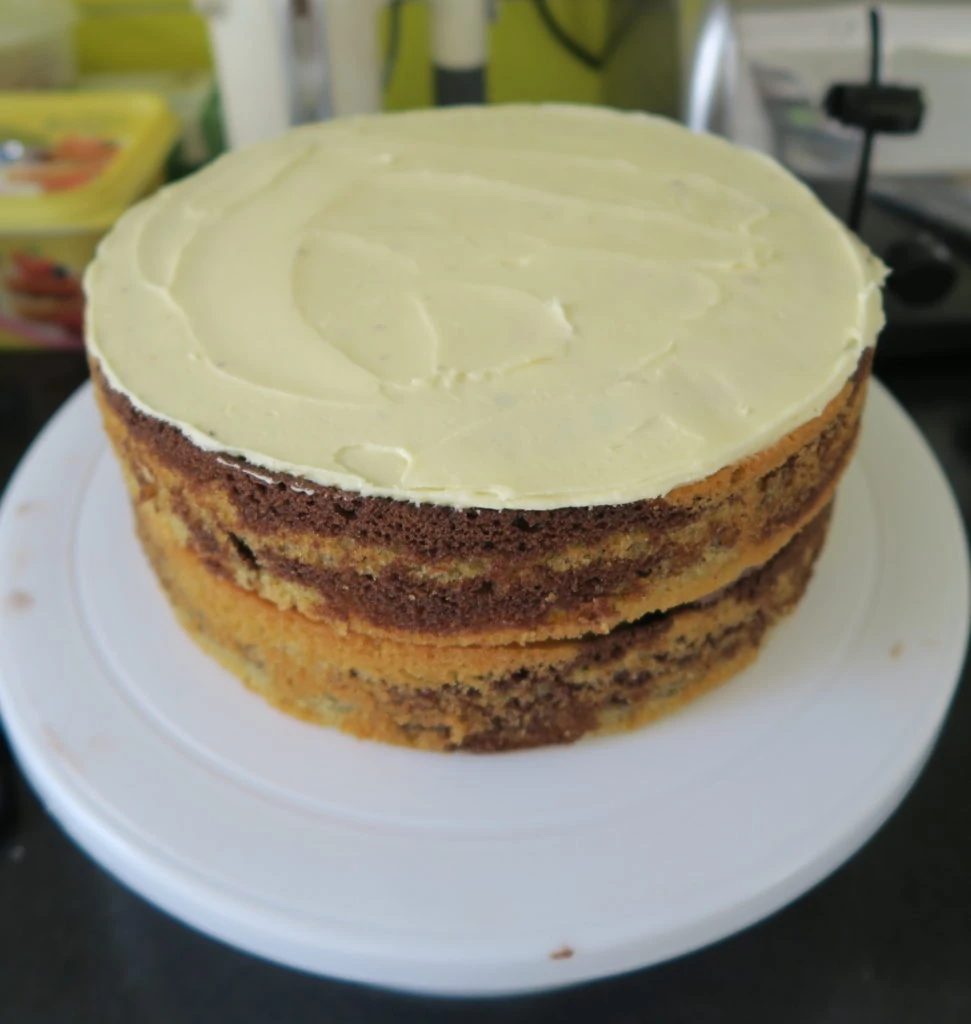
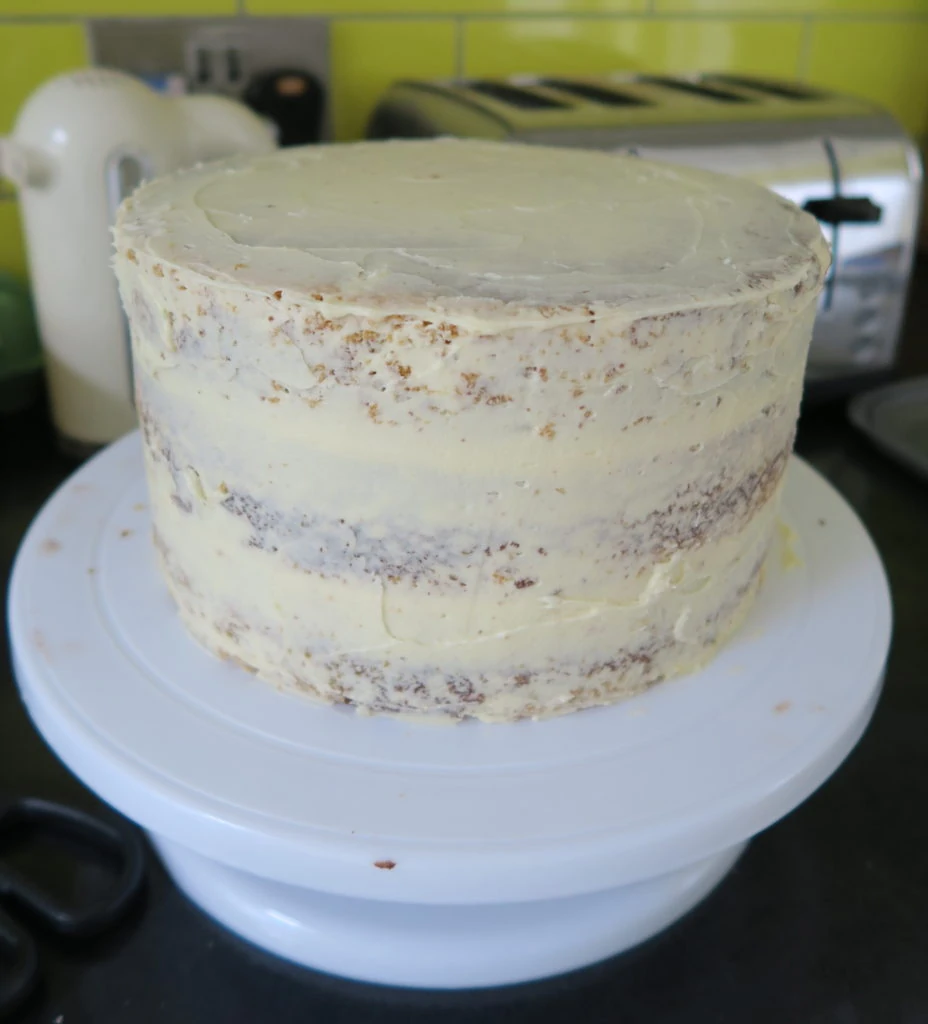
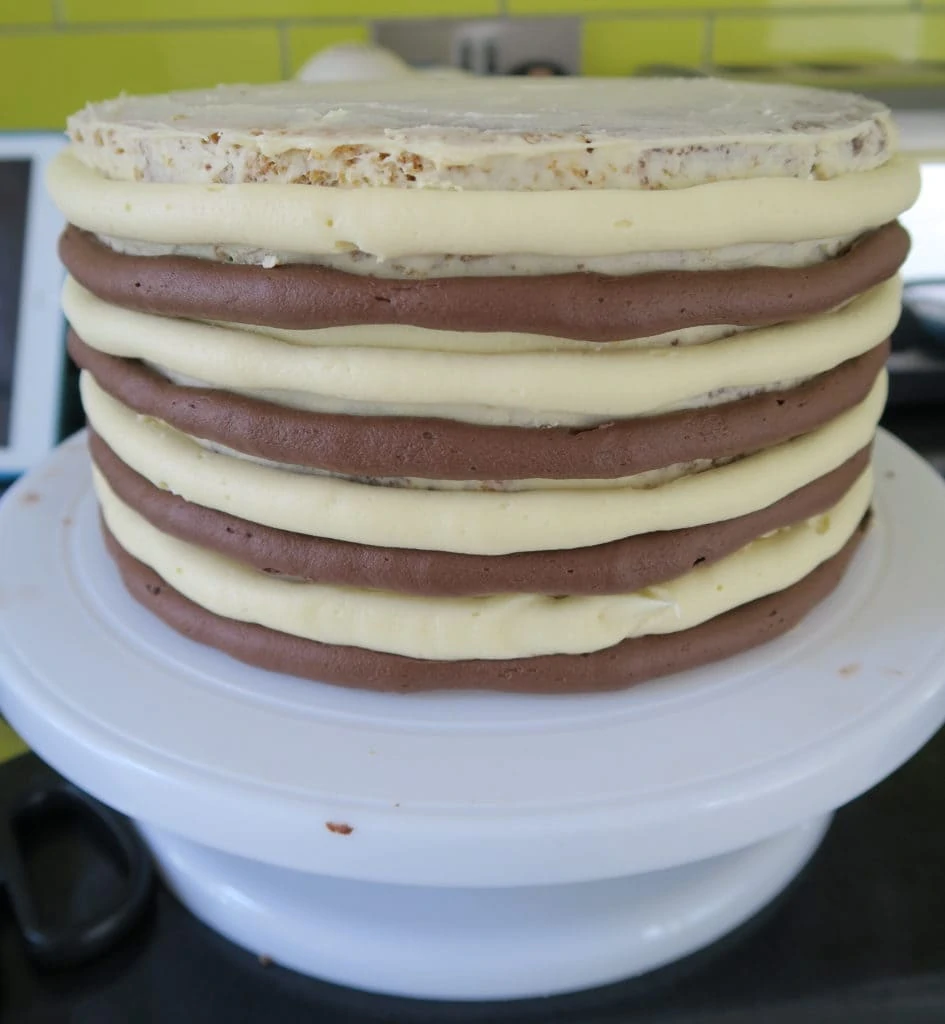
Level off the cakes if they have domed at all, then start to stack them. Put chocolate buttercream on the first sponge and vanilla buttercream on the second sponge. Cover the whole cake in a thin layer of vanilla buttercream as the crumb coat, and put it in the fridge for 30 minutes. To create the striped effect, pipe lines of alternating chocolate and vanilla buttercream all around the cake. Use a buttercream scraper to smooth the sides, making sure to wipe of excess buttercream from the scraper as you go. To finish, add buttercream to the top and smoothed it out. Then pipe alternating rosettes of chocolate and vanilla buttercream and fill the centre with chocolate curl sprinkles.
For the full recipe with measurements, head to the recipe card at the end of this post.
Can this cake be made in different sized tins?
Yes! If you would like to make this cake in different size tins, please check my Conversion Guide to find out how to adjust the recipe.
How should the cake be stored and can it be frozen?
The cake will keep in an airtight container for 3 days in a cool place. You can freeze the sponges either alone, or decorated. Once the sponges are fully cool, wrap them well with cling film or put them in an airtight container with some baking paper between them. You can freeze the buttercream on it’s own in a tub, or you can decorate the cake and freeze it fully assembled. To do this and avoid damage to the decoration, freeze it either in an airtight container. Or let it freeze solid on a cake board or plate, then wrap in cling film. Remove the cling film when you take it out to defrost it, if you don’t it could damage the decoration as it defrosts and softens. You can also freeze slices of the cake, again well wrapped in cling film or in airtight containers.
Can you make the cake with plain/all purpose flour?
Self raising flour, which is very commonly used in the UK where I am based, already contains a raising agent and a little salt too. Therefore if you want to swap it for plain or all purpose flour, you will need to add some additional baking powder and also a little salt if you like. Some people like to add salt to cake recipes and some don't, so I'll leave that up to you as it won't affect the bake. The general advice is to add 2 teaspoons baking powder (a measuring teaspoon, not the kind you stir your coffee with) per every 200g plain or all purpose flour. Please note, I have not tested this recipe using plain or all purpose flour.
Can this cake be made gluten free?
Yes! For gluten free you can replace the self raising flour with a gluten free self raising flour blend. If you only have a gluten free plain flour blend, you will need to add additonal baking powder. The general advice is to add 2 tsp baking powder per 200g flour, so for this recipe you'd need to add 4 additional teaspoons baking powder. You may also like to add xanthan gum for better texture. Please do check the labels for everything you use to make the cake if you are serving it to someone with an allergy or intolerance.
Can this cake be made dairy free?
For a dairy free version, use a dairy free baking spread and dairy free milk for both the cake and buttercream. I recommend Flora Plant or the Stork Baking Block for the buttercream, as they give the best texture. You will also need to decorate the cake with dairy free chocolate. Please do check the labels for everything you use to make the cake if you are serving it to someone with an allergy or intolerance.
Do you need an electric mixer to make this recipe?
While you can absolutely make this recipe with a wooden spoon and some elbow grease, I do recommend using an electric mixer for the best results. The cake will be lighter and fluffier when made with an electric mixer. The buttercream will also be smoother. You don't have to use an expensive stand mixer either, you can get electric hand whisks for as little as £10!
More tips for making the Ultimate Marble Cake:
- You can also create the striped buttercream effect using a special buttercream scraper tool that has notches in it
- This cake would be an amazing showstopper cake for a celebration or a birthday
- You could adapt the cake to have a different flavour sponge or different coloured buttercream stripes
Troubleshooting
If you have any questions about this recipe, or if something went wrong and you need help, please use the comment form below and I will get back to you. You can also get in touch with me on my Twitter, Instagram or Facebook. I'd love to hear from you!
Recommended equipment & ingredients*
- 8" cake tins
- Mixing bowls
- Cooling rack
- Kitchen scales
- Piping bags
- Electric hand mixer
- Stand mixer
- Round cake tin liners
- Decorating turntable
- Angled palette knife
- Buttercream scraper/smoother
- Wilton 8B Piping nozzle
*I earn a small amount of money if you buy the products after clicking on the links. You will not be charged anything extra for this. Thank you for supporting The Baking Explorer!
Ultimate Marble Cake
Ingredients
For the vanilla sponge
- 290 g Butter or baking spread
- 290 g Caster sugar
- 5 Eggs large
- 290 g Self raising flour
- 2 tsp Vanilla extract
For the chocolate sponge
- 290 g Butter or baking spread
- 290 g Caster sugar
- 5 Eggs large
- 250 g Self raising flour
- 40 g Cocoa powder
- 1 tbsp Milk
For the chocolate buttecream
- 250 g Butter or baking spread
- 440 g Icing sugar
- 60 g Cocoa powder
- 1 tbsp Milk
For the vanilla buttercream
- 250 g Butter or baking spread
- 500 g Icing sugar
- 2 tsp Vanilla extract
For decoration
- Triple chocolate curls
Instructions
- Pre-heat your oven to 160C Fan/180C/350F/Gas Mark 4, and grease and line three 8" cake tins that are at least 2" deep
- Make the vanilla sponge by mixing the butter and caster sugar in a large bowl until fluffy, ideally using an electric mixer
- Add the eggs and vanilla extract, and whisk until fully incorporated
- Add the self raising flour and whisk in gently until you can't see any flour anymore
- Make the chocolate sponge by mixing the butter and caster sugar in a large bowl until fluffy, ideally using an electric mixer
- Add the eggs and milk, and whisk until fully incorporated
- Add the self raising flour and cocoa powder and whisk in gently until you can't see any flour anymore
- Add the batter to the cake tins in alternate spoonfuls, place each spoonful on top of the previous one. Continue until all of the batter is used up. The batter will spread out and fill the tin as you add it, but you can give them a little shake if needed to encourage it
- Bake them for 30-35 minutes or until a skewer inserted in the middle comes out clean. Leave them to fully cool either in the tins or on cooling racks
- To make the chocolate buttercream mix the butter, cocoa powder and icing sugar together. Once it starts to come together add the milk and mix until smooth. You can add more milk if the buttercream is too stiff. Use an electric hand whisk or stand mixer for best results
- To make the vanilla buttercream mix the butter and icing sugar together. Once it starts to come together add the vanilla extract and mix until smooth. You can add more milk if the buttercream is too stiff. Use an electric hand whisk or stand mixer for best results
- If the cakes have domed on top, level them off with a cake leveller or knife
- Put one of the sponges on a decorating turntable and spread a layer of chocolate buttercream over it
- Add the second sponge on top and spread a layer of vanilla buttercream over it
- Add the third sponge and then cover the whole cake in a thin layer of vanilla buttercream as the crumb coat, then put it in the fridge for 30 minutes
- To create the striped effect, pipe lines of alternating chocolate and vanilla buttercream all around the sides of the cake. Use a buttercream scraper to smooth the sides and create the stripey effect, making sure to wipe off excess buttercream from the scraper as you go
- Once the sides are smoothed to your liking, add more buttercream to the top of the cake and smooth it out using a palette knife
- Then pipe alternating rosettes of chocolate and vanilla buttercream on top of the cake round the edge, and fill the centre with triple chocolate curl sprinkles - or any sprinkles of your choice
- Move the cake onto a serving plate or cake stand and dig in! Leftovers will keep in an airtight container in a cool place for 2-3 days

Corina Blum
This looks incredible Kat! It's definitely a show-stopping cake.
thebakingexplorer
Thank you!
jacqui Bellefontaine
Oh wow this cake looks amazing. I love how you have decorated it. Beautiful.
thebakingexplorer
Thank you so much Jacqui!
Jhuls @ The Not So Creative Cook
You definitely know how to get everybody's attention, Kat! 😀 This cake looks absolutely fantastic and I don't have to choose between chocolate and vanilla coz with your cake, I could have them both. 😀 Thanks for sharing at Fiesta Friday party, Kat! x
thebakingexplorer
Ah thank you so much Jhuls!!
Eb Gargano | Easy Peasy Foodie
Oh this is so clever! I love the stripy buttercream effect. Thanks for linking up to #CookBlogShare. Eb x
thebakingexplorer
Thanks Eb! I'm so obsessed with this effect now!
Cat | Curly's Cooking
Wow, what a showstopper. It looks amazing x
thebakingexplorer
Thank you!!
Georgie
Hi there. So the recipe doesn’t require baking powder for the sponges? Many thanks
thebakingexplorer
Hi Georgie, it's made with self raising flour which already contains baking powder. If you use plain or all purpose flour instead, you will need to add baking powder.
Angela / Only Crumbs Remain
Wow Kat, you've certainly achieved the classy and elegant feel that you were aiming for - it's a stunner! It reminds me a little bit of a zebra cake (I think that's what they call them - never tried it) to get those gorgeous vertical layers in the sponge 🙂
Angela x
thebakingexplorer
Thank you! Yes I was in two minds about whether to call it a marble or zebra cake as they are both very similar!
Jayne
Made the marble cake yesterday. Fab recipe. My brother and his wife report it tasted amazing.
thebakingexplorer
Thank you so much for letting me know you enjoyed the recipe Jayne, and I'm so happy to hear your brother and his wife enjoyed it too! 😀
Nickki
What a stunning cake! The stripy buttercream looks so effective!
thebakingexplorer
Thank you Nickki!
Lucy
I saw this on Instagram and thought it was amazing! Such an impressive cake dor a celebration.
thebakingexplorer
Awh thank you Lucy!
Anca
The cake looks amazing, the marble is really stunning. Well done.
thebakingexplorer
Thank you Anca!
Monika Dabrowski
This cake looks sensational, so smart and pretty:)
Choclette
Wow, this is amazing Kat. You've done those stripes so cleverly. Definitely the ultimate marble cake. Thanks for sharing with #WeShouldCocoa.
Kate - gluten free alchemist
I am still always in awe of your piping skills..... those stripes are so even! Another perfect bake and perfect cake! x
Amy
An absolutely delicious and incredibly easy recipe. The cake is so moist and yummy and the stripes turn something that is so simple and easy to do into something that looks impressive. Even people who are on diets ate at least 2 slices of this cake! My first Baking Explorer recipe and definitely not my last!
thebakingexplorer
Thank you Amy! I'm so glad you enjoyed the recipe 😀
Carol
I made this cake today for my son’s birthday and it was beautiful but I followed this recipe to the tee and it was so dry! Absolutely no moistness to this cake at all! The frosting was also like cement. I had to add about 1/4 of a cup of heavy cream to the buttercream to be able to spread it. I was so disappointed I wanted to cry.
thebakingexplorer
Hi Carole, I'm sorry this didn't work out for you. Did you use any different ingredients and did you weigh everything with kitchen scales? I see from your reference to heavy cream that you're perhaps in the US or Canada,
so I'm asking incase you converted the recipe into cups and this affected the final result. Or perhaps you used a US ingredient that affected it. The cake and buttercream recipes always works out great for me, and I've used them too many times to count now so they're been tested a lot.
Carol
I weighed everything out on my kitchen scale. I just don’t understand why the cake was so dense and dry. I think I am just not good at baking cakes from scratch. I have baked for years even made beautiful macarons but when it comes to cakes I bomb. I guess I will stick to box mixes.
thebakingexplorer
Thanks for replying Carole. Perhaps you overmixed the batter, which made it dense. The dryness could be from overbaking. Did you use self raising flour or add a raising agent (like baking soda) to all purpose flour? Not having a raising agent will also cause a dense finish. That's the best I can guess without being there or seeing it. I hope you try again with cakes as so much of baking is about trial and error so please don't give up!
Vriddhi
hey Kat, I want to bake this cake but I'm vegetarian so what can I substitute the eggs with to make them equally tasty? thank you❤️
thebakingexplorer
Hi, I am also vegetarian and all the recipes on my blog are suitable for vegetarians. Eggs are suitable for vegetarians, but if you are vegan or allergic to eggs you could use a vegan/egg free cake recipe as the base for this cake instead. I haven't made this cake without eggs so I wouldn't like to suggest something that I haven't tried myself. I hope that helps!
Dottie
This looks like a great recipe, my only question is are you using cake flour? You say self raising?
Thank you for clarifying.
thebakingexplorer
Hi Dottie, self raising flour is very common here in the UK, it is an all purpose flour that has a raising agent mixed into it so there is no need to add baking soda for example. I'm sure cake flour would also work well, but if the cake flour you use does not have a raising agent mixed in, you will need to add something like baking powder, baking sode etc. I hope that helps!
Lauren
Could this mix be baked in 2 tins rather than 2 then cut into 4 layers? I only have 2 cake tins ??
thebakingexplorer
Yes as long as the tins are deep enough so the mix doesn't spill over the edge when it bakes. Or you could reduce the recipe by one third to fit your tins. I hope that helps! 🙂
Kiera
Best recipe I have ever tried! Everyone loved it, chocolate was not too chocolatey like a lot of cakes! Thanks so much!
thebakingexplorer
Thank you so much Kiera!
Denise
Made the cake for my daughters 13th Birthday. I wanted a cake that looked impressive but wasn't too chocolatety and sickly. He stripes weren't as neat on the outside but it didnt matter. Everyone loved it! Sponge was lovely and tasted fantastic. I will definitely make again.
Emily Elvin
Amazing recipe - so easy to follow and gave the wow! factor that I wanted for my husbands 30th. Thank you so much 😊
Be
Hi,
Do you think these sponges would freeze well?
My son is keen on this as a birthday cake. I’m thinking of making the vanilla elements green as I have ordered a dinosaur topper.
I am not an experienced piper so would it pay to practice on the flat then a bowl first?
Be
thebakingexplorer
Hi Be, yes they will freeze very well, wrap them well individually in cling film. The green idea sounds great! Yes it's always good to practice to build up your confidence. A lot of people pratice with cold mash potato as it's a similar texture and saves making/wasting loads of buttercream 🙂
Hajra
I tried the recipe it came out so good.Very perfect recipe for perfect cake.Thank you so much Kat.😍😍😍😍
thebakingexplorer
So happy to hear this Hajra! Thank you for the lovely feedback!