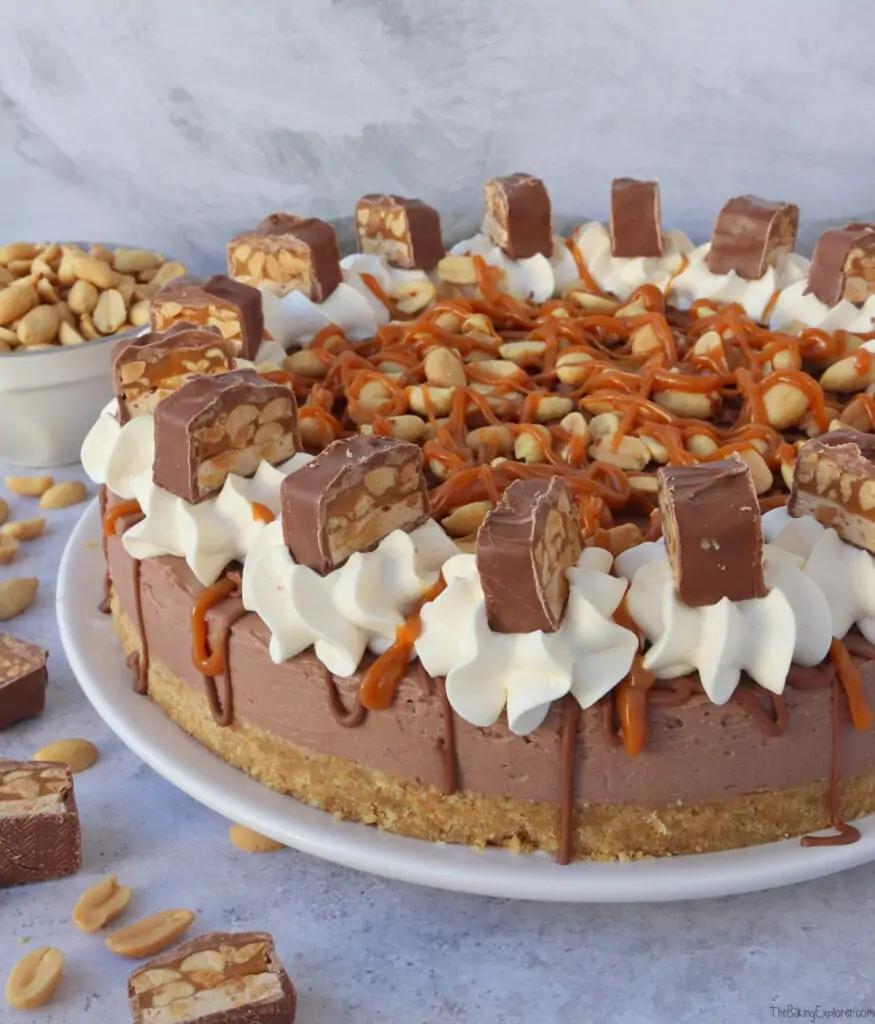
Snickers are one of my favourite chocolate bars - the combination of chocolate, nuts and caramel is so delicious and I never get tired of it! This No Bake Snickers Cheesecake is inspired by the Snickers chocolate bar. It has a buttery biscuit base, a chocolate and peanut butter filling, then it's topped with milk chocolate, caramel sauce, whipped cream, peanuts and Snickers bars. It's an absolute dream for Snickers fans!

For the full recipe with measurements, head to the recipe card at the end of this post.
How to make Snickers Cheesecake
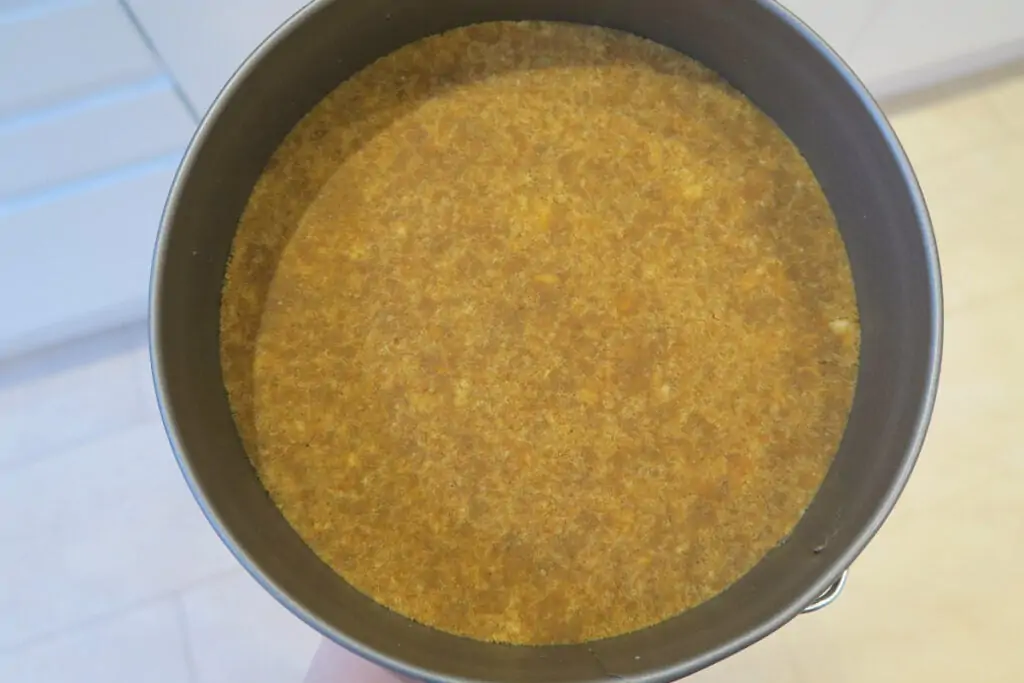
To make the biscuit base, use a food processor to blitz the biscuits into crumbs (or bash them up in a bowl with the end of a rolling pin). Then mix in melted butter and press the mixture into the bottom of a 23cm springform tin. Put it in the fridge for 30 minutes to set.
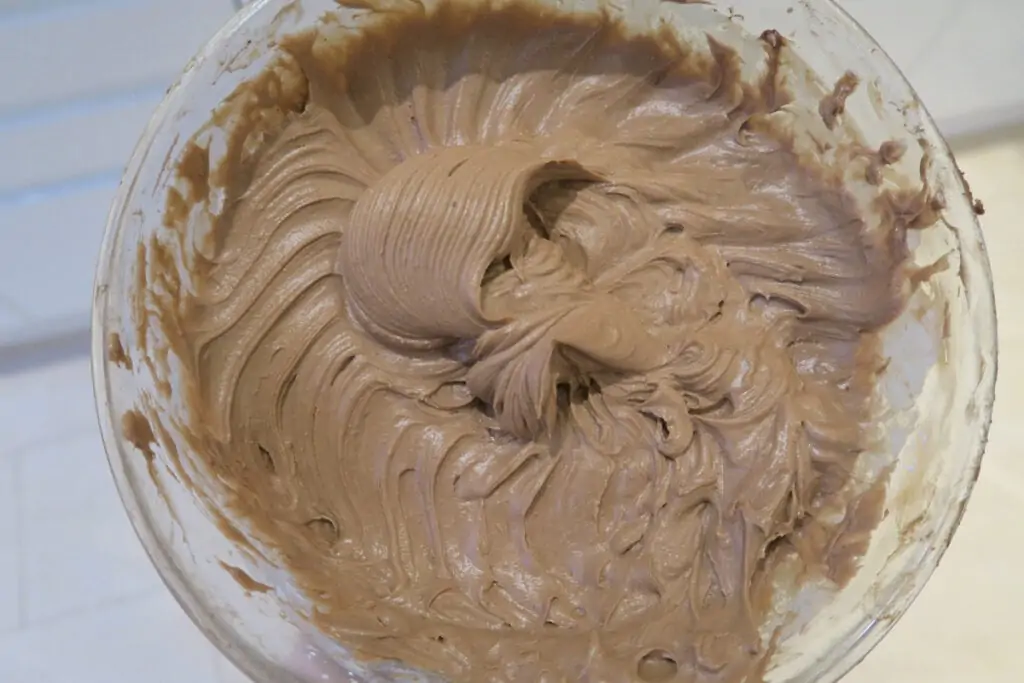
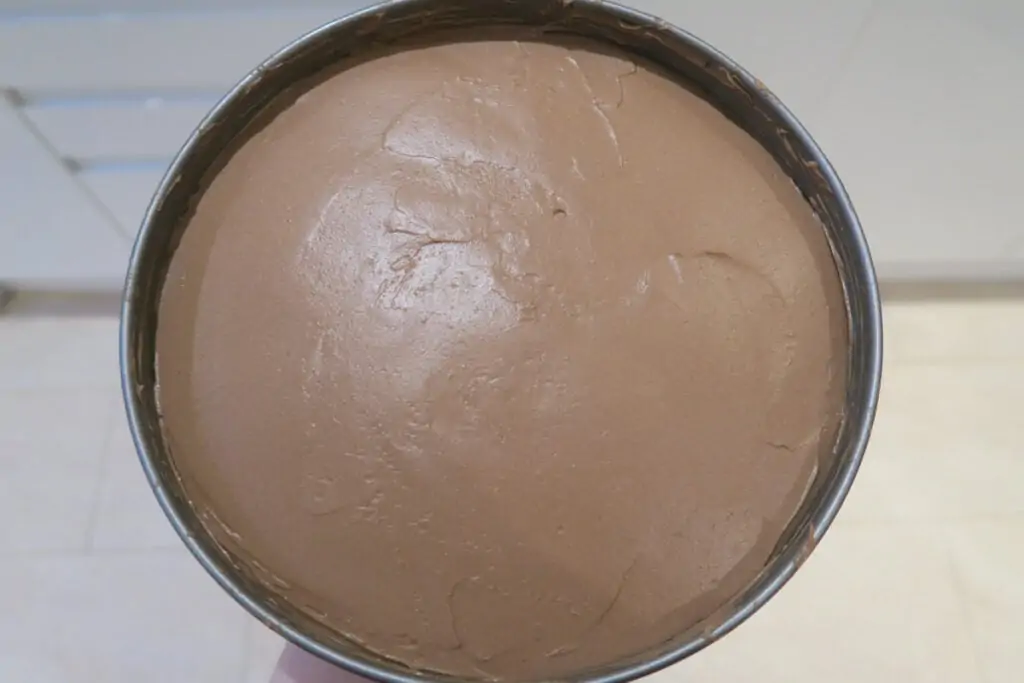
For the cheesecake filling, use an electric hand whisk to mix together the cream cheese, icing sugar, cocoa powder and peanut butter. Once it is smooth with no lumps, add the double cream and whisk until it is very thick and holds it's shape.
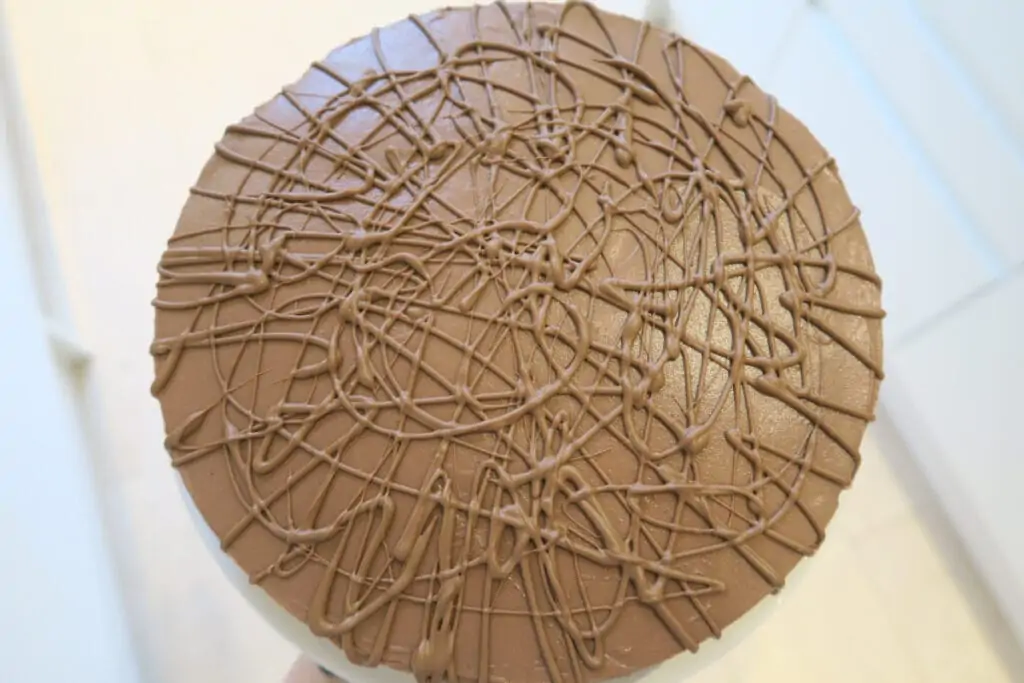
Smooth the mixture into the tin on top of the biscuit base, then put it in the fridge overnight to set. To decorate, drizzle the cheesecake with melted milk chocolate, then add whipped cream, peanuts, caramel sauce and Snickers bars.
How do you make sure the cheesecake sets?
When you’re mixing the filling, you want it to get to a stage where you can scoop some up with your spatula or spoon and you have to give it a tap on the side of the bowl or slight flick of the wrist to get the mixture off the spoon. If it’s sloppy and slides right off the spoon without any encouragement needed, then you need to mix it more. Always use an electric mixer for best results. It’s also very important to use full fat cream cheese and double cream (heavy cream), as any low fat versions will affect the setting of the cheesecake. I always set my cheesecake overnight in the fridge, I’d suggest a minimum of 4 hours.
How do you remove a no bake cheesecake from the tin?
To see step by step photos and a video showing you how to remove a no bake cheesecake from the tin, as well as the answers to lots of other common no bake cheesecake questions, check out my How to make a No Bake Cheesecake guide!
How should the cheesecake be stored and can it be frozen?
Store the cheesecake in the fridge to keep it fresh and enjoy it within 2-3 days. It will be fine after 3 days, but I always find fresh cream is nicer when eaten within 2 days. You can freeze the cheesecake without the decoration. Before you freeze it, you do need to set it in the fridge for at least 4 hours, then move to the freezer. I usually freeze the cheesecake in the tin, with cling film covering the top. Check your tin is freezer safe before doing this. Or you can remove it from the tin and freeze it in an airtight container. Or freeze it on a plate and when it is frozen solid, then cover it with cling film. Make sure to remove the cling film as soon as you take it out to defrost.

What caramel sauce is best to use?
My favourite caramel sauce to use is my Homemade Caramel Sauce, it's rich, smooth and absolutely divine! You can also easily add salt to it to make it into a salted caramel sauce. If you don't want to make your own, it's quite easy nowadays to find a good quality ready made caramel (or salted caramel) sauce in the shops or online. I have used Tesco's Finest, Bonn Maman and Carnation Caramel in the past with great results.
More tips for making the Snickers Cheesecake:
- If you can't get hold of Snickers bars, you can decorate the top with some extra peanuts, or leave it plain if you prefer
- I drizzled melted milk chocolate over the cheesecake, but you could use dark or even white chocolate instead

Recommended equipment & ingredients*
- Mixing bowls
- Kitchen scales
- Piping bags
- 23cm Springform tin
- Electric hand mixer
- Food processor
- Salted Caramel Sauce
- Angled palette knife
- Snickers
*I earn a small amount of money if you buy the products after clicking on the links. You will not be charged anything extra for this. Thank you for supporting The Baking Explorer!

More Snickers recipes...
Snickers Cheesecake (No Bake)
Ingredients
For the biscuit base
- 300 g Digestive biscuits
- 135 g Butter or baking spread melted
For the filling
- 650 g Full fat cream cheese
- 125 g Icing sugar
- 30 g Cocoa powder
- 150 g Peanut butter
- 300 ml Double cream
For decoration
- 50 g Milk chocolate melted
- 50 g Caramel sauce
- 25 g Peanuts
- 200 ml Double cream
- 1 tbsp Icing sugar
- 1 tsp Vanilla extract
- 150 g Snickers bars chopped up
Instructions
- To make the base use a food processor to blitz the biscuits into crumbs, or bash them with a rolling pin in a bowl or a freezer bag, then put them in a mixing bowl
- Pour the melted butter into the biscuit crumbs and mix in. Press the mixture into the bottom of a 23cm springform tin until compact and even. Put it in the fridge for 30 minutes to set
- For the cheesecake filling use an electric food mixer with a whisk attachment or an electric hand whisk to mix together the cream cheese, icing sugar, cocoa powder and peanut butter until smooth with no lumps
- Add the double cream and whisk until it is thick and holds it's shape. You want it to get to a stage where you can scoop some up with your spatula or spoon and you have to give it a tap on the side of the bowl or slight flick of the wrist to get the mixture off the spoon. If it’s sloppy and slides right off the spoon without any encouragement needed, then you need to mix it more
- Smooth the filling into the tin on top of the biscuit base, then put it in the fridge overnight, or for at least 4 hours, to set
- Remove the cheesecake from the tin and put on your serving plate. Smooth the sides with a butter knife to create a neater finish if needed
- Drizzle or pipe the melted chocolate all over the cheesecake
- Whip up the double cream with the icing sugar and vanilla, ideally using an electric whisk, and pipe rosettes all around the edge of the cheesecake
- Sprinkle the peanuts in the centre of the cheesecake and place the chopped up Snickers pieces around the edge on top of the whipped cream. Drizzle the caramel sauce over the peanuts (you can warm the caramel sauce for 15 seconds in the microwave first to make it easier to drizzle)
- Serve immediately, store any leftovers in the fridge and eat within 2 days
Notes
Nutrition
If you like this, check out more of my Cheesecake recipes!
NB. This post is not in any way sponsored by Snickers - I just love their product!
I'm linking this recipe up with Cook Blog Share.



Cat | Curly's Cooking
Well this is a thing of beauty! Love snickers and love these flavours.
Chloe
Genius strikes again, this looks lush!
thebakingexplorer
Thanks Chloe!