
Step by step...

I started by making the creme patisserie the night before so I could cool it in the fridge overnight. I've only made creme patisserie once before and the recipe worked beautifully so I decided to use it again. This did make far too much for the 7 cupcakes I needed, so I made another 12 the next day! So you may wish to half the creme patisserie recipe if you're making a smaller number of cakes. I heated whole milk with
the seeds from a vanilla pod until it reached boiling point. Then I took it off the heat and poured into a jug.

In my food mixer I whisked up egg yolks with caster sugar until pale and thick. I added cornflour and mixed that in. Then I put the mixer on a medium speed and poured the milk in slowly as it mixed.

I poured the mixture back into the pan and heated it up whilst stirring continuously. There is a moment when it suddenly thickens, I started whisking it at this point to keep it smooth and stop any lumps.

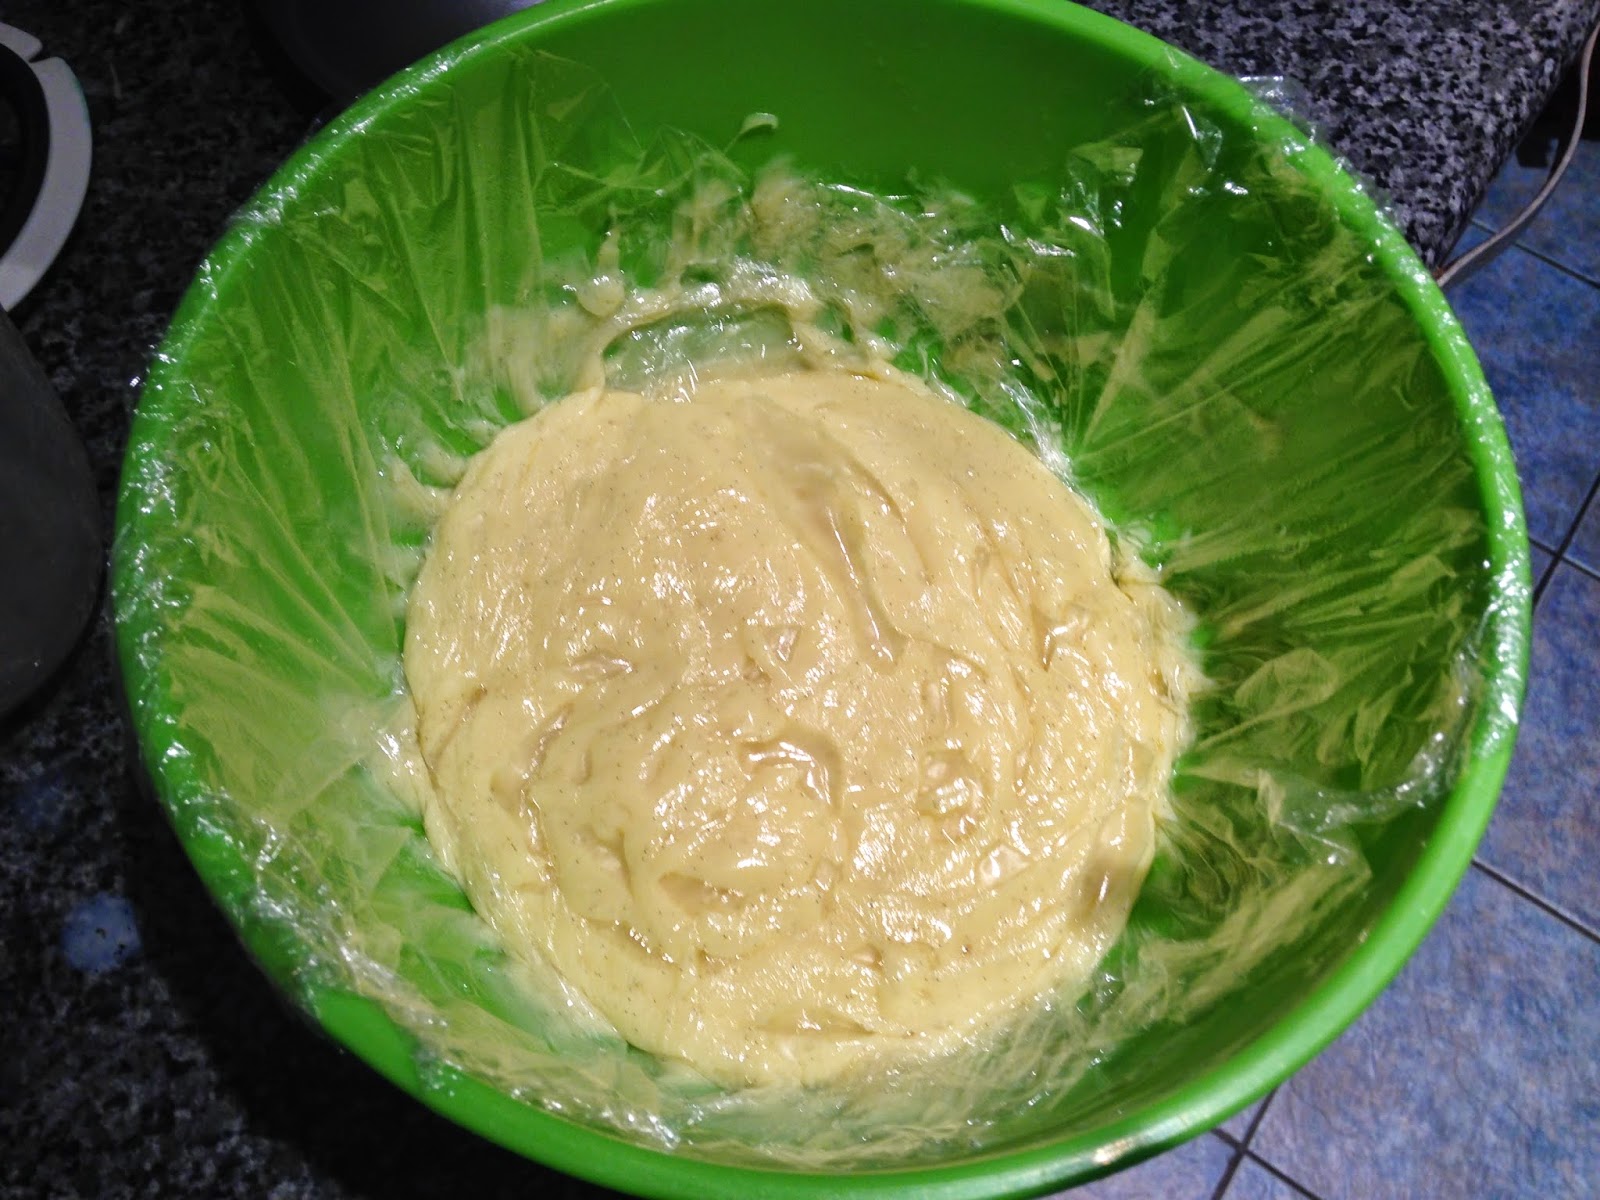
I put it in a bowl, and covered it with cling film. I made sure the cling film was touching the creme patisserie so that a skin doesn't form on it. Then I left it in the fridge overnight to cool.

The next day I made the cupcakes. I was taking them to a dinner party where one of the guests had a gluten intolerance so I made regular cupcakes with gluten free flour. So it's up to you which to use if you try this recipe. I creamed together butter and caster sugar. I then whisked in eggs and vanilla extract.

Next I added gluten free self raising flour and milk, and mixed in. If you don't need these to be gluten free, just use regular self raising flour and don't add the milk.

I divided the cupcake mixture into 7 cases as that's how many I needed, but I reckon you could stretch the mixture to 8 cupcakes. As I mentioned before, as the creme patisserie recipe makes quite a lot so you can make a lot more cupcakes to use it up if you wish.

They baked for 20 minutes until golden. I left them to cool completely.

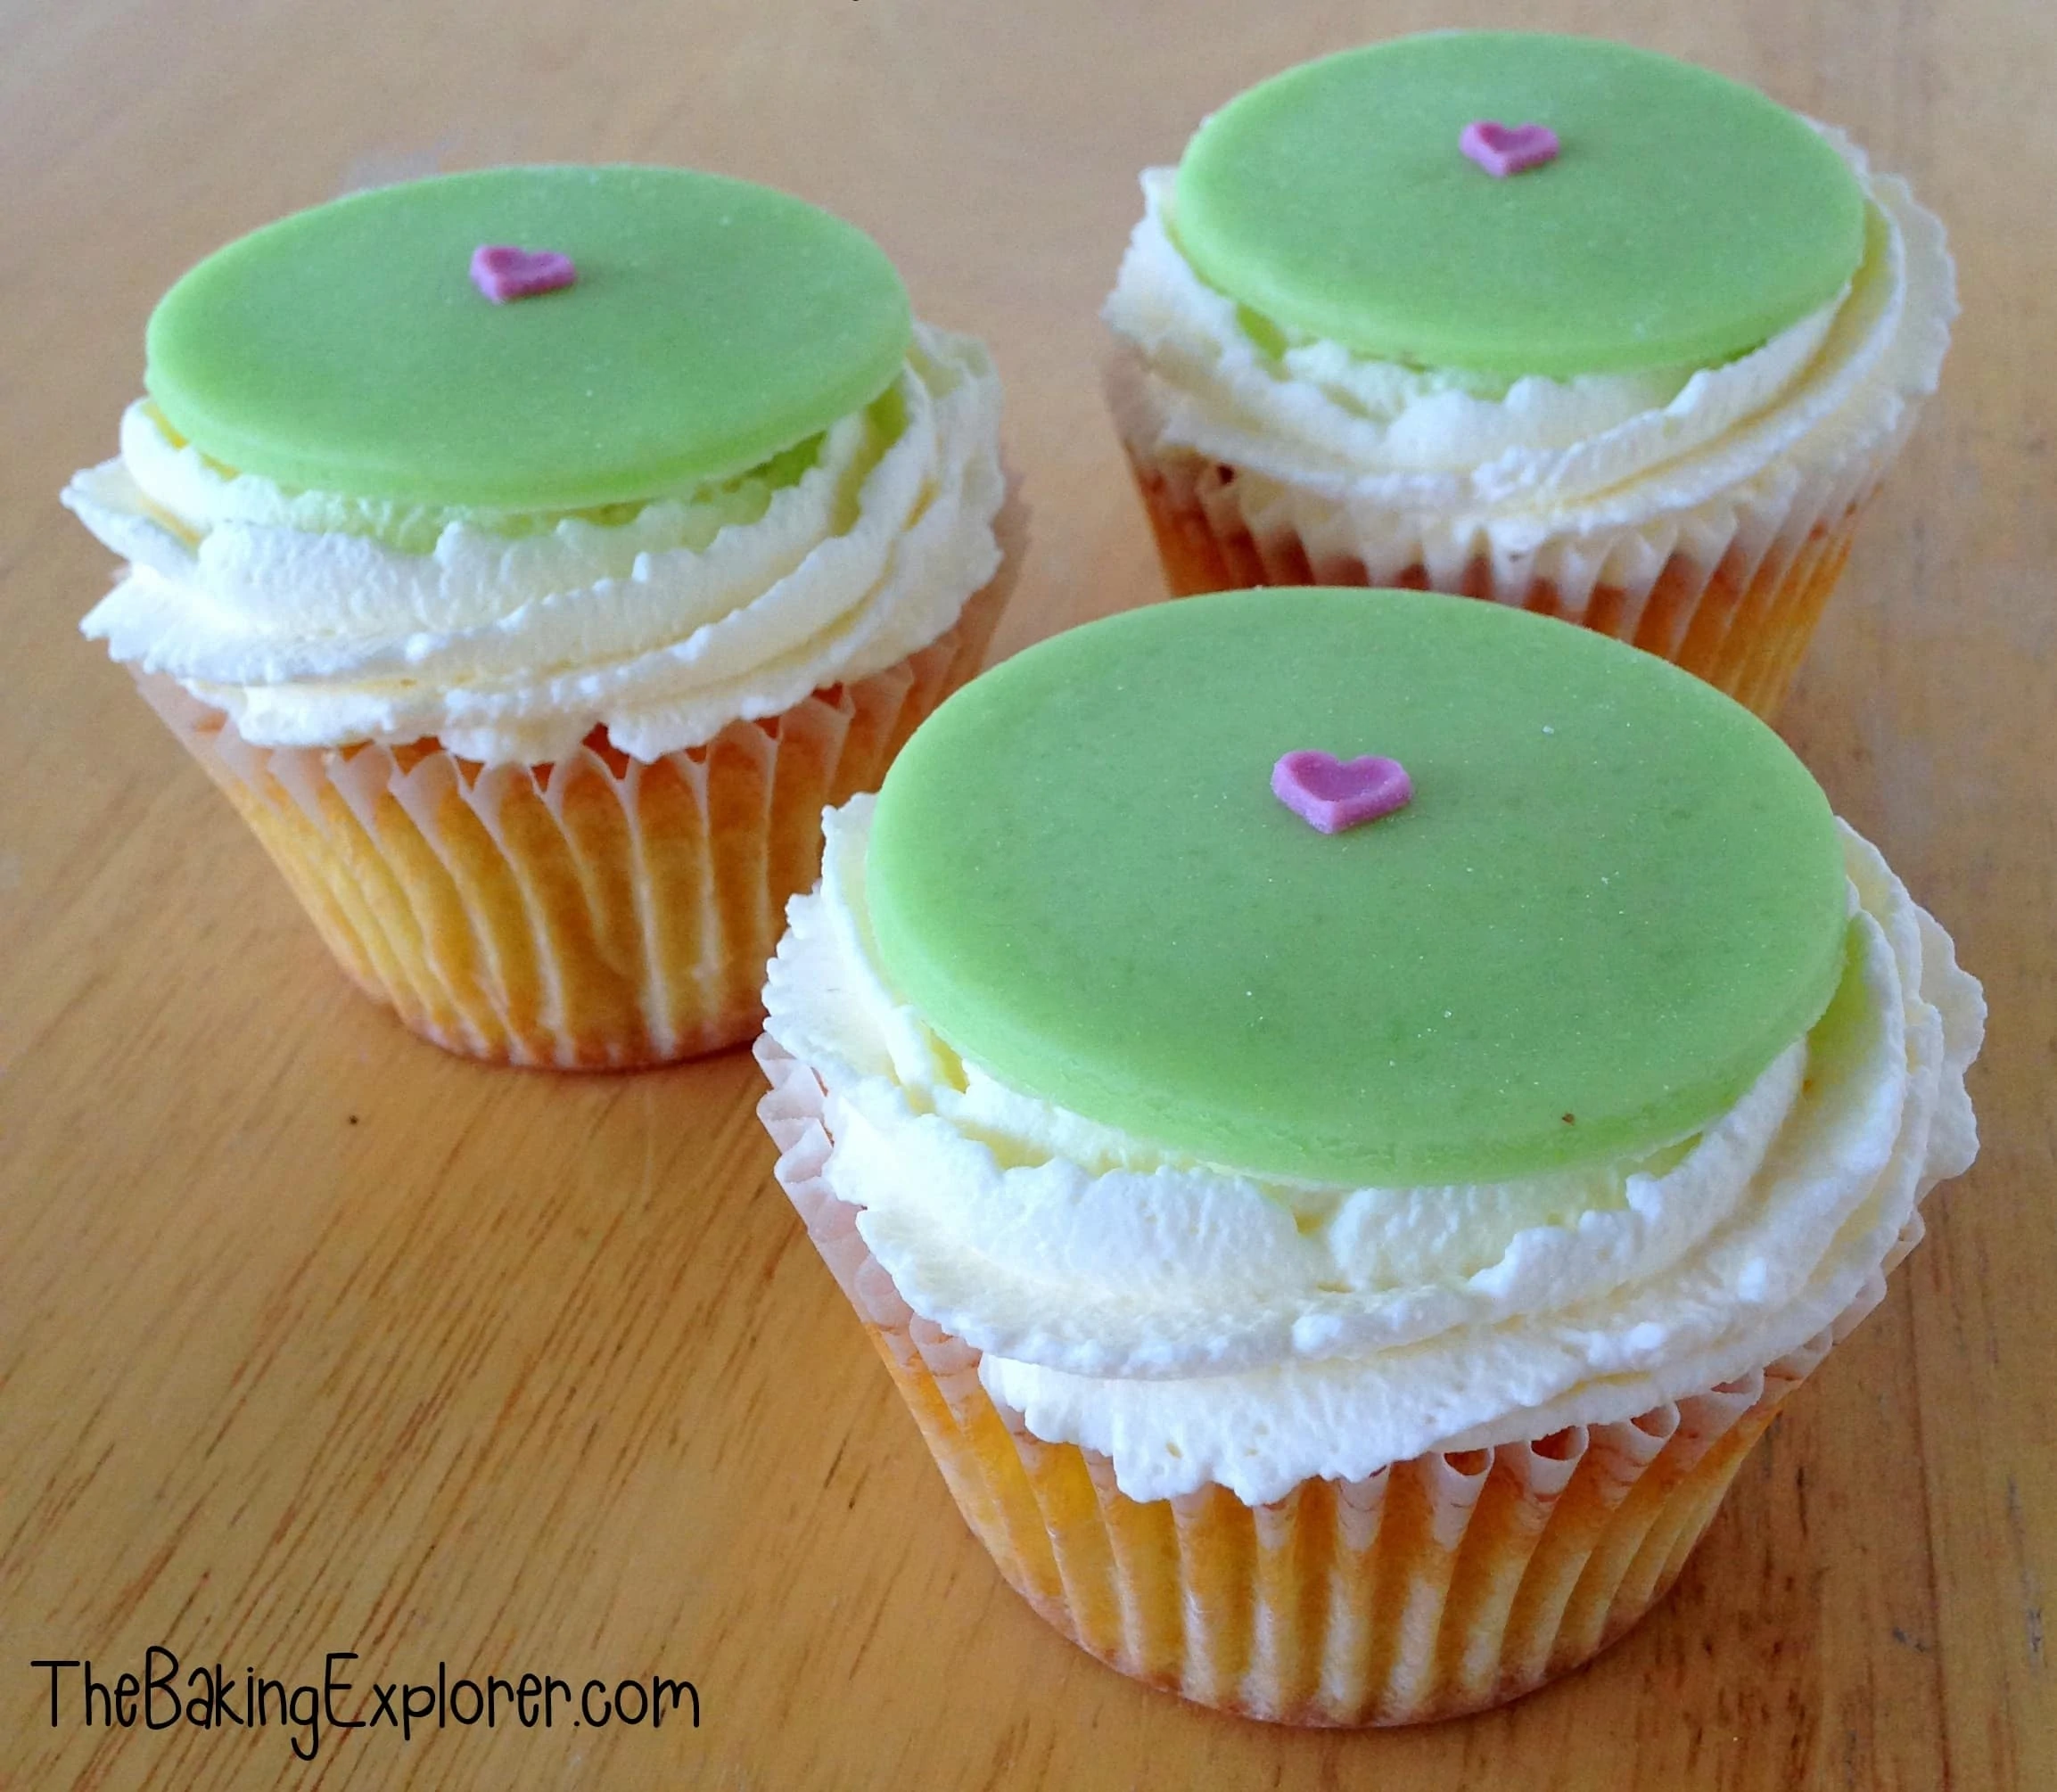
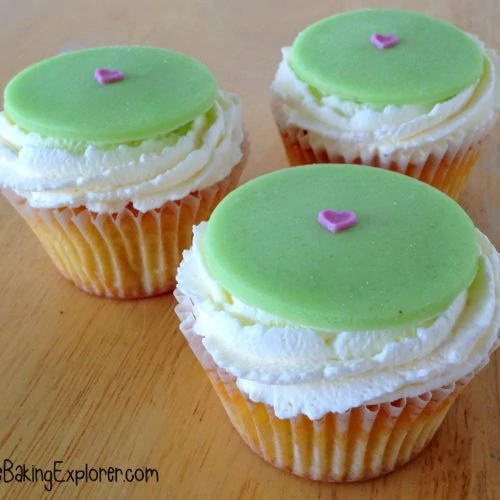
While they were cooling I kneaded some green food colouring into natural marzipan and cut out 2.5 inch circles. I got exactly 19 circles from this much marzipan. Then I left the marzipan out to harden up.

I used a tiny dab of water to stick a pink heart sprinkle into the middle of each marzipan circle. Traditionally a pink flower is put on top of a Prinsesstårta, but I had these pink heart sprinkles in the cupboard from Valentine's Day baking and I thought they looked really cute!

Once fully cool I used a knife to scoop out the middle of the cupcakes. A cupcake corer won't make enough room for the filling so you do need to do this manually.

I half filled the holes with seedless raspberry jam, about 1 tsp per cupcakes.

Then I topped them up with the creme patisserie and smoothed the top.

I whipped up double cream and piped swirls onto each cupcake, I kept the swirls flat so I could place a circle of marzipan on top.

Well I was so pleased with the Swedish Princess Cupcakes! Making a full sized Prinsesstårta can be tricky, but these Swedish Princess Cupcakes are so much simpler. Everyone at the dinner party loved the cupcakes. The Swedes really have it down, I mean, cream, custard and jam in a cake - how can you go wrong?!
Recommended equipment & ingredients*
| Cupcake tin | Electric hand mixer | Piping bags |
| Cupcake corer | Jem 1E Piping nozzle | White cupcake cases |
| Natural marzipan | Green food colouring | Kitchen scales |
*I earn a small amount of money if you buy the products after clicking on the links. You will not be charged anything extra for this. Thank you for supporting The Baking Explorer!
More Swedish Princess recipes...
 |
| Swedish Princess Cake |
Swedish Princess Cupcakes (Optional Gluten Free)
Ingredients
For the creme patisserie
- 500 ml Whole milk
- 1 Vanilla pod
- 6 Egg yolks
- 140 g Caster sugar
- 45 g Cornflour
For the cupcakes
- 240 g Caster sugar
- 240 g Butter or baking spread
- 4 Eggs large
- 2 tsp Vanilla extract
- 240 g Self raising flour gluten free optional
- 3 tbsp Milk only add if using gluten free flour
For the filling
- 65 g Seedless raspberry jam
For the decoration
- Green food colouring
- 100 g Natural marzipan
- Pink sprinkles
- 250 ml Double cream
Instructions
- Start by making the creme patisserie the night before. Heat the whole milk with the seeds from the vanilla pod in a pan until it reaches boiling point. Then take it off the heat and pour it into a jug
- In a food mixer whisk up the egg yolks with the caster sugar until pale and thick. Add the cornflour and mix in. Then put the mixer on a medium speed and pour the milk in slowly as it mixes
- Pour the mixture back into the pan and heat it up whilst stirring continuously. It will suddenly thicken after approximately 5 minutes, start whisk it at this point to keep it smooth and stop any lumps from forming
- Put the creme patisserie in a bowl, and cover it with cling film so that the cling film is pressed into the bowl and is touching the top of the creme patisserie. Leave it in the fridge overnight to cool
- Pre-heat your oven to 180C/160C Fan/350F/Gas Mark 4 and line a cupcake tin with paper cases
- To make the cupcakes, cream together butter and caster sugar. Then whisk in the eggs and vanilla extract
- Add the flour (if using gluten free flour add the milk), and mix in
- Divide the mixture into cases and bake for 20 minutes until golden. Leave them to cool completely
- Knead the green food colouring into the natural marzipan and cut out 2.5 inch circles. Leave the marzipan circles to harden up
- Use a tiny dab of water to stick a pink heart sprinkle into the middle of each marzipan circle. You can also use a pink flower, pink heart made from fondant or leave plain
- Use a knife and spoon to scoop out the middle of the cupcakes
- Half fill the scooped out holes with seedless raspberry jam, about 1 tsp per cupcake
- Then fill the other half of the scooped out holes with the creme patisserie and smooth the top
- Whip up the double cream and pipe swirls onto each cupcake. Keep the swirls flat, then place a circle of marzipan on top of each cupcake
- Serve immediately and store leftovers in the fridge, eat within 2 days
Laura Denman
This is a brilliant idea. I love transforming big cakes into easier to manage and transport smaller cakes and these ones look beautiful.
Kat BakingExplorer
Thanks Laura! They're certainly more simple to make than the large one!
Sadhna Grover
Hi Kat, very nice cupcakes,
I am celebrating my First Blog Anniversary-http://herbsspicesandtradition.blogspot.ca/2015/05/my-first-blog-anniversary-event.html
There is a event and a give away. Please join, it is open for everybody.
Baking Addict
I was impressed when you baked the full sized version. I am equally impressed with these cupcakes as you've managed to capture all the flavours and decorated them perfectly.
Kat BakingExplorer
Thanks Ros! I really appreciate that.
Stuart Vettese
Yay - you made something from the winning country! These look cute and tasty. Hope you enjoyed your break.
Kat BakingExplorer
Woohoo! And I didn't even know! I did thank you 🙂
Kate Glutenfreealchemist
Brilliant! These are so cool..... I remember your full-sized one well..... that was fab too! Great that you have made them GF!!!!
Kat BakingExplorer
Thanks Kate! Yes I took them to a dinner party with a GF guest and I wanted them to be able to enjoy the cupcakes too. Was really lovely seeing the look on his face when he realised he could tuck in too!