

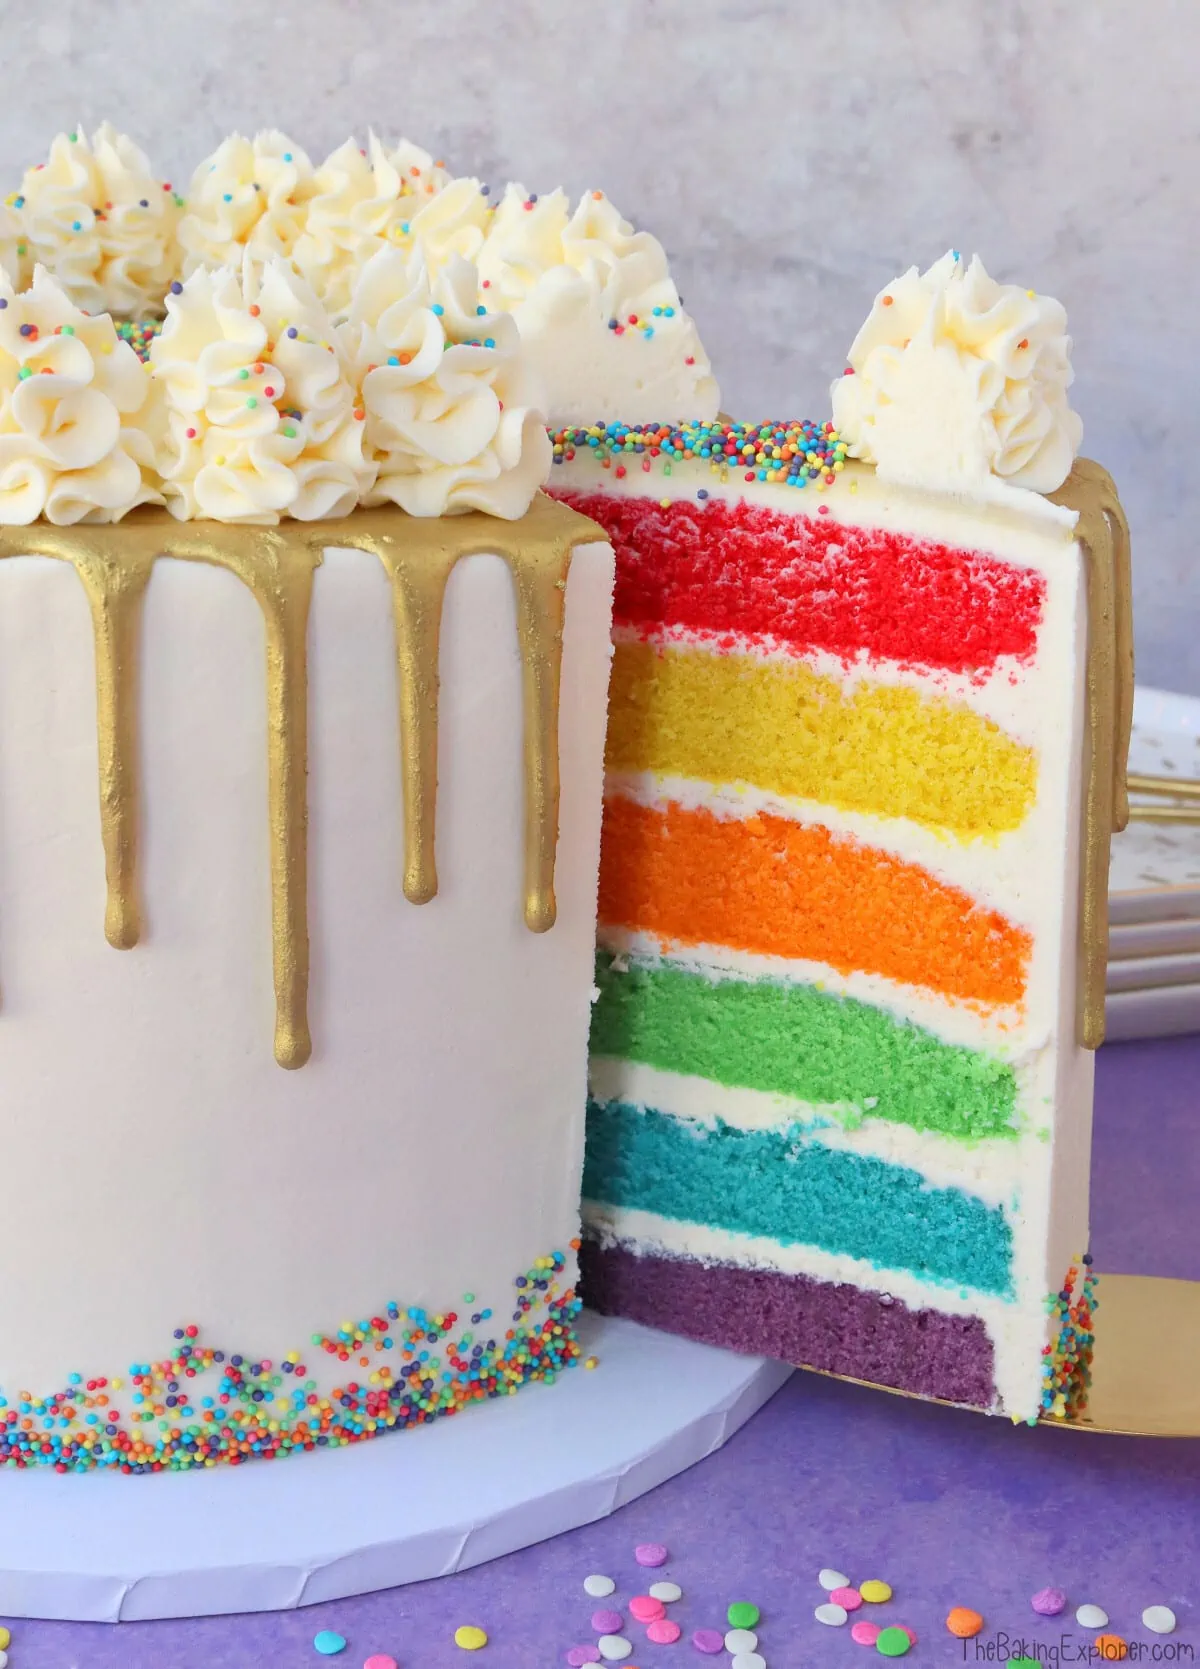
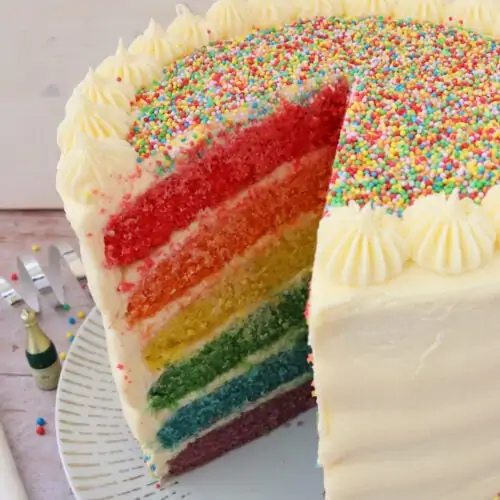
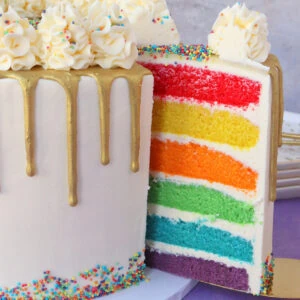
This Rainbow Drip Cake is an ultimate show stopping cake! Not only does it have a stunning gold drip over the smooth white buttercream, but inside are six layers of brightly coloured rainbow cake. I love cakes with a surprise inside, and this cake does not disappoint. This cake is big, tall and covered in sprinkles, so it's great for serving a crowd at a party or celebration. If you want a cake that everyone will be talking about, then this is the cake for you!
This post may contain affiliate links. I earn from qualifying purchases.
Ingredient Tips & Equipment Information
- Make sure all your ingredients (particularly the eggs and butter) are at room temperature before you start baking.
- I prefer to use a baking spread like Stork for the cake, and unsalted butter for the buttercream as I find they provide the best results.
- For the best results, use good quality professional food colourings. My favourite brands are Pro Gel and Sugarflair. You can buy these easily online. Other well known brands are Colour Mill and Americolor.
- For all the tips and tricks on how to make a drip cake, including a how to video, check out my Ultimate Drip Cake How To Guide!
- Although I provide cup measurements, I highly recommend weighing your ingredients out using digital kitchen scales. It is the most accurate way to measure ingredients and will ensure the best results. Digital scales are very low cost and can be purchased for around £12 ($16.50).
- For teaspoon (tsp) and tablespoon (tbsp) measurements, please use measuring spoons and not the type of spoons you eat with. Again this will ensure accuracy and provide the best results.
For the full recipe with measurements, head to the recipe card at the end of this post.
How to make Rainbow Drip Cake


To make the cakes, mix together the butter and sugar until creamy, then mix in the eggs and vanilla extract. Finally, gently mix in the self raising flour. I only have three 8" cake tins, so I made half of the cake mixture, coloured and baked it. Then repeated the process for the other three colours.


Divide the batter into bowls and colour using food colouring. Then add into cake tins and bake. Leave to cool fully.


To make the buttercream, mix the butter until creamy and paler in colour, then add the icing sugar, milk and vanilla extract. Mix until combined, then if you like you can add some whitening solution to whiten the buttercream. Stack up the cake with a layer of buttercream in between in each one. Then cover the cake in a layer of buttercream, this is called the crumb coat. Put it in the fridge for 30 minutes. Bring it out of the fridge and cover in a thicker layer of buttercream and smooth it out. Add sprinkles around the base of the cake. Chill the cake again for 30 minutes.


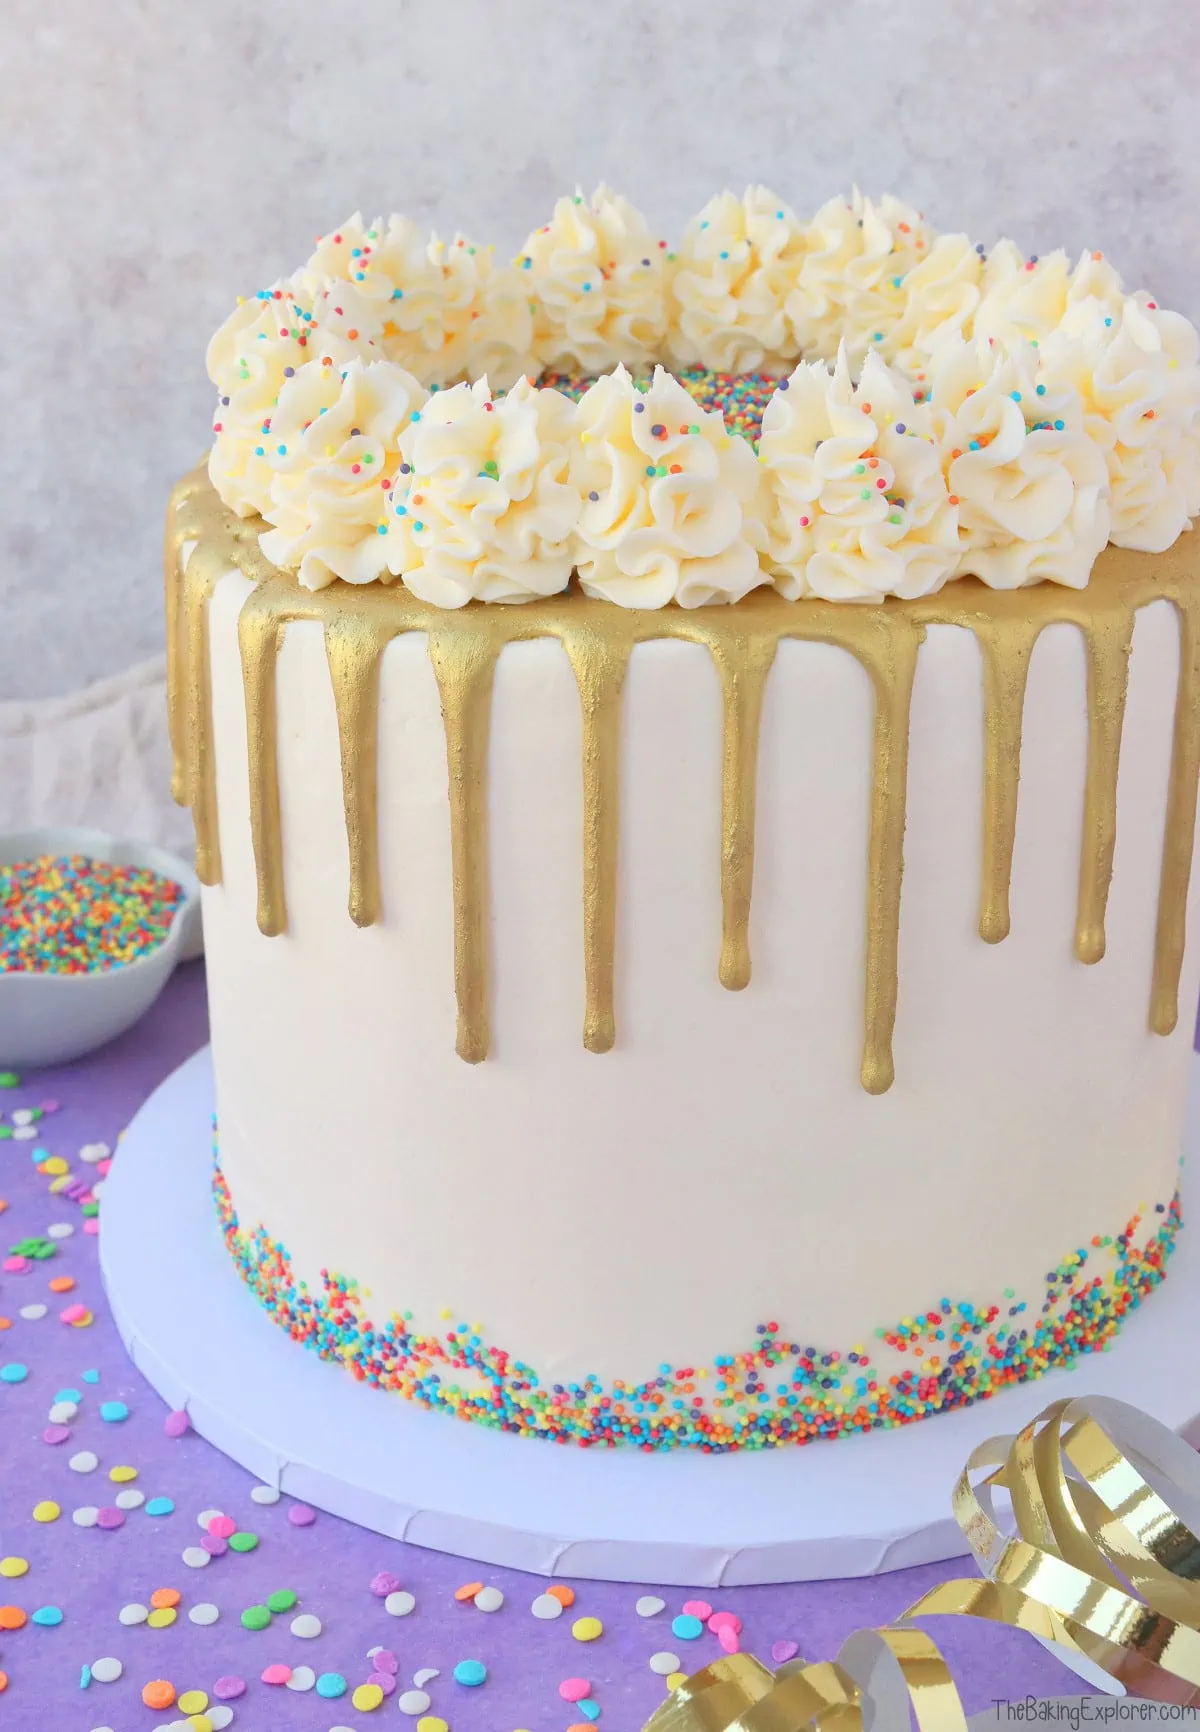
Make the drip by melting white chocolate and double cream together. If you are doing a gold drip like I did, then I like to add some of the lustre dust to the drip. It doesn't make the drip gold, but it creates a better background colour for the gold drip. Add the drip to the cake, then put in the fridge until the drip has set fully. To paint it, mix gold lustre dust with some dipping solution, or some clear alcohol like vodka, and paint the drip gold. Finally pipe the remaining buttercream on top of the cake in swirls, and add more sprinkles.
For the full recipe with measurements, head to the recipe card at the end of this post.

What is the best food colouring to use?
To get bright shades that remains strong after the cake is baked, you need to use professional grade gel food colouring. You can buy these easily from many online shops, including Amazon. I used the brand Pro Gel for these cupcakes, other good brands include Sugarflair, Colour Mill and Americolor.
How do you get the perfect chocolate drip?
It’s really important to have a good base for the chocolate drip, so the cake needs a ‘crumb coat’ base layer of buttercream, then a thicker top layer of buttercream. Try and get it as smooth as you can so the chocolate drip has a nice even surface to drip down. Each layer of buttercream needs to firm up in the fridge and be chilled when you apply the chocolate drip. Be frugal with the drip amounts at first and see how far it drips, then you can reduce or increase the amount of chocolate you release from the piping bag or squeeze bottle as you move around the cake. For all the information, including a tutorial video and step by step instructions with photos, check out my Ultimate Drip Cake How To Guide!
Do you have to do a gold drip?
No, you can decorate this cake with add kind of drip you prefer. You can check out any of my drip cake recipes for instructions, ingredients and inspiration!

How long does the cake last for and can you freeze it?
The cake will keep in an airtight container for 3 days in a cool place. You can freeze the sponges. Once the sponges are fully cool, wrap them well with cling film or put them in an airtight container with some baking paper between them. You can also freeze the buttercream on it’s own in a tub. If you want to decorate and then freeze the cake without damaging the decoration, freeze it either in an airtight container or let it freeze solid on a cake board or plate, then wrap in cling film. Remove the cling film when you take it out to defrost it, if you don’t it could damage the buttercream as it defrosts and softens. You can also freeze slices of the cake, again well wrapped in cling film or in airtight containers.
Can you make the cake with plain/all purpose flour?
Self raising flour, which is very commonly used in the UK where I am based, already contains a raising agent and a little salt too. Therefore if you want to swap it for plain or all purpose flour, you will need to add some baking powder and also a little salt if you like. Some people like to add salt to cake recipes and some don't, so I'll leave that up to you as it won't affect the bake. The general advice is to add 2 teaspoons baking powder (a measuring teaspoon, not the kind you stir your coffee with) per every 200g plain or all purpose flour. So for this recipe you'd need to add 5 ¼ teaspoons baking powder. Please note, I have not tested this recipe using plain or all purpose flour.
Will chilling the cake in the fridge dry it out?
No, the first chill to set the crumb coat is only for 30 minutes. Then the second chill, which again is only 30 minutes, the cake is covered in a thick layer of buttercream which seal the sponge inside. I've never experienced dry cakes from using this method. The most common cause of dry cakes is actually over baking your cakes.
Can this recipe be made gluten or dairy free?
Yes! For gluten free you can replace the self raising flour with a gluten free self raising flour blend. If you only have a gluten free plain flour blend, you will need to add additional baking powder. The general advice is to add 2 tsp baking powder per 200g flour, so for this recipe you'd need to add 5 ¼ teaspoons baking powder. You may also like to add 2 tsp xanthan gum for better texture. For a dairy free version, use a dairy free baking spread and dairy free milk for the cake and buttercream. Please check the labels of everything you use if you are serving this cake to someone with an allergy or intolerance.
Can this cake be made in different size cake tins?
Yes! If you would like to make this cake in different size tins, please check my Conversion Guide to find out how to adjust the cake recipe.
More tips for making the Rainbow Drip Cake:
- I used Antique Gold lustre dust.
- The piping nozzle I used for this cake was a Wilton 2D.

Troubleshooting
If you have any questions about this recipe, or if something went wrong and you need help, please use the comment form below and I will get back to you. You can also get in touch with me on my Twitter, Instagram or Facebook. I'd love to hear from you!
Recommended equipment & ingredients
- 8" cake tins
- Mixing bowls
- Cooling rack
- Kitchen scales
- Electric hand mixer
- Piping bags
- Round cake tin liners
- Cake leveller
- Decorating turntable
- Angled palette knife
- Buttercream scraper/smoother
- Red food colouring
- Yellow food colouring
- Orange food colouring
- Green food colouring
- Purple food colouring
- Blue food colouring
- Wilton White White
- Rainbow sprinkles
- Wilton 2D Piping nozzle
I earn a small amount of money if you buy the products after clicking on the links. You will not be charged anything extra for this. Thank you for supporting The Baking Explorer!

More rainbow recipes...


Rainbow Drip Cake
Ingredients
For the cake
- 550 g Butter or baking spread softened, unsalted
- 550 g Caster sugar
- 10 Eggs large
- 4 tsp Vanilla extract
- 550 g Self raising flour
- Red, yellow, orange, green, blue and purple food colouring Use professional grade colours for best results (e.g. Sugarflair, Pro Gel, Colour Mill)
For the buttercream
- 700 g Butter softened, unsalted
- 1.4 kg Icing sugar (1,400 grams)
- 2 tsp Vanilla extract
- 5 tbsp Milk
- 2 tsp Wilton white white optional
For the gold drip
- 100 g White chocolate
- 40 ml Double cream
- 1 g Gold lustre dust I used Antique Gold by Sugarflair
- 5-10 ml Dipping solution or a clear alcohol like vodka
For decoration
- Sprinkles
Instructions
- I own three 8" cake tins so I did three layers of the cake at a time. Only make as much mixture as you have cake tins for (and that will fit in your oven at the same time). This is because cake batter sat out for a long period of time will affect the final result. If you are halving the recipe to cook it in two batches, it's 275g of butter, sugar and flour, 5 eggs and 2 tsp vanilla extract.
- Pre-heat your oven to 160C Fan/180C/350F/Gas Mark 4, and grease and line your 8" cake tins
- Make the first three sponges by mixing half of the butter and caster sugar in a large bowl until fluffy and creamy, this takes about 3 minutes using an electric mixer
- Add half of the eggs and vanilla extract, and whisk until fully incorporated
- Add half of the self raising flour and whisk in gently, only until you can't see any flour anymore
- Divide the mixture equally between three bowls, add red food colouring to one bowl, orange to another and yellow to the last one. Mix until the desired colour is achieved
- Divide the mixture between the tins and bake for 15-20 minutes or until a skewer inserted in the middle comes out clean. Remove from the tins and leave them to fully cool on cooling racks
- Wash the tins, re-line and grease them, then repeat steps 3 - 7 but add the green, blue and purple food colouring instead
- To make the buttercream, mix the butter until creamy and paler in colour, around 3-5 minutes. Add the icing sugar, vanilla extract and milk, and mix until smooth. For best results use an electric mixer. You can add more milk if it is too stiff
- If you want the buttercream to be white, add the Wilton white white and mix in
- Start stacking the sponges on your cake board, ideally on a decorating turn table. Spread a layer of buttercream between each sponge, before adding the next one. Make sure to stack them in the rainbow colour order: purple, blue, green, orange, yellow, red
- Once the sponges are all stacked and filled with buttercream, cover the whole cake in a "crumb coat" of buttercream. Put it in the fridge for 30 minutes to set the buttercream layer
- Remove from the fridge and spread on a final and thicker layer of buttercream and smooth it out using a buttercream smoother/scraper. Use a Put it back in the fridge for 30 minutes
- To make the chocolate drip, put the white chocolate and double cream into a bowl and microwave for 20 seconds, then stir. Continue microwaving in 10 second blasts, stirring between each blast, until melted and smooth
- I like to add a little bit of the lustre dust to the drip mixture too, but this is optional, it gives a better background colour for the gold 'paint'
- Put the chocolate drip mixture into a piping bag or squeezy bottle, if using a piping bag snip a small section off the end
- Pipe blobs of drip around the edge of the cake, allowing it to drip down the sides in varying amounts
- Once the drips are complete you can cover the whole top of the cake with the chocolate drip mixture it you like. Pipe the remaining mixture all over the top of the cake and use a palette knife to smooth it out. Put the cake in the fridge until the drip is fully set, around 30-60 minutes
- When you are ready to paint the fully set drip, mix the lustre dust with the dipping solution in a small bowl to create a 'paint'. Use a cake paint brush to carefully paint the drip gold all over. If the lustre dust dries out, add more dipping solution. Or if you run out of the gold paint, mix up some more with more dipping solution and more lustre dust
- Put the remaining buttercream into a piping bag fitted with a nozzle of your choice and pipe some swirls around the edge of the cake
- Add sprinkles all over the top of the cake
- Leftovers will keep in an airtight container in a cool place for 2-3 days
Notes
- Make sure all your ingredients (particularly the eggs and butter) are at room temperature before you start baking.
- I prefer to use a baking spread like Stork for the cake, and unsalted butter for the buttercream as I find they provide the best results.
- For the best results, use good quality professional food colourings. My favourite brands are Pro Gel and Sugarflair. You can buy these easily online. Other well known brands are Colour Mill and Americolor.
- For all the tips and tricks on how to make a drip cake, including a how to video, check out my Ultimate Drip Cake How To Guide!
- Although I provide cup measurements, I highly recommend weighing your ingredients out using digital kitchen scales. It is the most accurate way to measure ingredients and will ensure the best results. Digital scales are very low cost and can be purchased for around £12 ($16.50).
- For teaspoon (tsp) and tablespoon (tbsp) measurements, please use measuring spoons and not the type of spoons you eat with. Again this will ensure accuracy and provide the best results.
Paula
Hi, will be making this cake next month. When mixing in the colours, I'm thinking it will take a good mix to blend colours. So, is that ok? Always iffy about the “don’t over mix” rule, Thanks
thebakingexplorer
Hi Paula, it shouldn't take too much mixing if you use a good quality gel colour. If you are worried, you can add the colour in at the beginning. Then you might just need to add a little bit at the end if you want it brighter.
Zandile
Hi Kat
Can I use cake flour instead of the self-raising floor?
thebakingexplorer
You can but you will need to add baking powder as self raising flour already contains it