
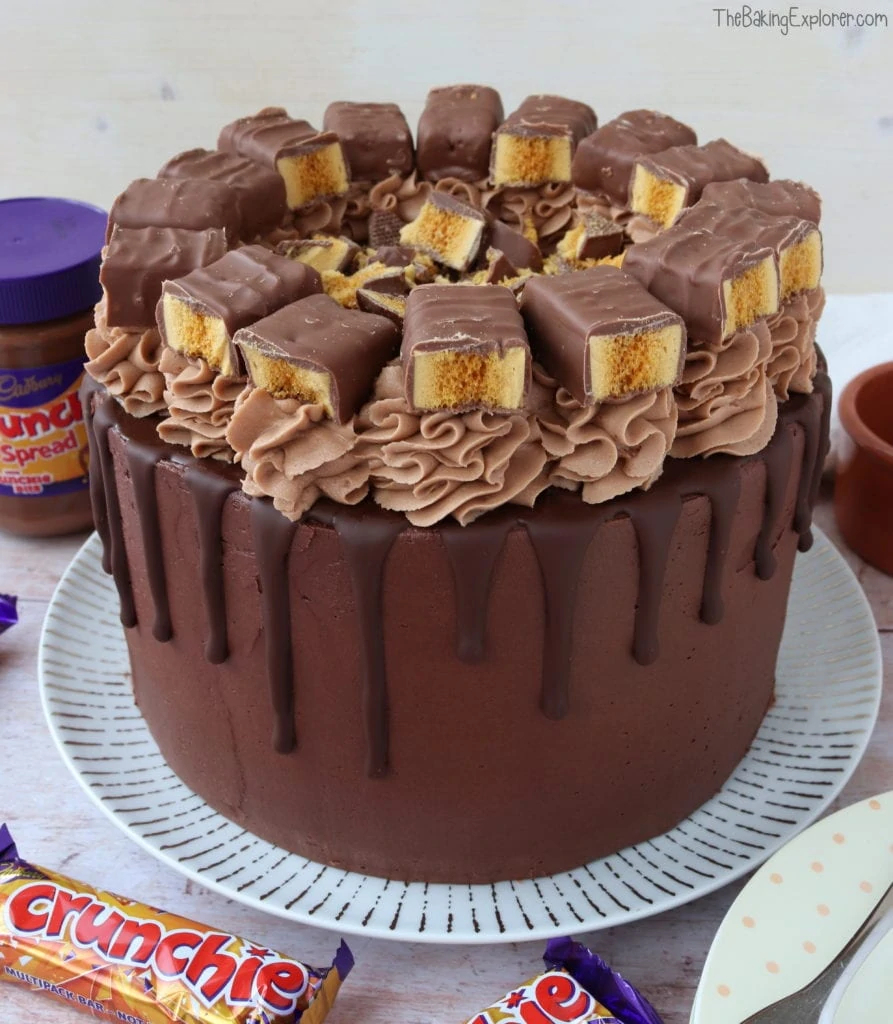
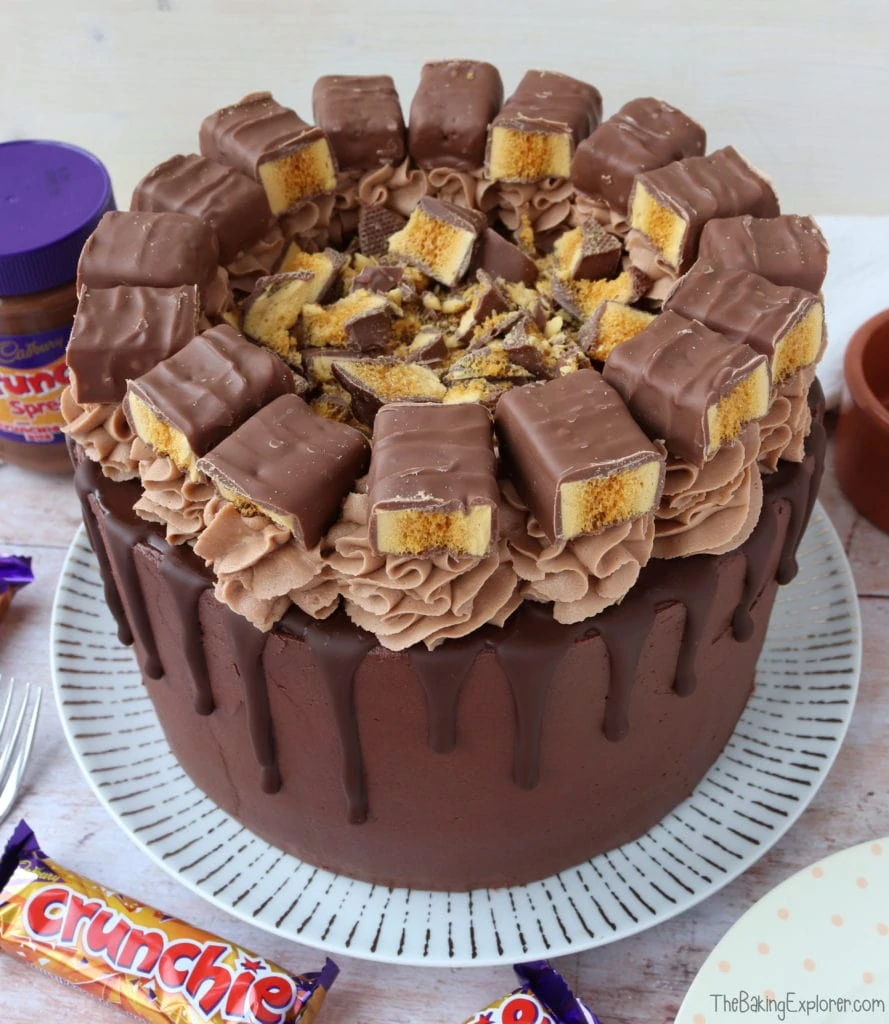
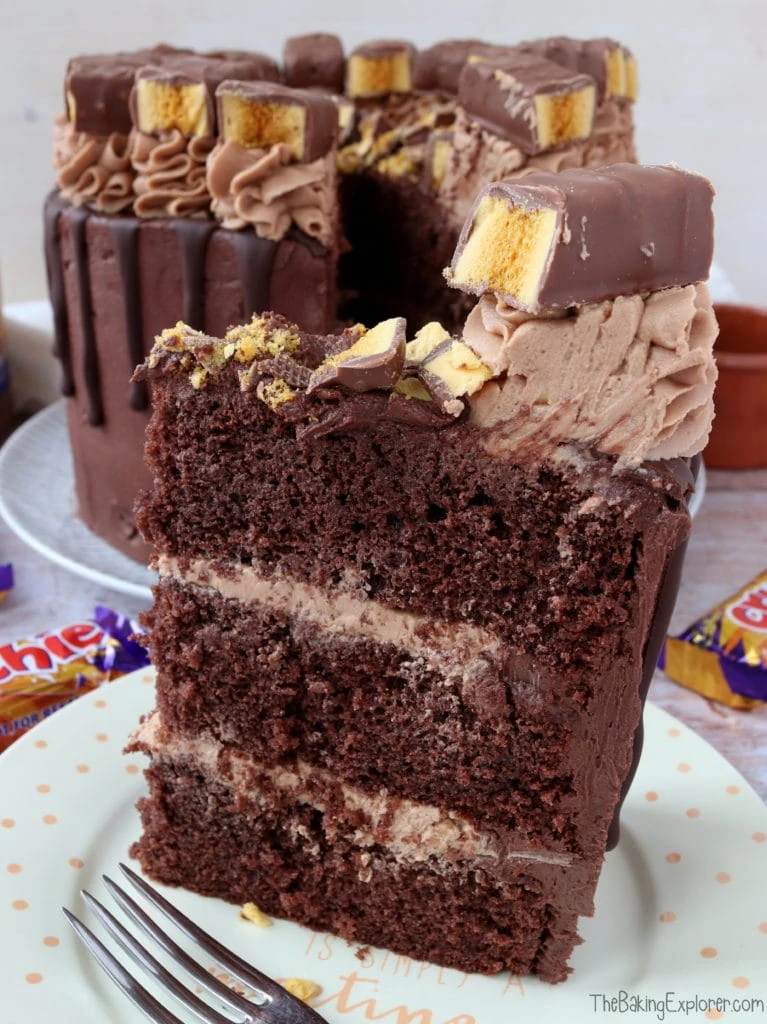
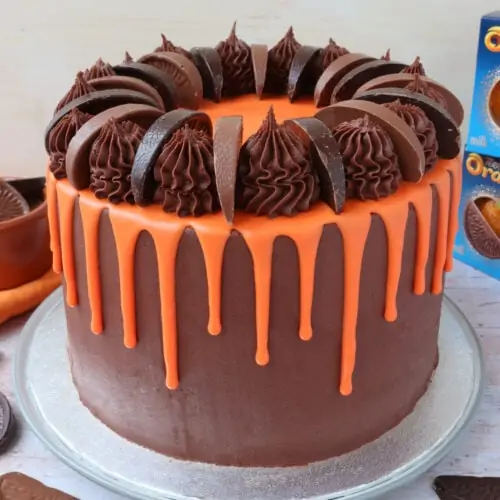
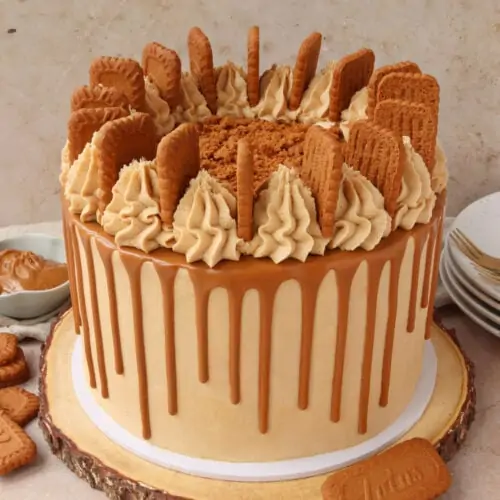
This celebration worthy Crunchie Drip Cake is made up of three layers of chocolate cake, with Crunchie buttercream between each layer, surrounded by rich chocolate buttercream and decorated with a chocolate drip, more Crunchie buttercream and then lots of Cadbury's Crunchie bars on top. It's Crunchie heaven! This cake would make such a perfect birthday or celebration cake for the Crunchie fan in your life!
This post may contain affiliate links. I earn from qualifying purchases.
Ingredient Tips & Equipment Information
- Make sure all your ingredients (particularly the butter and eggs) are at room temperature before you start baking.
- I used a baking spread for the cake and unsalted butter for the buttercream.
- Crunchie spread is available from Asda, Sainsburys and online. Check the recommend equipment and ingredient section below for an Amazon link. If you can't get hold of it, you can make extra chocolate buttercream and use that instead.
- You can use any cocoa powder for this cake, of course the better quality it is, the better flavour it will have. Also do make sure you are using cocoa powder and not a hot chocolate powder.
- The Crunchies will go slightly soft after a short while once the honeycomb inside is exposed to the air, so add them as close to serving as possible.
- For all the tips and tricks on how to make a drip cake, including a how to video, check out my Ultimate Drip Cake How To Guide!
- Although I provide cup measurements, I highly recommend weighing your ingredients out using digital kitchen scales. It is the most accurate way to measure ingredients and will ensure the best results. Digital scales are very low cost and can be purchased for around £12 ($16.50) .
- For teaspoon (tsp) and tablespoon (tbsp) measurements, please use measuring spoons and not the type of spoons you eat with. Again this will ensure accuracy and provide the best results.
For the full recipe with measurements, head to the recipe card at the end of this post.
How to make a Crunchie Drip Cake
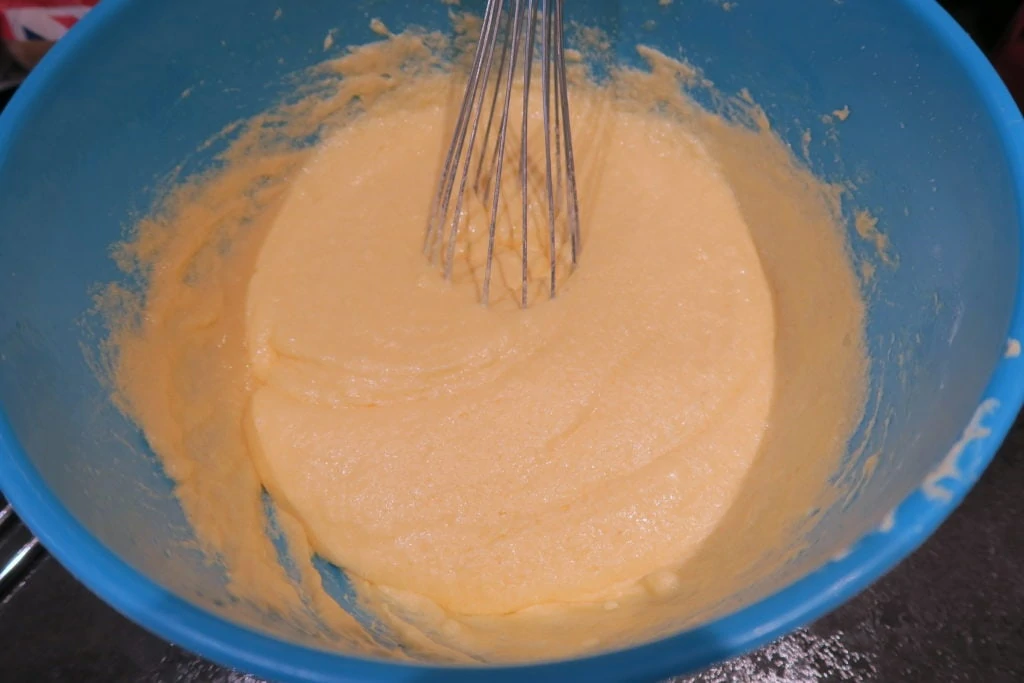
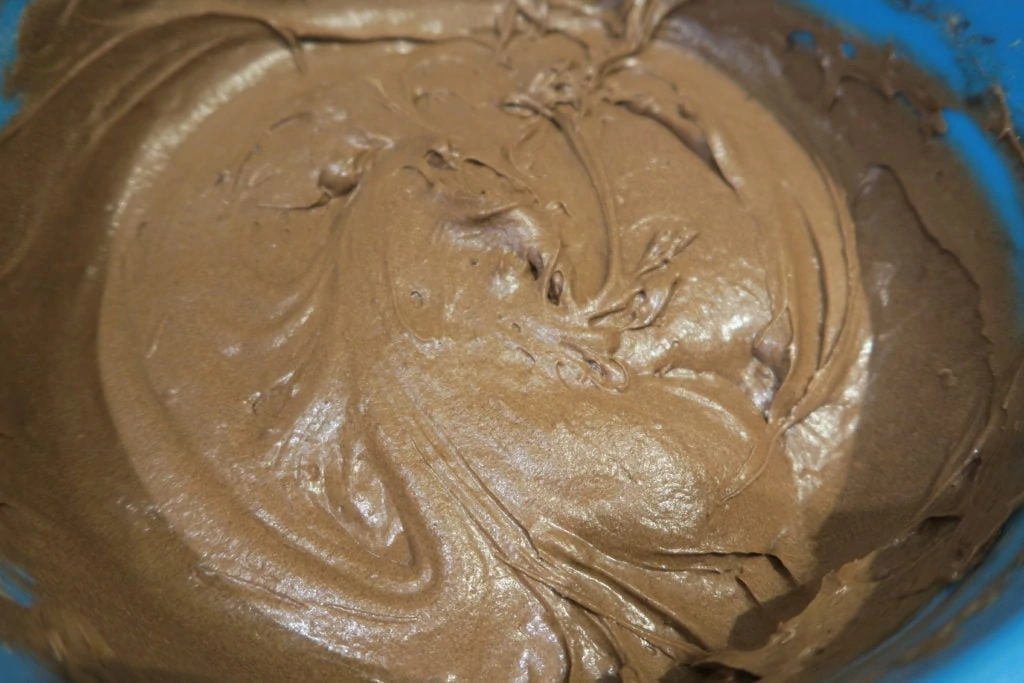
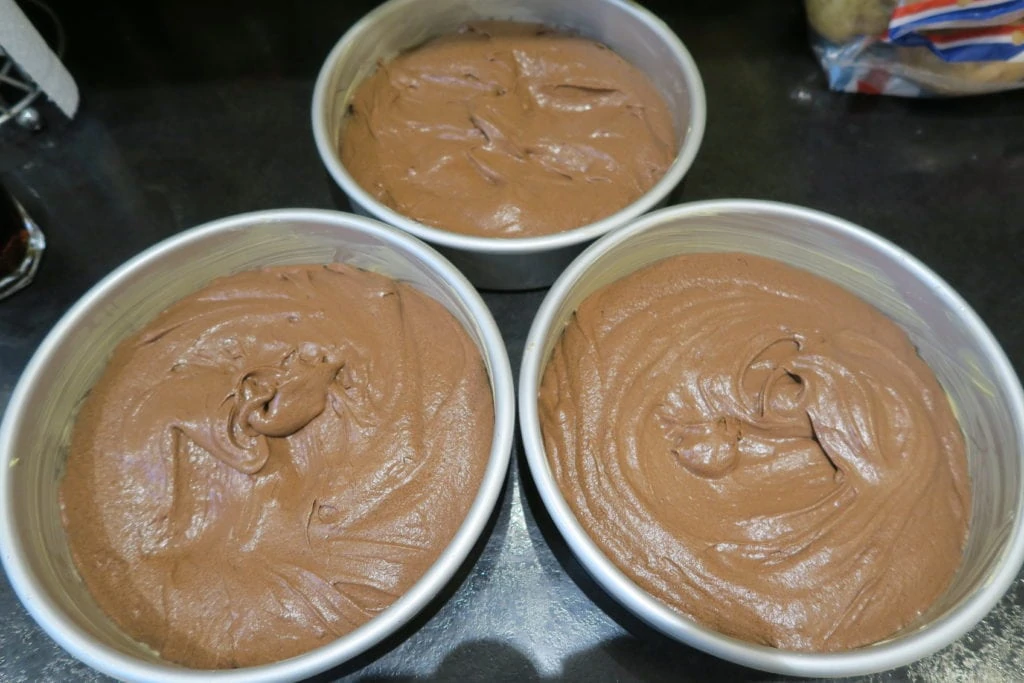
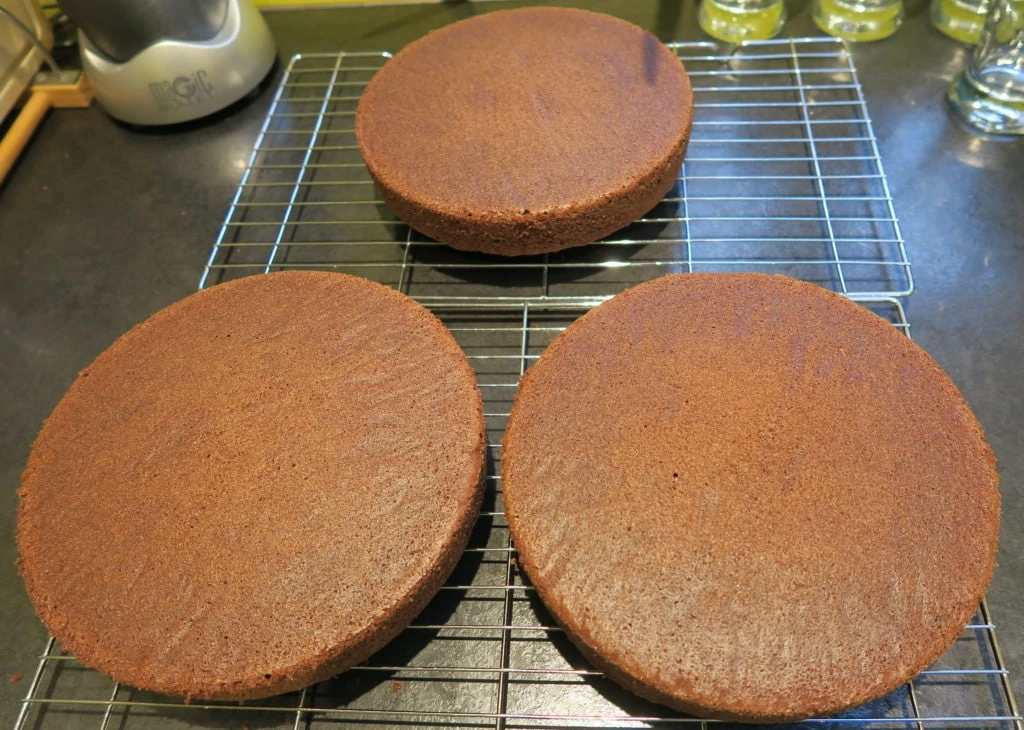
To make the chocolate sponges, mix together butter and sugar, then whisk in eggs and milk. Add self raising flour, cocoa powder and baking powder, and mix in. Divide the mixture evenly between three lined and greased 8″ cake tins. Bake them for 35 minutes, and leave them to cool.
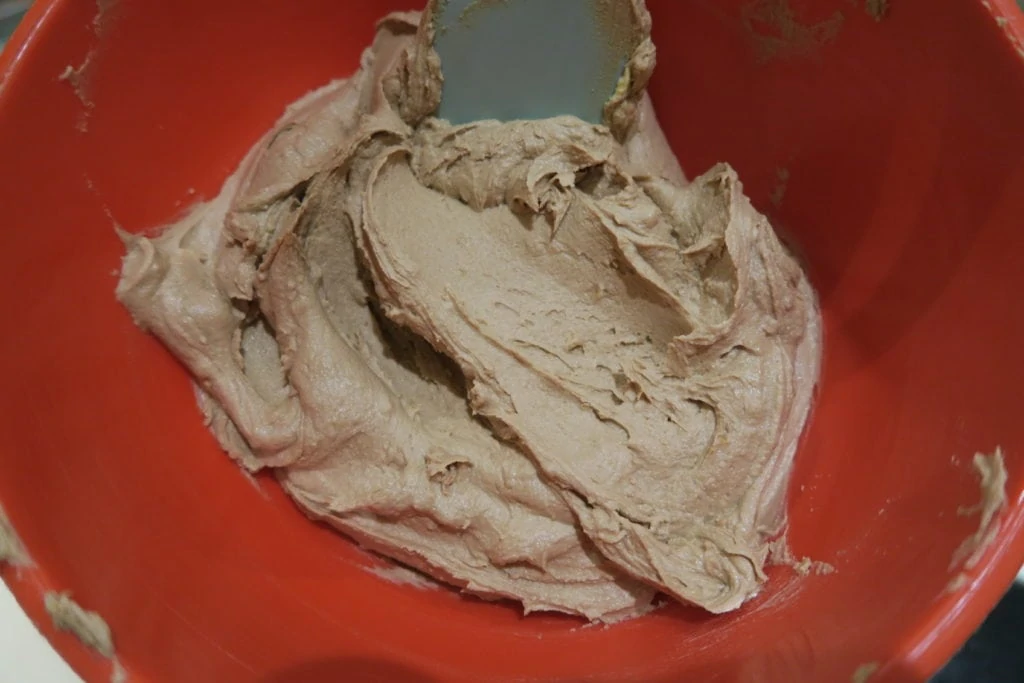
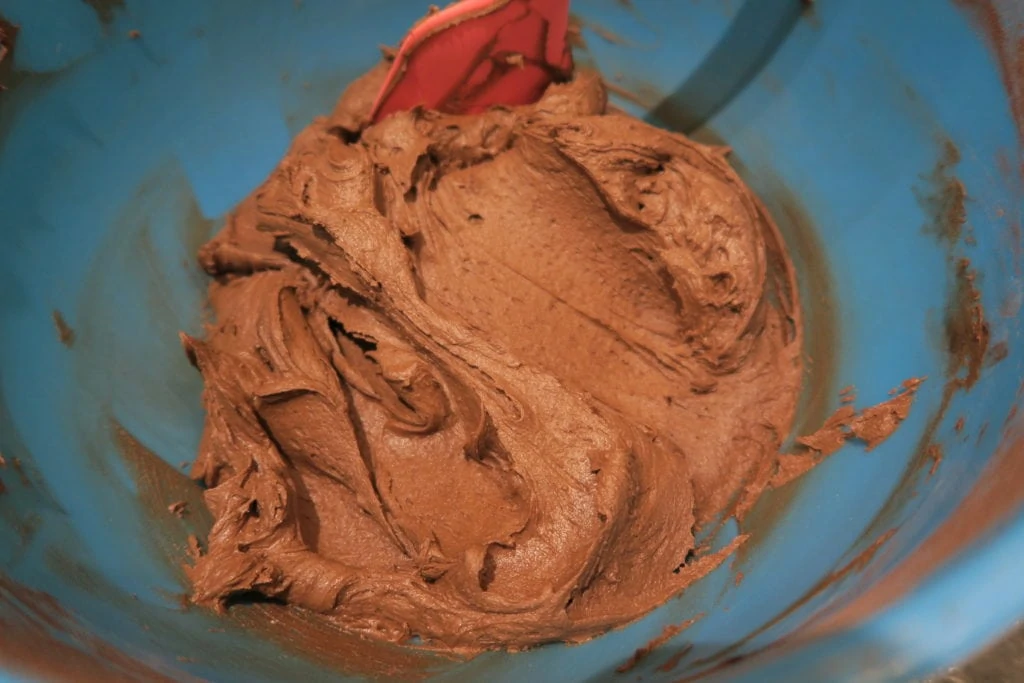

For the Crunchie buttercream, mix together butter and icing sugar, then add the milk and Crunchie spread and mix until smooth. For the chocolate buttercream, mix together the butter, cocoa powder and icing sugar, then add milk and mix until smooth. To stack and decorate the cake, level off each sponge with a cake leveller so they are all an even height, Then place the bottom chocolate sponge on a decorating turn table, pipe chocolate buttercream around the edge and fill the middle with Crunchie buttercream. Do the same with the next sponge.


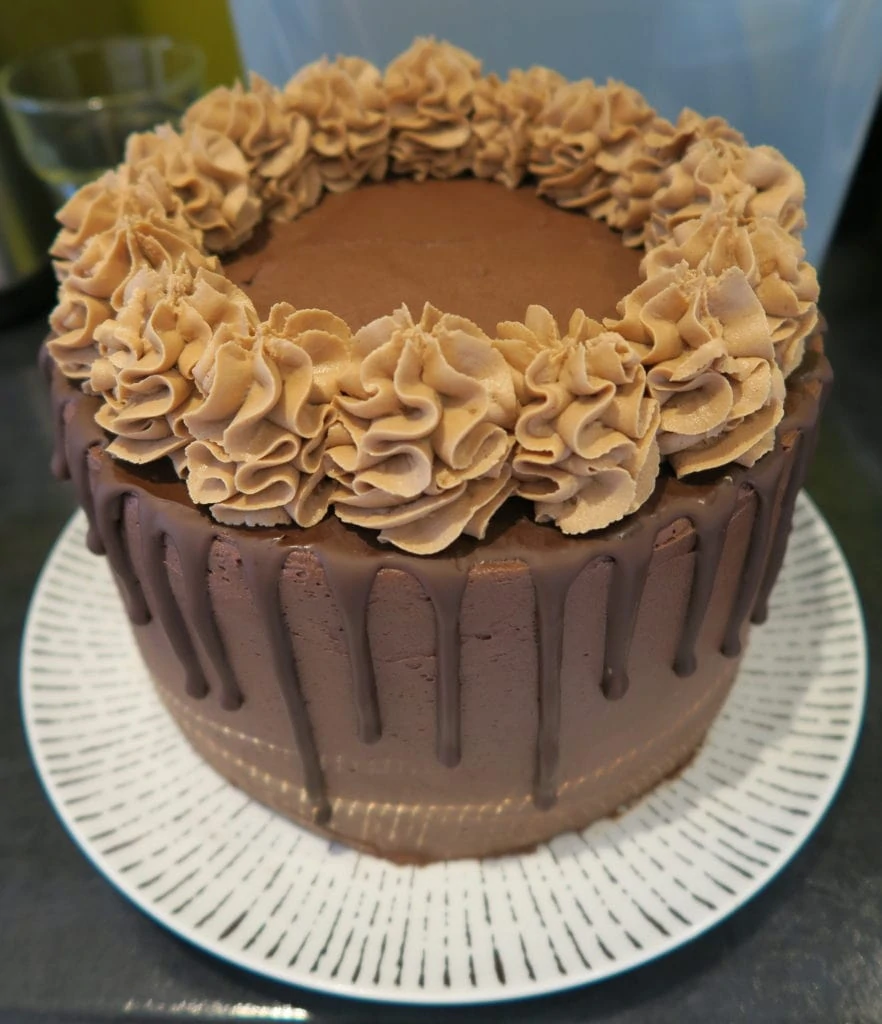
Then cover the cake with a crumb coat of chocolate buttercream and put it in the fridge for 30 minutes. Next add the final layer of chocolate buttercream and smooth it out. Add the chocolate drip, and pipe Crunchie buttercream all around the cake in rosettes.
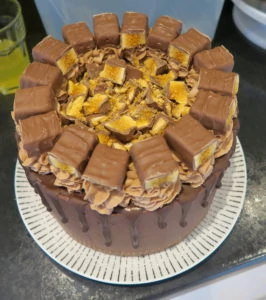
Finally break up the Crunchie bars and place them on top. Also chop up some more Crunchie bars and place them in the centre of the cake.
For the full recipe with measurements, head to the recipe card at the end of this post.

Can the cake be made in different size cake tins?
Yes! If you would like to make this cake in different size tins, please check my Conversion Guide to find out how to adjust the recipe.
How do you get the perfect chocolate drip?
It's really important to have a good base for the chocolate drip, so the cake needs a 'crumb coat' then a top layer of buttercream. Try and get it as smooth as you can so the chocolate drip has a nice even surface to drip down. Each layer of buttercream needs to firm up in the fridge and be chilled when you apply the chocolate drip. Be frugal with the drip amounts at first and see how far it drips, then you can reduce or increase the amount of chocolate you release from the piping bag or squeeze bottle as you move around the cake. For all the information, including a tutorial video and step by step instructions with photos, check out my Ultimate Drip Cake How To Guide!
How long does the cake last for and can you freeze it?
The cake will keep in an airtight container for 3 days in a cool place. You can freeze the sponges either alone, or decorated (but do not freeze the crunchies). Once the sponges are fully cool, wrap them well with cling film or put them in an airtight container with some baking paper between them. You can freeze the buttercream on it’s own in a tub, or you can decorate the cake and freeze it fully assembled. To do this and avoid damage to the decoration, freeze it either in an airtight container or let it freeze solid on a cake board or plate, then wrap in cling film. Remove the cling film when you take it out to defrost it, if you don’t it could damage the decoration as it defrosts and softens. You can also freeze slices of the cake, again well wrapped in cling film or in airtight containers.
What if you can't find the Crunchie spread?
Crunchie spread is available from Asda, Sainsburys and online. Check the recommend equipment and ingredient section below for an Amazon link. If you can't get hold of it, you can make extra chocolate buttercream and use that instead.
Can you make the cake with plain/all purpose flour?
Self raising flour, which is very commonly used in the UK where I am based, already contains a raising agent and a little salt too. Therefore if you want to swap it for plain or all purpose flour, you will need to add some additional baking powder and also a little salt if you like. Some people like to add salt to cake recipes and some don't, so I'll leave that up to you as it won't affect the bake. The general advice is to add 2 teaspoons baking powder (a measuring teaspoon, not the kind you stir your coffee with) per every 200g plain or all purpose flour. So for this recipe you'd need to add 4 teaspoons baking powder. Please note, I have not tested this recipe using plain or all purpose flour.
Can this cake be made dairy or gluten free?
Yes! For gluten free you can replace the self raising flour with a gluten free self raising flour blend. If you only have a gluten free plain flour blend, you will need to add additional baking powder. The general advice is to add 2 tsp baking powder per 200g flour, so for this recipe you'd need to add 4 teaspoons baking powder. You may also like to add ¾ tsp xanthan gum for better texture. For a dairy free version, use a dairy free baking spread and dairy free milk for both the cake and buttercream. Please do check the labels for everything you use to make the cake if you are serving it to someone with an allergy or intolerance.
Troubleshooting
If you have any questions about this recipe, or if something went wrong and you need help, please use the comment form below and I will get back to you. You can also get in touch with me on my Twitter, Instagram or Facebook. I'd love to hear from you!
Recommended equipment & ingredients
- 8" cake tins
- Mixing bowls
- Cooling rack
- Kitchen scales
- Angled palette knife
- Buttercream scraper/smoother
- Round cake tin liners
- Decorating turntable
- Piping bags
- Electric mixer
- Crunchie Spread
- Cake leveller
The items above are all affiliate links. I will receive a small amount if you make a purchase, this does not increase the price for you at all. Thank you for supporting The Baking Explorer!
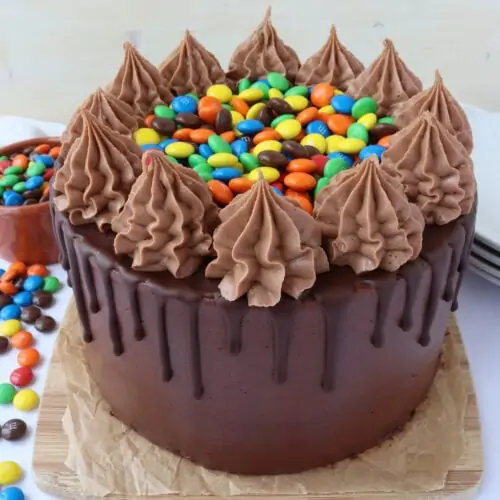
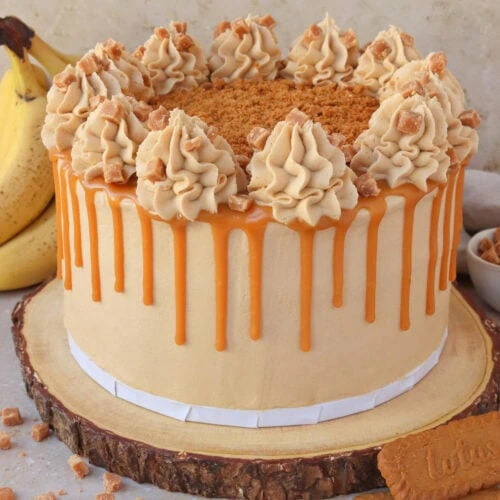
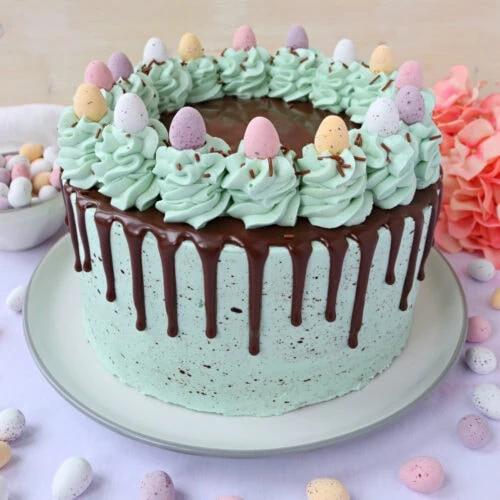
More drip cake recipes…

More Crunchie recipes...


Crunchie Drip Cake
Ingredients
For the sponge
- 500 g Caster sugar
- 500 g Butter or baking spread softened, unsalted
- 9 Eggs large
- 425 g Self raising flour
- 75 g Cocoa powder
- 1 tbsp Milk
- ¼ tsp Baking powder
For the Crunchie buttercream
- 200 g Butter softened, unsalted
- 400 g Icing sugar
- 200 g Crunchie spread
- 1-2 tbsp Milk
For the chocolate buttercream
- 350 g Butter softened, unsalted
- 615 g Icing sugar
- 85 g Cocoa powder
- 1 tbsp Milk
For a chocolate ganache drip
- 65 g Dark chocolate
- 65 ml Double cream
OR for cheat's chocolate drip
- 75 g Dark chocolate
- 1 tsp Vegetable oil
For decoration
- 7 Crunchie bars
Instructions
- Pre-heat your oven to 160C Fan/350F/Gas Mark 4, and grease and line three 8" cake tins that are at least 2" deep
- Make the sponge by mixing the butter and caster sugar in a large bowl until fluffy, ideally using an electric mixer
- Add the eggs and milk, and whisk until fully incorporated
- Add the self raising flour, cocoa powder and baking powder and whisk in until you can't see any flour anymore
- Divide the mixture between the tins, use scales for accuracy
- Bake them for 30-35 minutes or until a skewer inserted in the middle comes out clean. Leave them to fully cool either in the tins or remove from the tin and place on cooling racks
- To make the chocolate buttercream mix the butter, cocoa powder and icing sugar together. Once it starts to come together add the milk and mix until smooth (you can add more milk if it's too stiff). For best results use an electric mixer
- To make the Crunchie buttercream mix the butter and icing sugar together. Once it starts to come together add the milk and Crunchie spread and mix until smooth (you can add more milk if it's too stiff). For best results use an electric mixer
- If the cakes have domed on top, level them off with a cake leveller or a knife
- Put one of the sponges on a decorating turntable and pipe a border of chocolate buttercream around the edge of the sponge
- Fill in the centre of the sponge with some Crunchie buttercream, then add the next sponge on top
- Do the same again - pipe a chocolate buttercream border and fill the centre with Crunchie buttercream, then add the final sponge on top
- Use some chocolate buttercream to fully crumb coat the cake, then put it in the fridge for 30 minutes to firm up
- Coat the cake with a second layer of chocolate buttercream and smooth it out as best you can. Then put it back in the fridge for 30 minutes to 1 hour to set
- To make the dark chocolate ganache chocolate drip, put the ingredients into a bowl and microwave for 20 seconds, then stir. Continue microwaving in 10 second blasts, stirring between each blast, until melted and smooth
- OR To make the cheat's dark chocolate drip, melt the dark chocolate in the microwave for 30 seconds, then stir. Continue microwaving in 10 second blasts, stirring between each blast, until melted and smooth. Stir in the vegetable oil
- Put your chosen chocolate drip mixture into a piping bag and snip a small section off the end
- Pipe blobs around the edge of the cake, allowing the chocolate to drip down the sides in varying amounts
- Use a palette knife to smooth the chocolate on the top of the cake. You can cover the whole top of the cake with chocolate it you like
- Put the remaining Crunchie buttercream into a piping bag with your chosen nozzle and pipe swirls all around the edge of the cake
- Place the chopped Crunchie bar pieces all around the edge and sprinkle more finely chopped up Crunchie bar pieces in the middle
- Move the cake onto a serving plate or cake stand, and dig in! Leftovers will keep in an airtight container in a cool place for 2-3 days
Notes
- Make sure all your ingredients (particularly the butter and eggs) are at room temperature before you start baking.
- I used a baking spread for the cake and unsalted butter for the buttercream.
- Crunchie spread is available from Asda, Sainsburys and online. Check the recommend equipment and ingredient section below for an Amazon link. If you can't get hold of it, you can make extra chocolate buttercream and use that instead.
- You can use any cocoa powder for this cake, of course the better quality it is, the better flavour it will have. Also do make sure you are using cocoa powder and not a hot chocolate powder.
- For all the tips and tricks on how to make a drip cake, including a how to video, check out my Ultimate Drip Cake How To Guide!
- Although I provide cup measurements, I highly recommend weighing your ingredients out using digital kitchen scales. It is the most accurate way to measure ingredients and will ensure the best results. Digital scales are very low cost and can be purchased for around £12 ($16.50) .
- For teaspoon (tsp) and tablespoon (tbsp) measurements, please use measuring spoons and not the type of spoons you eat with. Again this will ensure accuracy and provide the best results.
Nutrition
If you like this, check out more of my Cake recipes!
Please note: this recipe is NOT in anyway sponsored by Crunchie, I just love their product!
Midge @ Peachicks' Bakery
That's one stunning cake! Hubby would love this for his birthday!
thebakingexplorer
Thanks so much!
Deirdre
Oh wow, how did you get the chocolate drips so perfect? I love Crunchies, I can predict what the next birthday cake I make will be...
thebakingexplorer
Thank you! I put the chocolate drip mixture into a piping bag and pipe blobs to drip down the sides
Sophie
Hello what piping nozzle do you use to get this effect? Looks amazing x
thebakingexplorer
Hi Sophie, it was either 2d or 1m from Wilton, sorry I can't remember exactly!
Lou | Crumbs and Corkscrews
Oh my... that looks and sounds utterly amazing! The perfect party cake, although I'm not sure if I would be willing to share it, ha!
thebakingexplorer
Thanks so much Lou, I know the feeling! 😀
Rita
Lovely Cake! Friday Fiesta Rocks!
thebakingexplorer
Thank you!
Monika Dabrowski
Looks almost too good to eat, I love how you've decorated your cake!
thebakingexplorer
Thanks Monika!
Jenny Paulin
ooooh Kat this cake is to die for . Like died and gone to chocolate cake and crunchie heaven!!! I wish in was pregnant so I could make all these yummy cakes and have a good reason to eat them!!!! YUM!
thank you for shorting with #Bakeoftheweek x
thebakingexplorer
Ah thank you so much!
Anna | Once Upon A Food Blog
This looks gorgeous! I'm not the world's biggest chocolate fan but I do like Crunchies and would definitely be happy to polish a slice or two of this cake off!
thebakingexplorer
Ah thank you Anna, that's a great compliment!
Cat | Curly's Cooking
Oh wow. This looks amazing! Your drip is absolutely perfect and the layers look great!
thebakingexplorer
Thank you so much Cat!
frugal hausfrau
This cake is gorge! And those flavors! Wish I had a crunchy bar right now AND the cake!!
Thanks for sharing with us at Fiesta Friday!
Mollie
thebakingexplorer
Thank you so much!!
esti buesa
This is fantastic recipe for a gorgeous cake! I made it for my son's 13th and he was delighted!
Fantastic blog, thanks Kat xxx
thebakingexplorer
Thank you so much Esti!
Janet
I’m going to make this cake for a grooms cake for my sons wedding. It will be stacked 10 inch with 8 inch on top and covered in crunch bars. They are his favorite candy and I couldn’t think of a better way to show him how much I love him
thebakingexplorer
That sounds amazing Janet! He will love it!
Jayne
Also made this cake for my step sons birthday. Was fabulous. This is my go to site for recipes. They are fab recipes.
thebakingexplorer
Thank you so much Jayne for your lovely feedback!